- Item Name : Agntix - Multipurpose Laravel CMS for Business, Portfolio & Creative Agencies
- Created: 28 September 2025
- Item Version : v1.2.1
- Author : aqlova
- Support Ticket: https://help.aqlova.com/login

Introduction
Agntix CMS is a modern Laravel 12-based Content Management System built to empower businesses, creative agencies, and professionals. With a clean and powerful admin panel, Agntix lets you easily manage portfolios, showcase services, publish blogs, and run a fully integrated e-commerce shop.
Designed with scalability and flexibility in mind, Agntix comes packed with SEO-friendly tools, role-based user management, and a secure architecture that ensures reliability. Whether you’re an entrepreneur, a creative professional, or a developer, Agntix provides everything you need to build and manage stunning, feature-rich websites effortlessly.
Perfect for businesses, agencies, and creators who demand performance, security, and modern design in one complete CMS solution.
We would like to thank you for choosing us
Getting started
You will need to make sure your server meets the following requirements:
- PHP >= 8.2
- BCMath PHP Extension
- Ctype PHP Extension
- Fileinfo PHP extension
- JSON PHP Extension
- Mbstring PHP Extension
- OpenSSL PHP Extension
- PDO PHP Extension
- Tokenizer PHP Extension
- XML PHP Extension
Recommended PHP configuration limits
- max_execution_time 180
- memory_limit 128M
- post_max_size 64M
- upload_max_filesize 32M
- max_input_time = 60
- max_input_vars = 3000
What's Included
After purchasing Agntix script, go to your Download page. You can download Agntix Script package which contains the following files:
The contents of the theme package downloaded from Themeforest
- main_files - contains the main Laravel source code.
- documentation - contains the documentation for this script
Installation
You can install this script on your local server or on a live server. We will tell you how to install this script step by step on both local and live servers.
Local Installation
The installation of this script on a local server is straightforward. Follow these steps:
Creating Database using phpMyAdmin
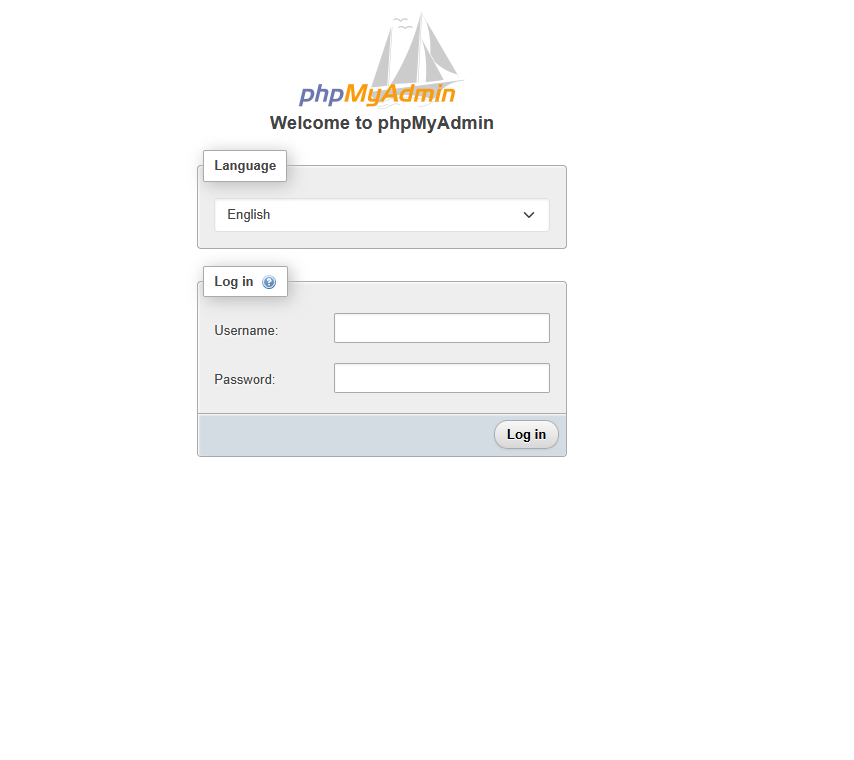
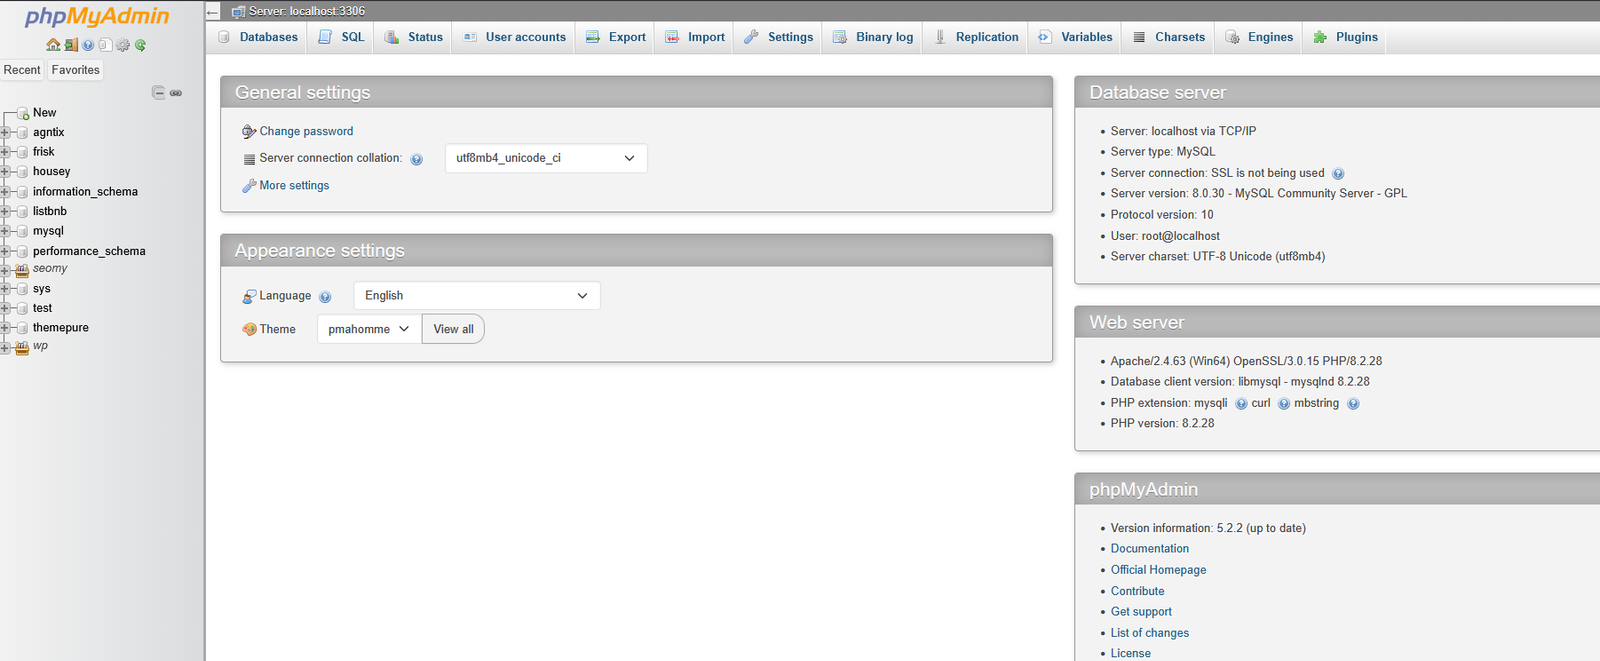
Step 1: Login to your phpMyAdmin panel using the login information. You will see an interface like this:
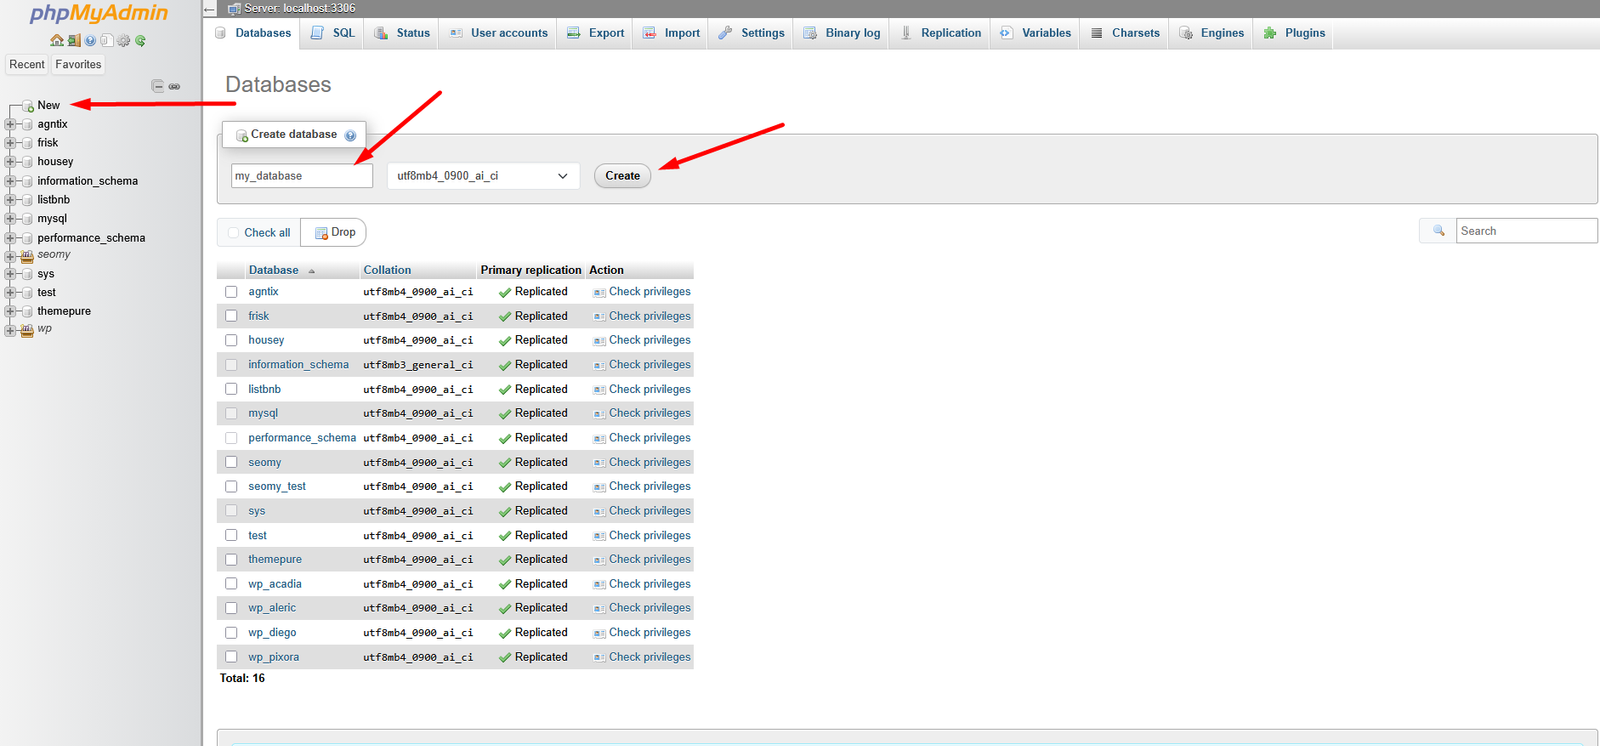
Step 2: Create a new database by entering a name and clicking the "Create" button.
Add files to local server folder
Step 1: Download the latest version of the script from the official website.
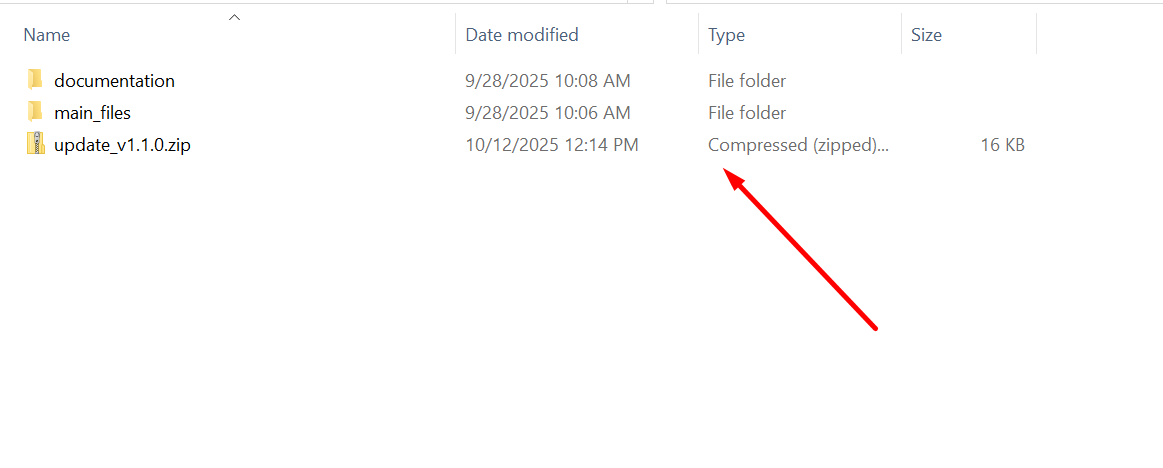
Step 2: Extract the downloaded ZIP file.
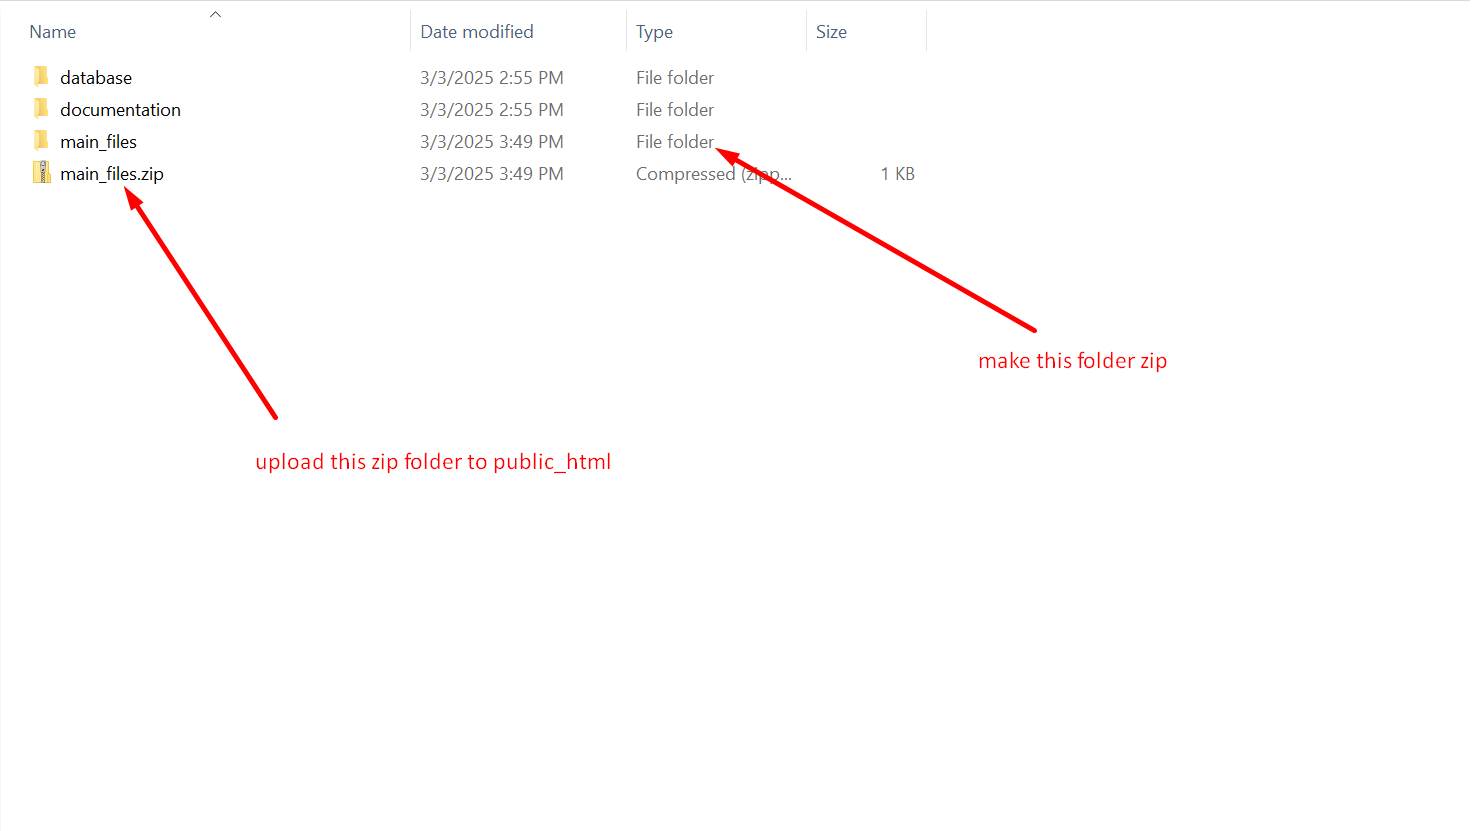
After extract you will find these files:
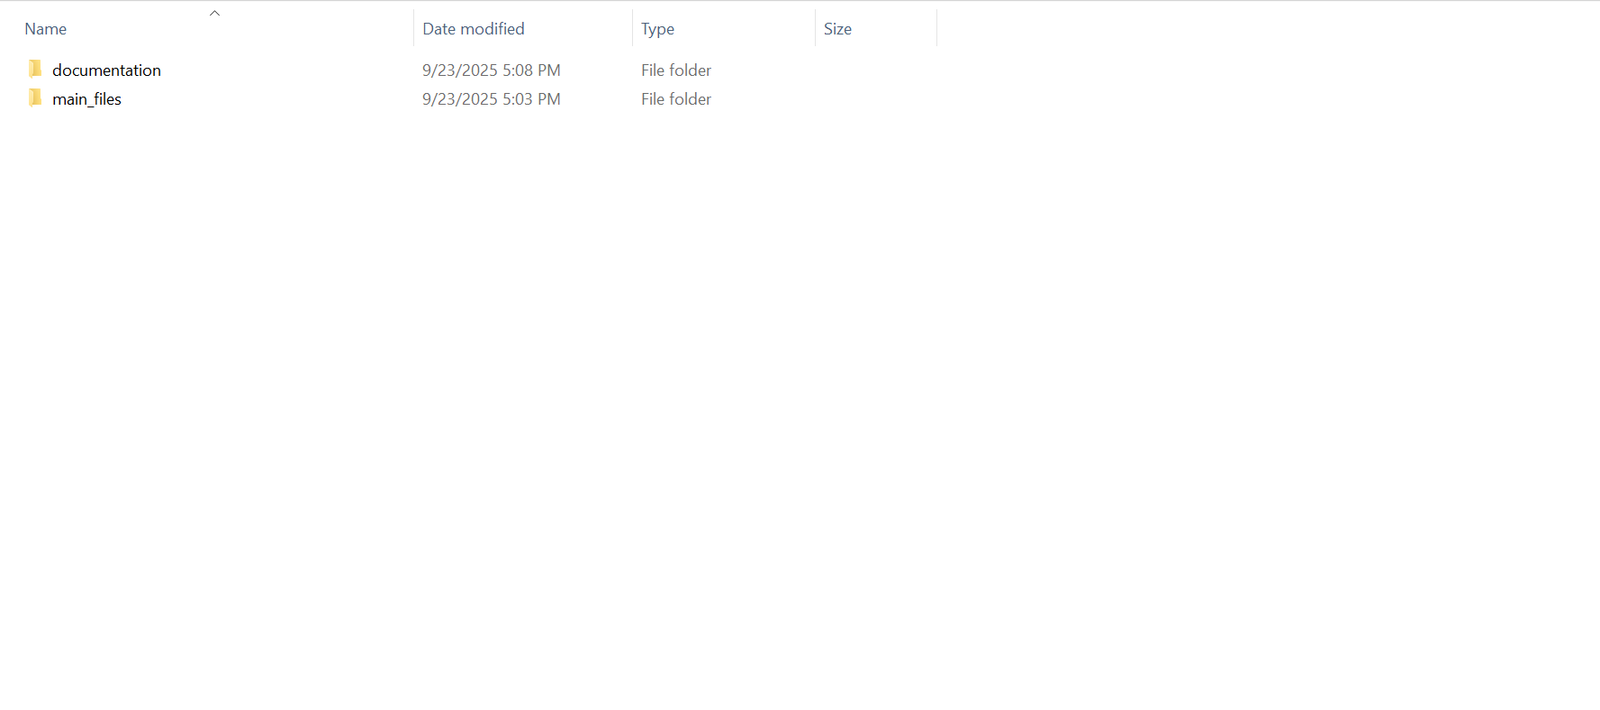
Step 3: Now Copy the main_files folder.
Step 4: Paste the copied files into the root directory of your local server (e.g.,C:\laragon\www\your_project).
Installer for Local Server
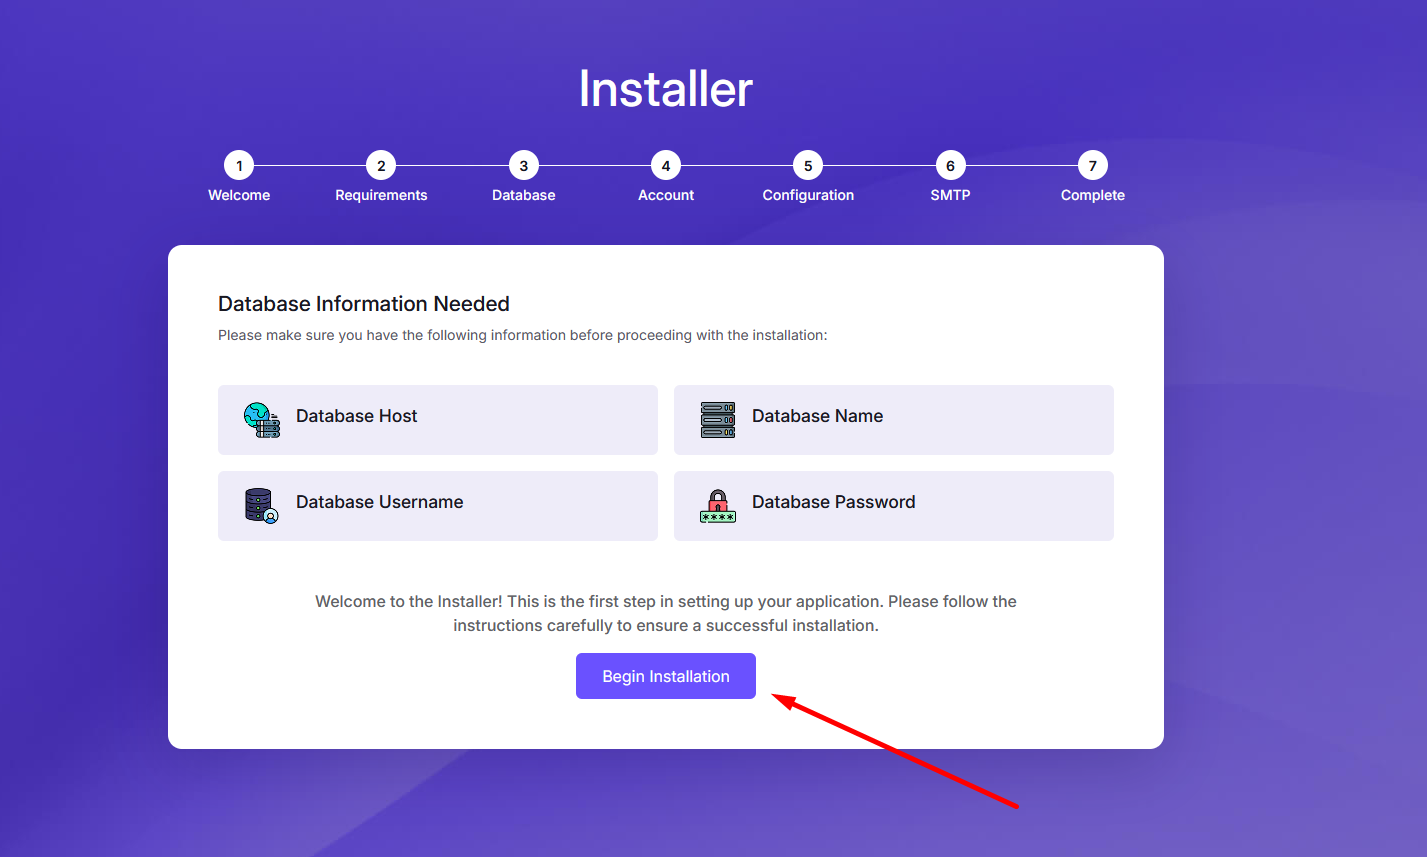
Step 1: Go to your local server URL (e.g., http://localhost/your_project). You will see the welcome page of the installer. Click on Begin Installation button to continue
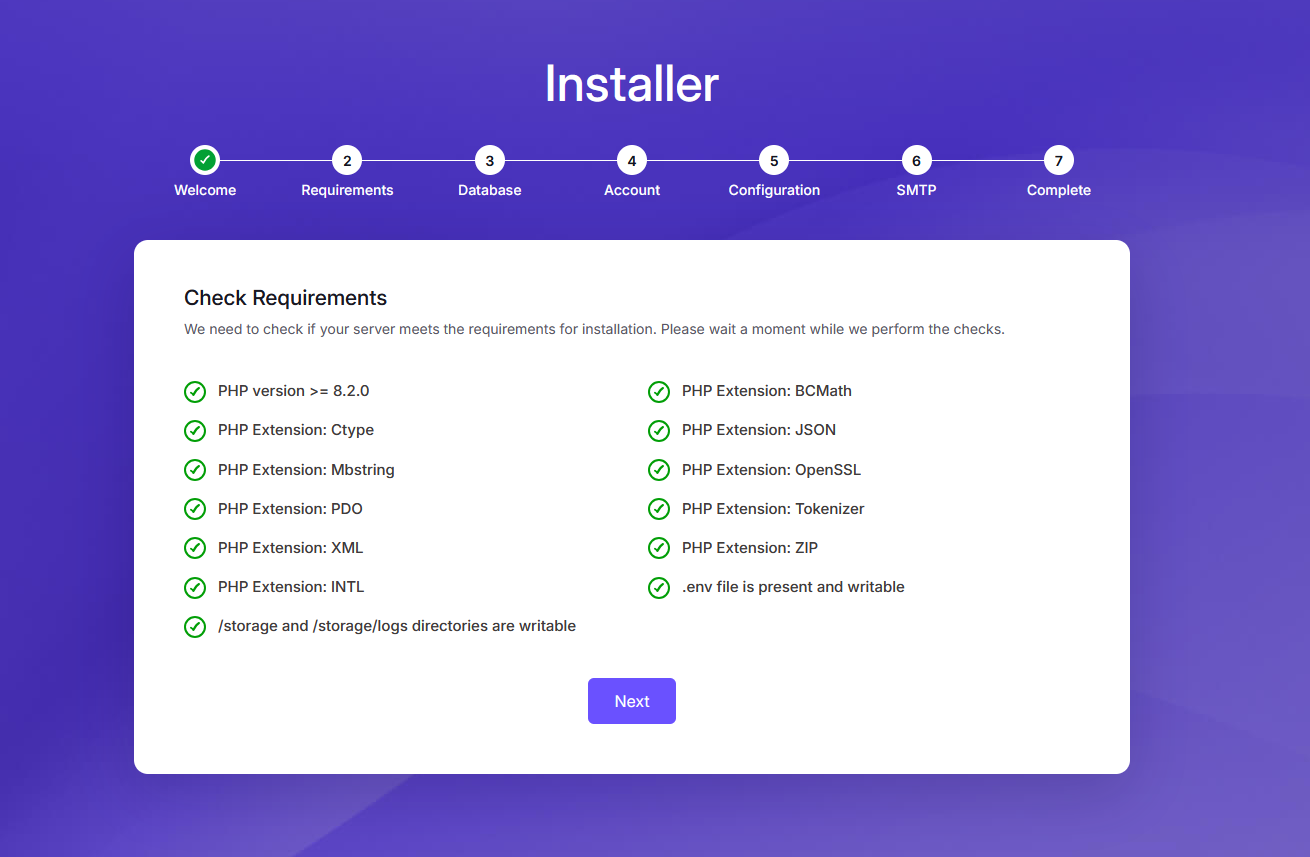
Step 2: You will see the requirements page. If your server meets the requirements, you will see a green tick mark. If not, you will see a red cross mark. You need to fix the issues before proceeding.
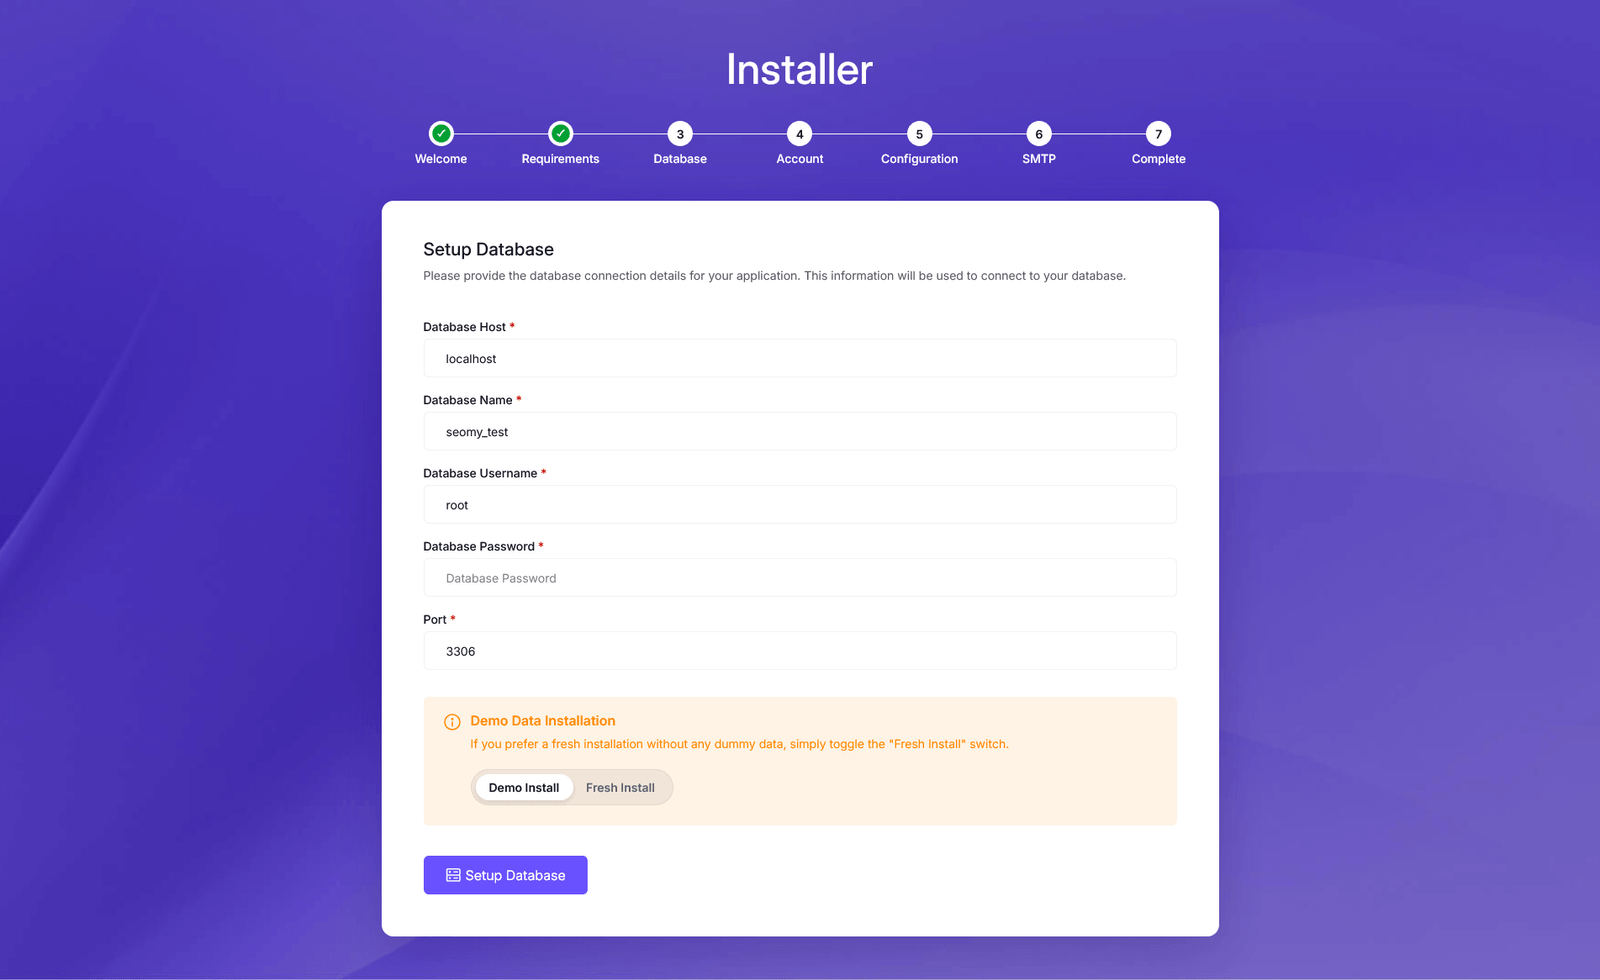
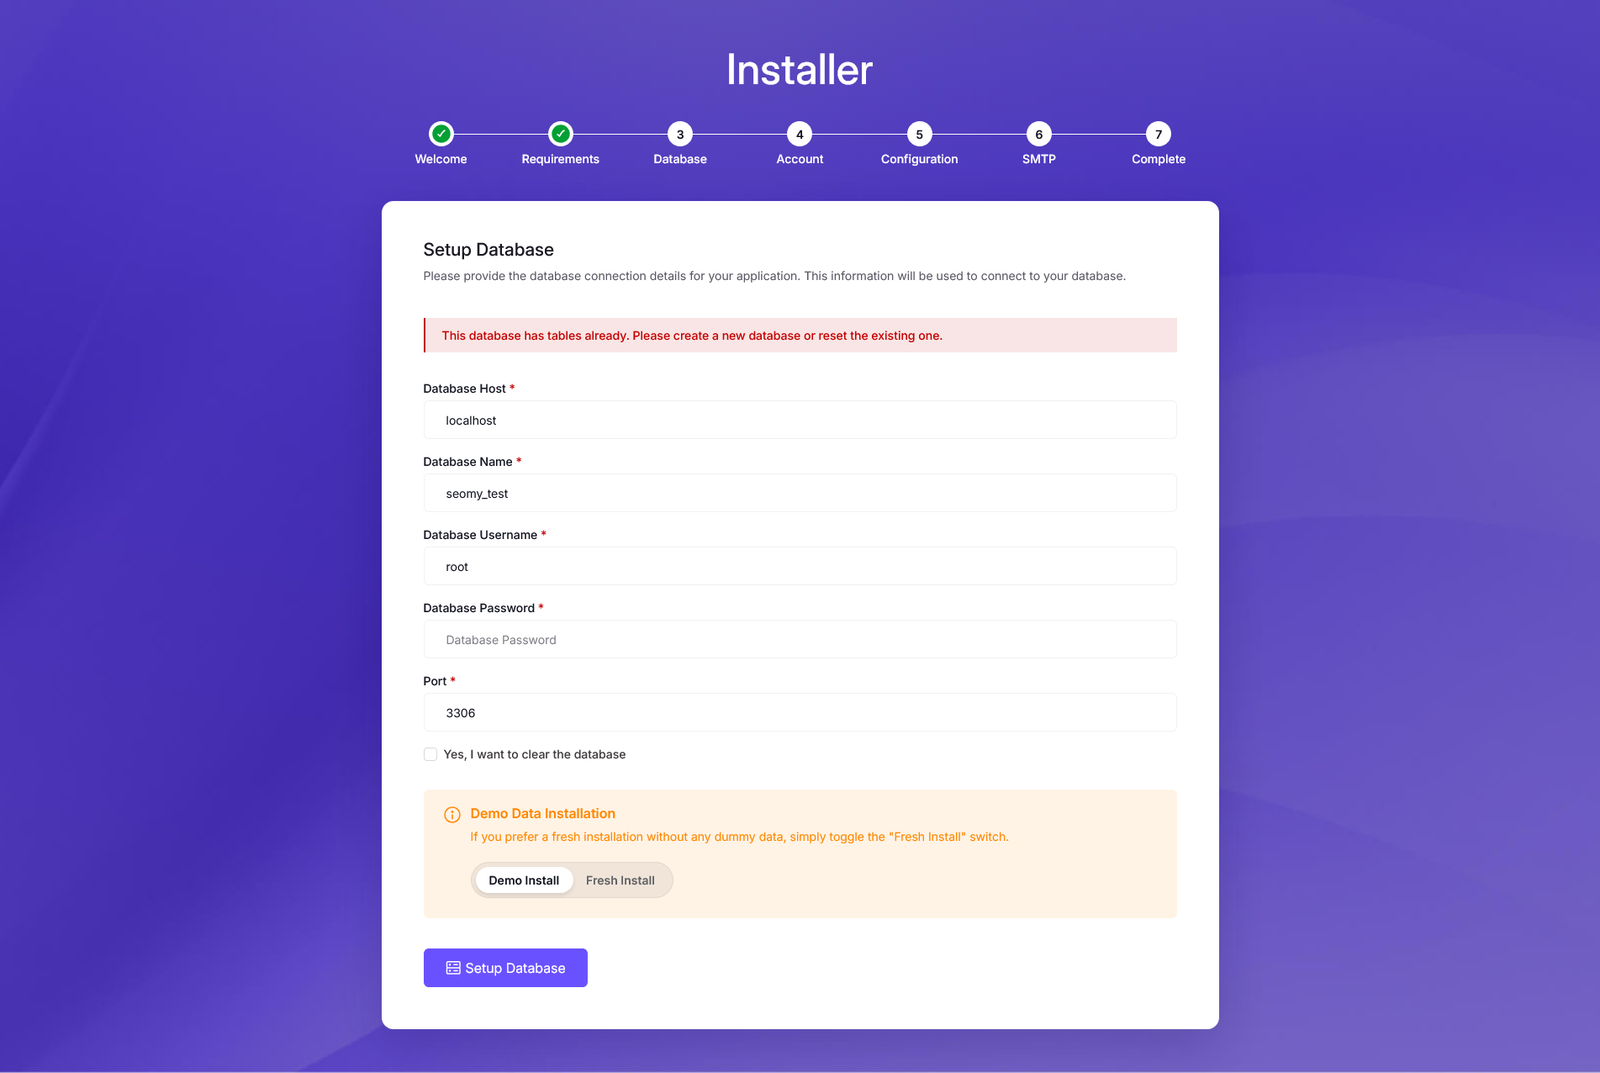
Step 3: Enter your database credentials. You need to enter the database name, username, and password that you created earlier. Click on Setup Database button to test the connection. Also check the database host and port. You will see a warning about demo data installtion. If you want to setup a demo data install then select demo install or if you want to setup a fresh install then select fresh install. After that just click on Setup Database
Step 4: When you click the Setup Database button, the system will check the database connection and attempt to set up the database. If existing data or tables are found, a warning message will appear. In that case, you can either create a new database or reset the current one. To reset the existing database, select the Yes, I want to clear the database checkbox.
If the database is empty, it will proceed to create the necessary tables and insert either demo or fresh data, based on your selection.
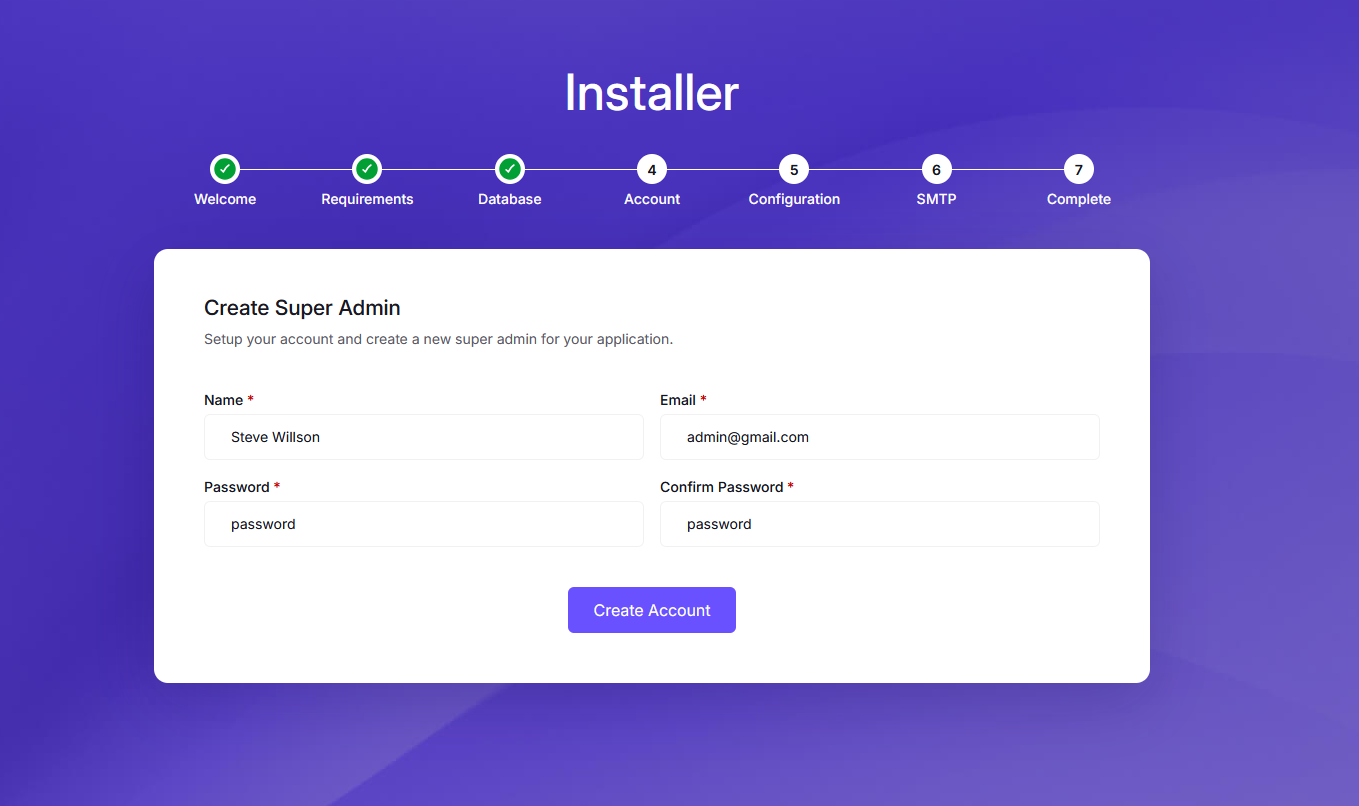
Step 5: After the database setup is complete, you will redirected to Account Setup Page. Enter your data and create a super admin for your site.
Step 6: Now setup your app name and timezone for your site. After that click on Set Configuration button.

Step 7: Now you will see the Mail Setup page. You need to enter your SMTP credentials to send emails from your site. If you don't want to setup SMTP now, you can skip this step and setup later from admin panel.
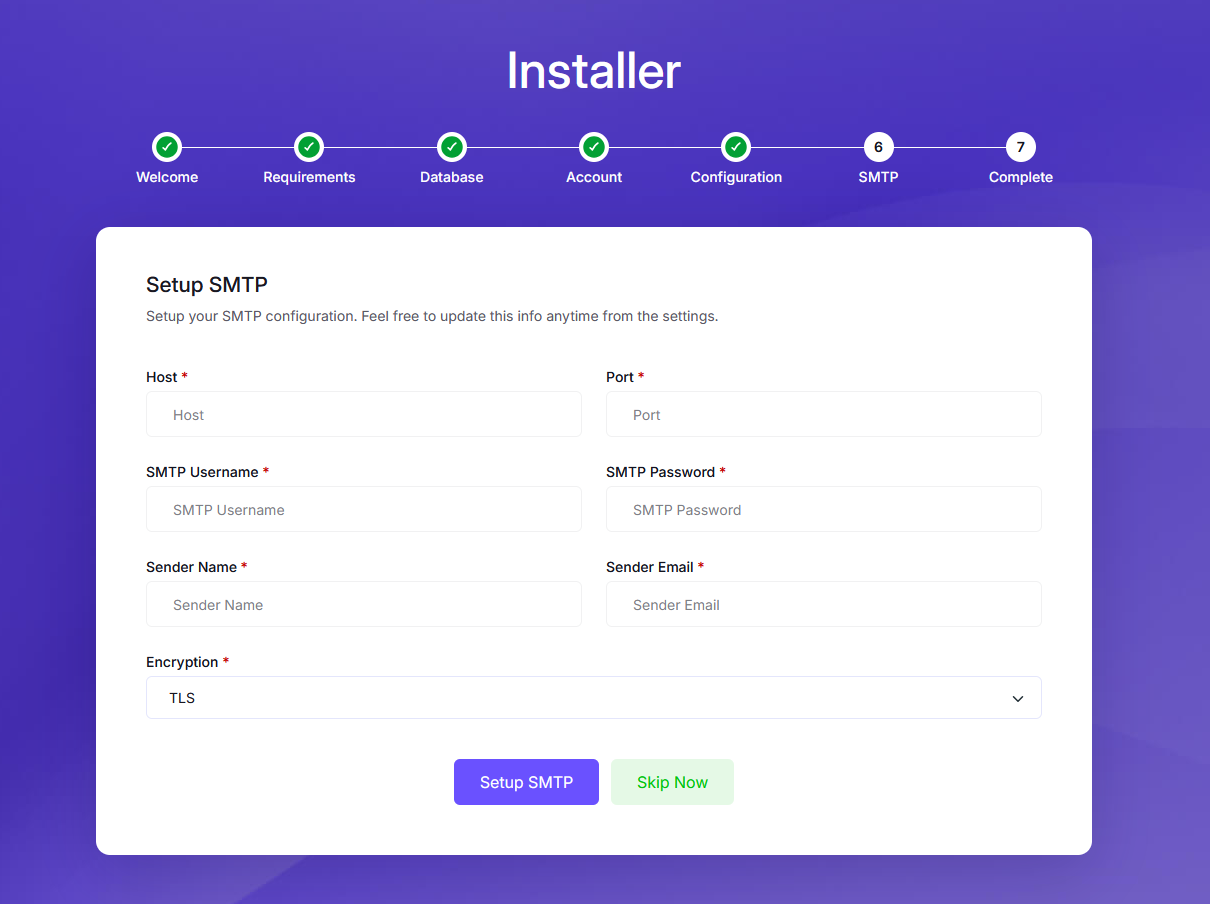
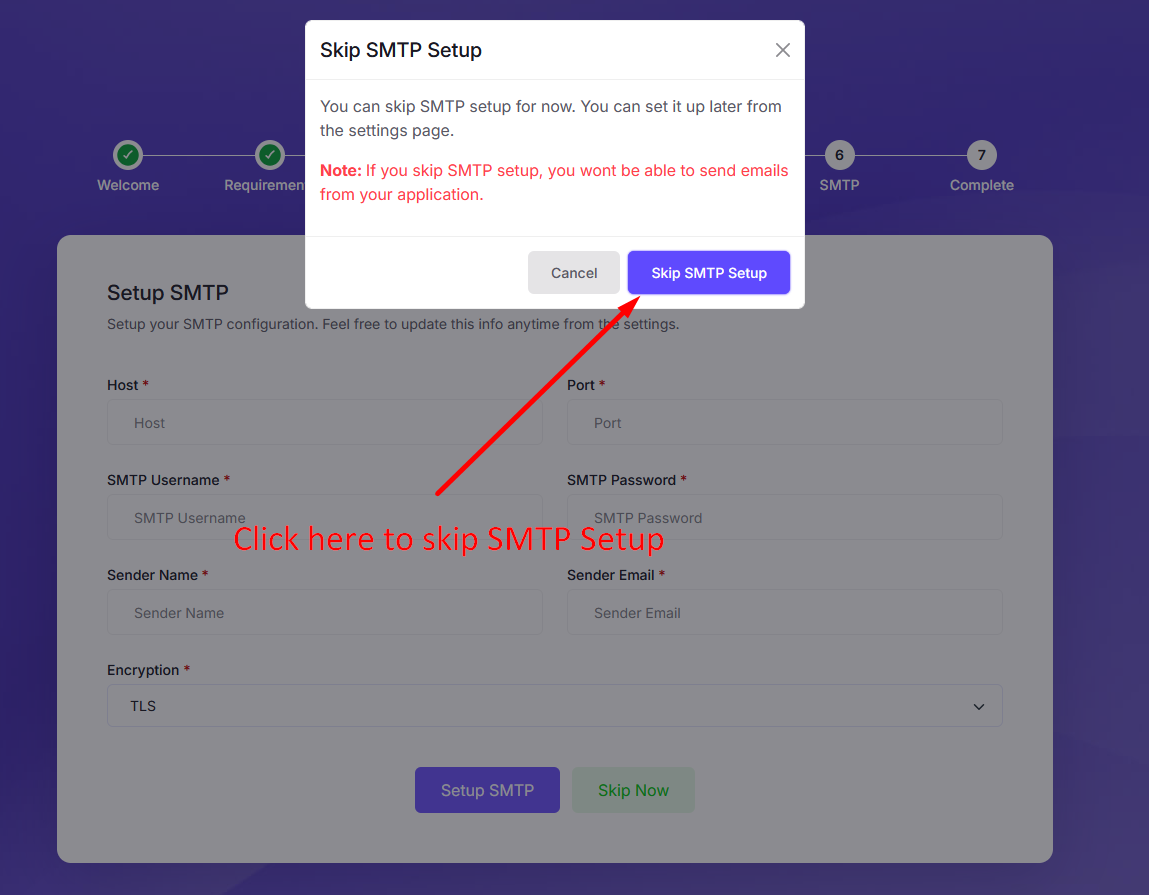
If you want to skip SMTP setup, just click on Skip SMTP Setup button. Then you will see the popup message, click Skip SMTP Setup button to skip the SMTP setup.
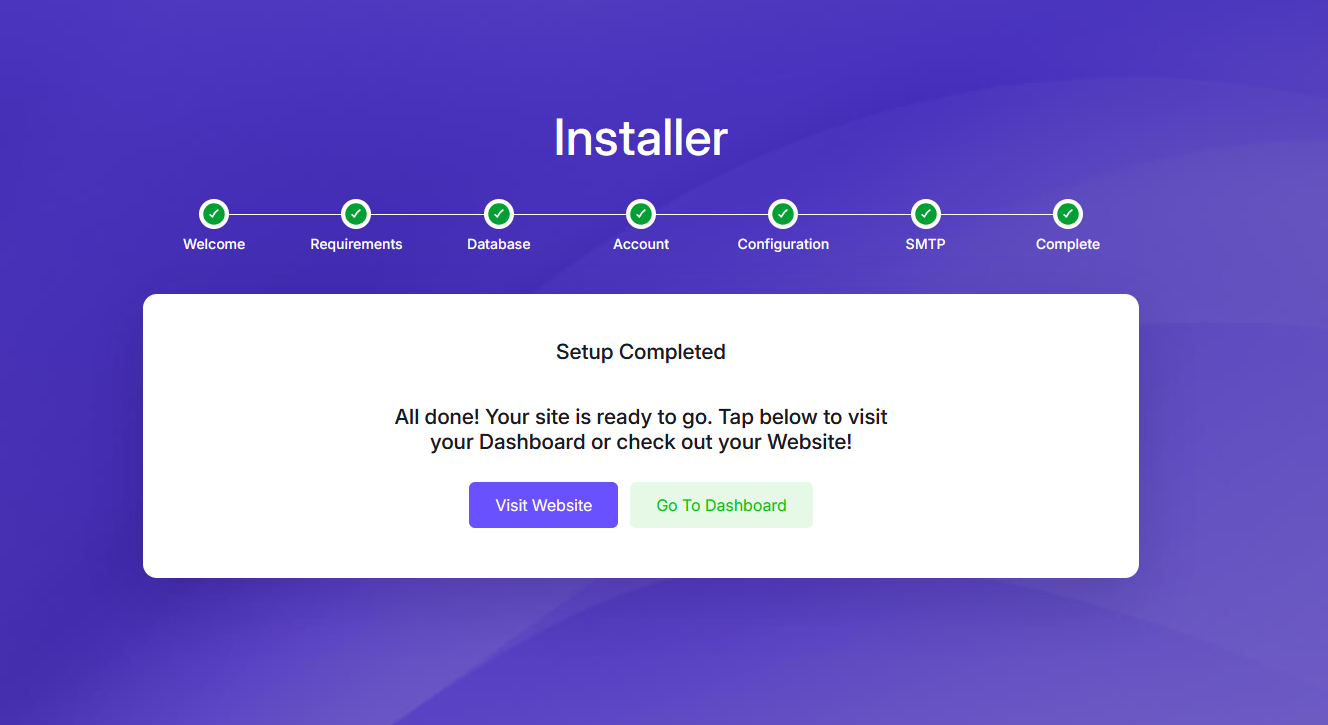
Step 8: Congratulations. You have successfully installed the script. Now you can login to your admin panel using the credentials you created earlier Or Visti your site.
cPanel Installation
The installation of this script is super easy. If you can install normal php based scripts on your server, you can install our script. We will tell you how to install this script step by step on a server.
Creating Database using Cpanel
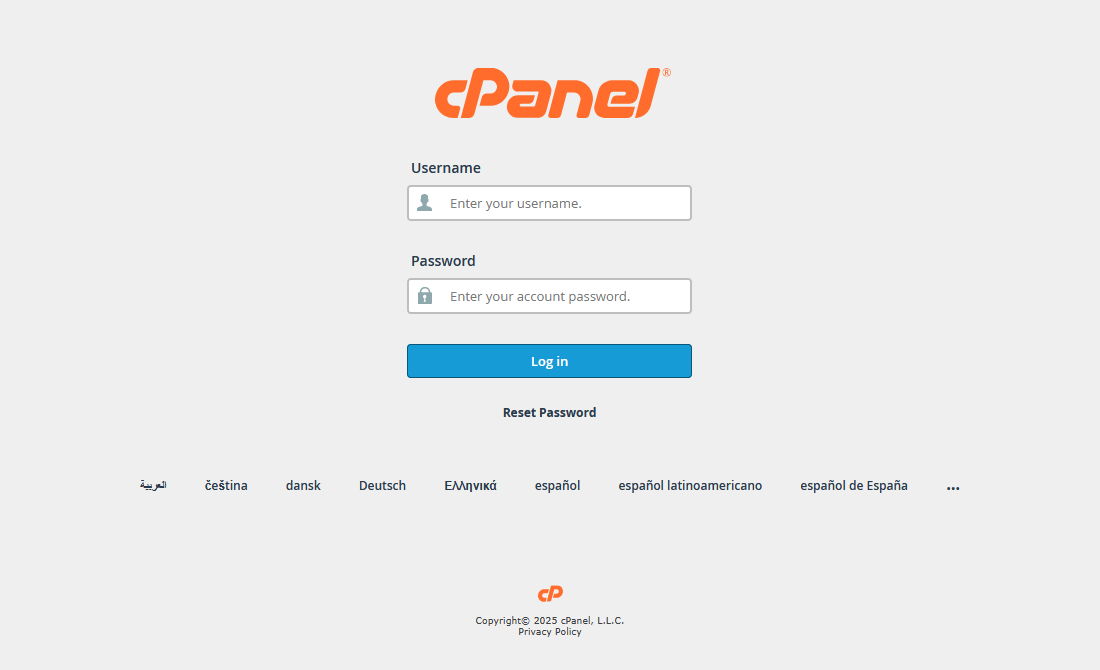
Step 1: Login to your hosting's cpanel using the login information. You will see an interface like this:
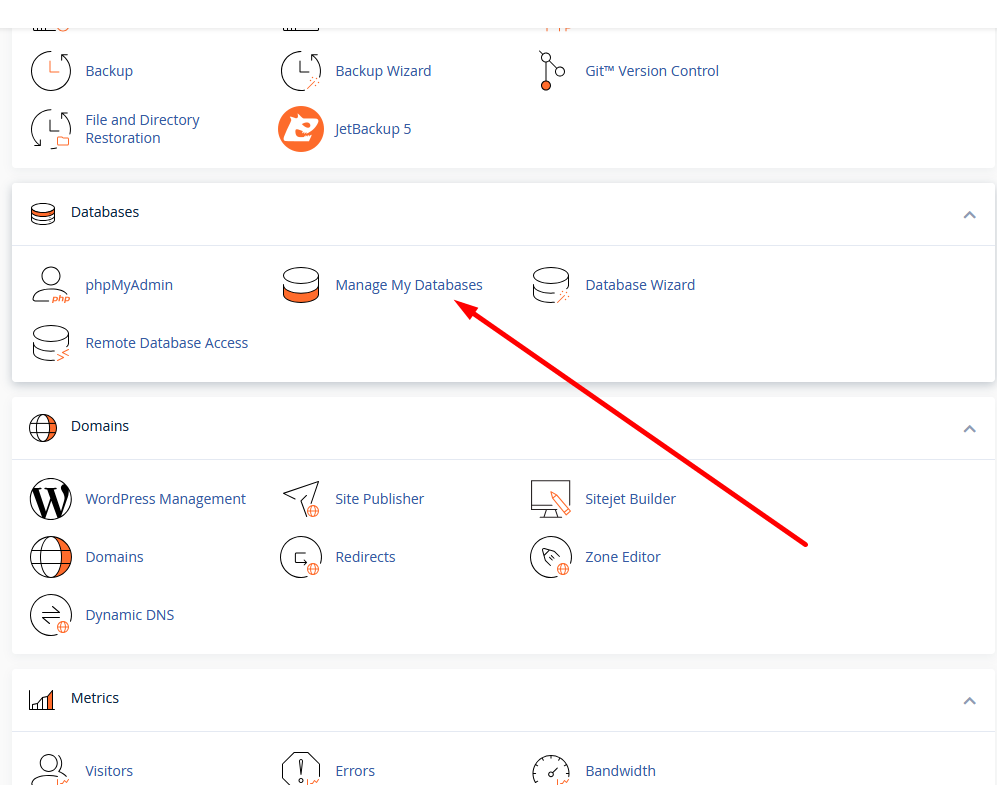
Step 2: Find the database section and create a new databse.
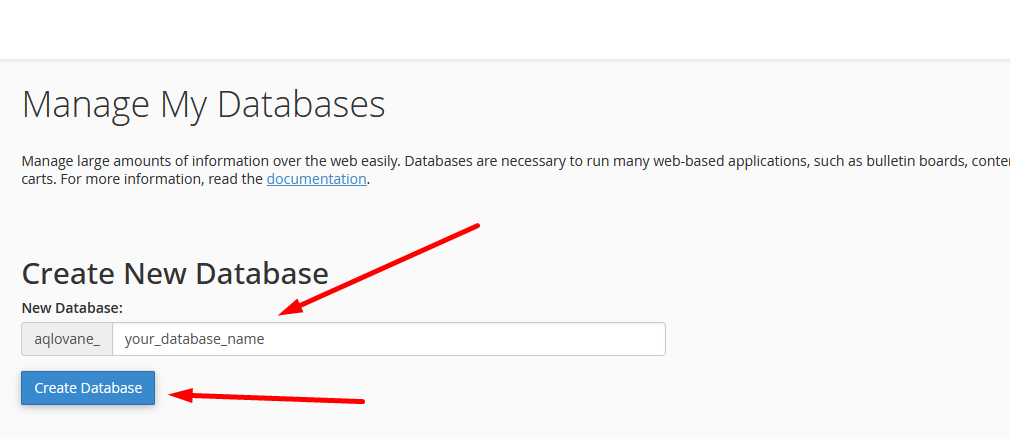
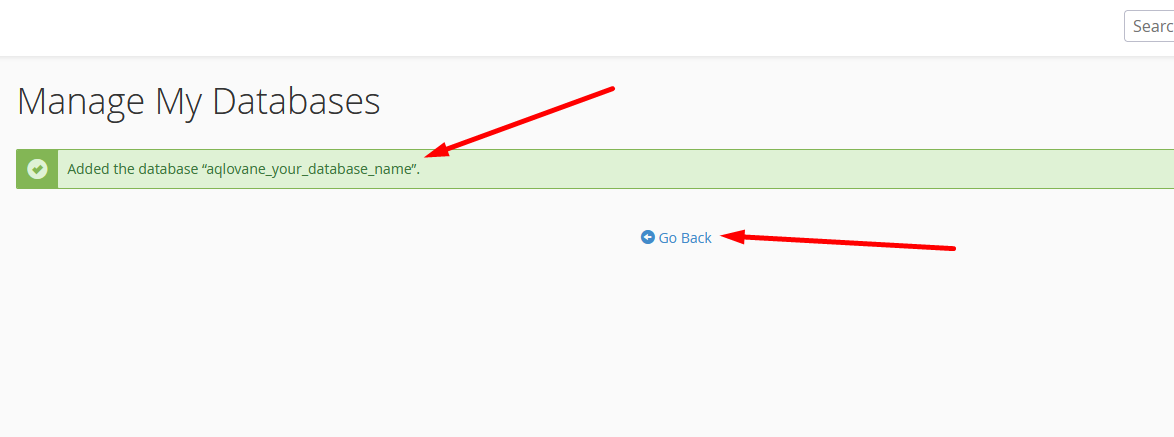
Step 3: Add Database name and click on create database button.
Step 4: After Create Databse click on Go Back button.
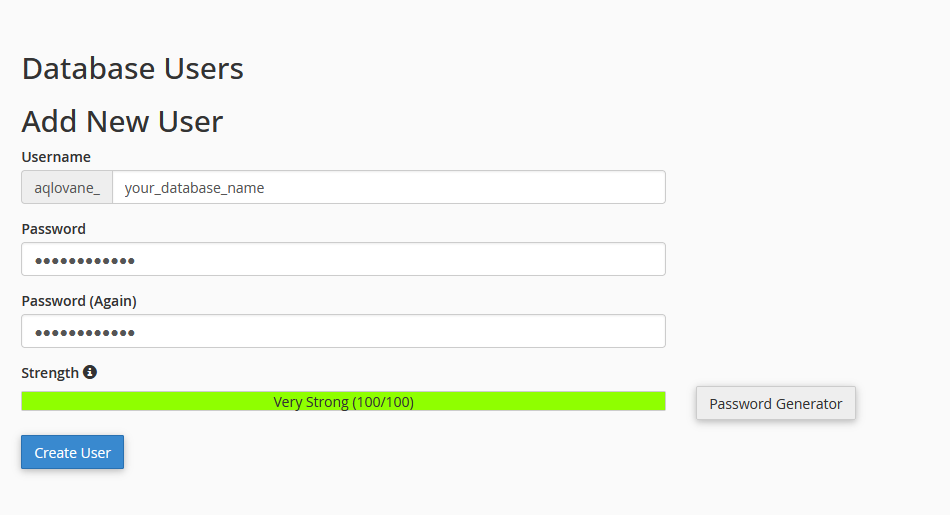
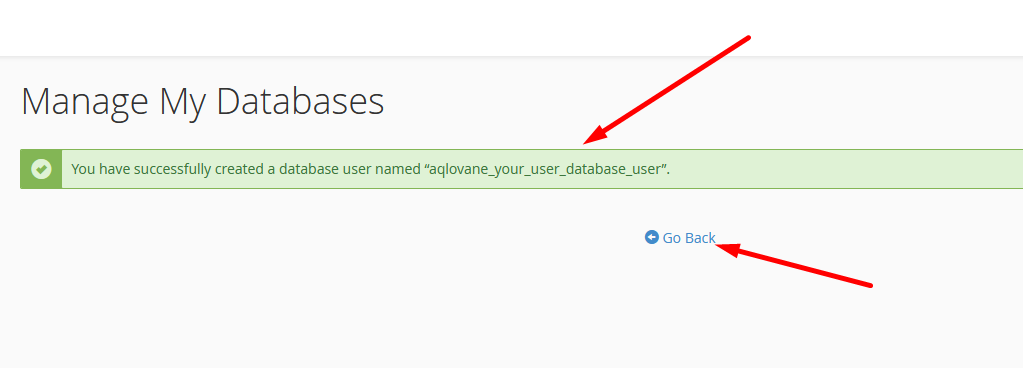
Step 5: Create a new user for the database. Add username and password and click on create user button.
Step 6: After Add User click on Go Back button.
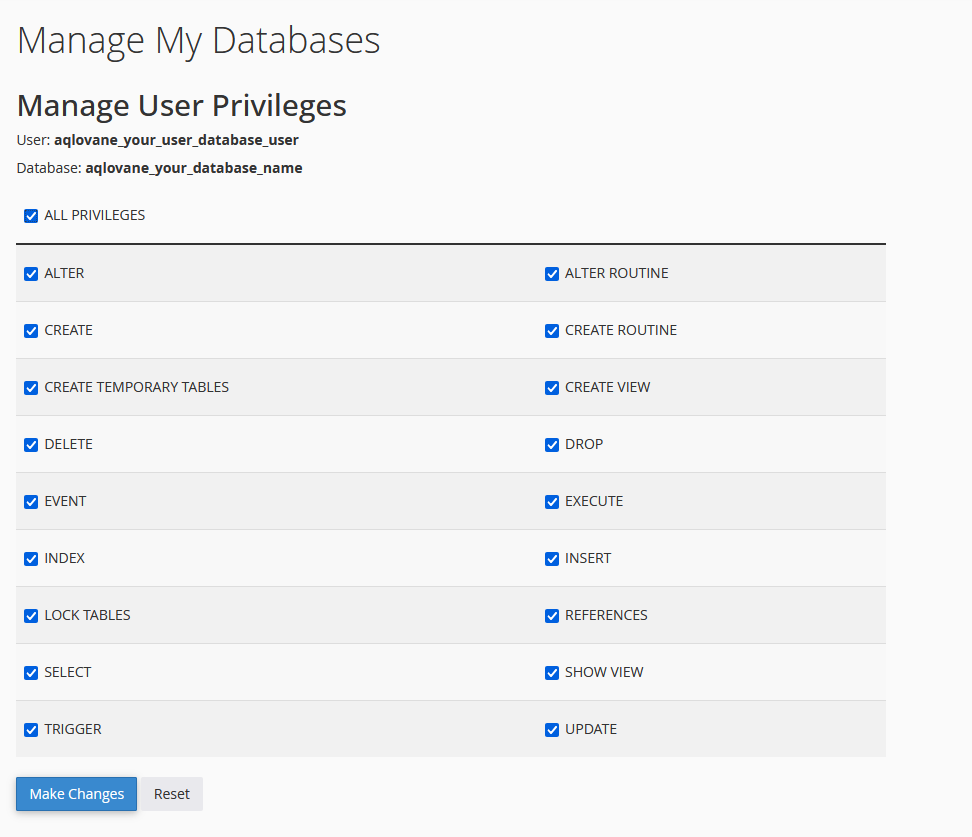
Step 7: Now add user to database
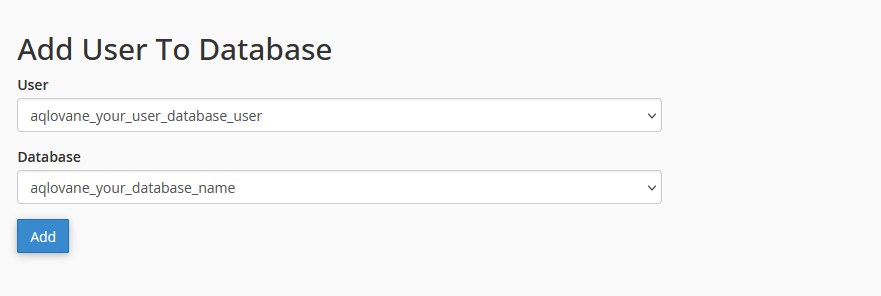
Step 8: Add all privileges to the user. Click on make changes button.
Uploading Files using Cpanel
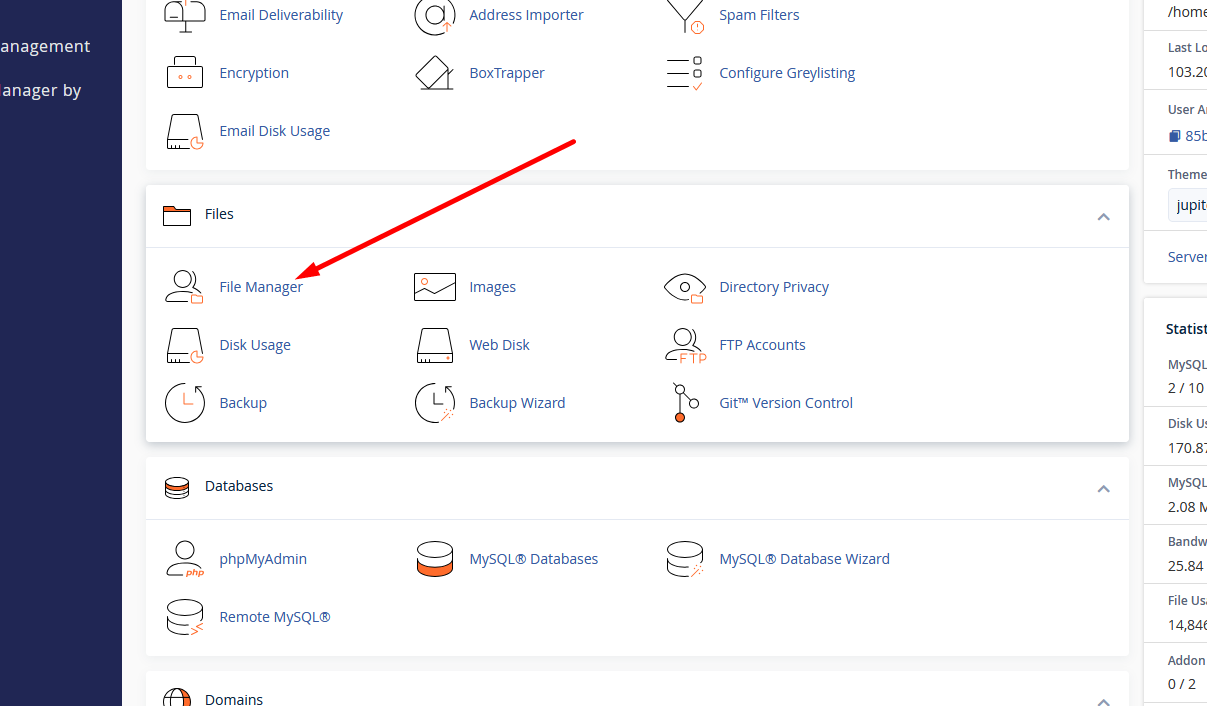
Step 1: Go to the file manager section of your cpanel.
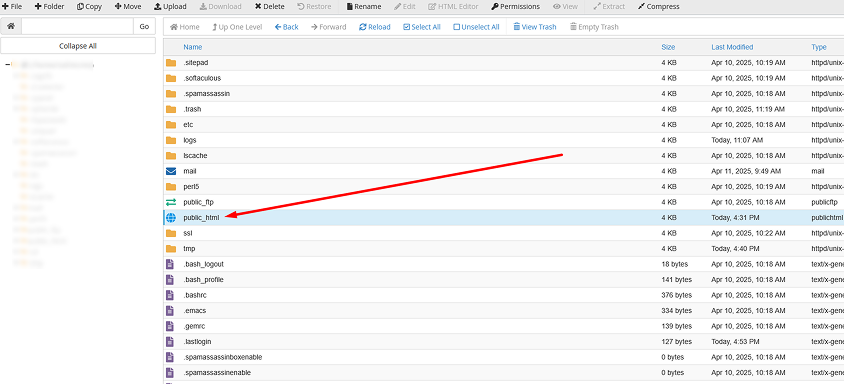
Step 2: Go to the public_html folder. This is the root folder of your website.
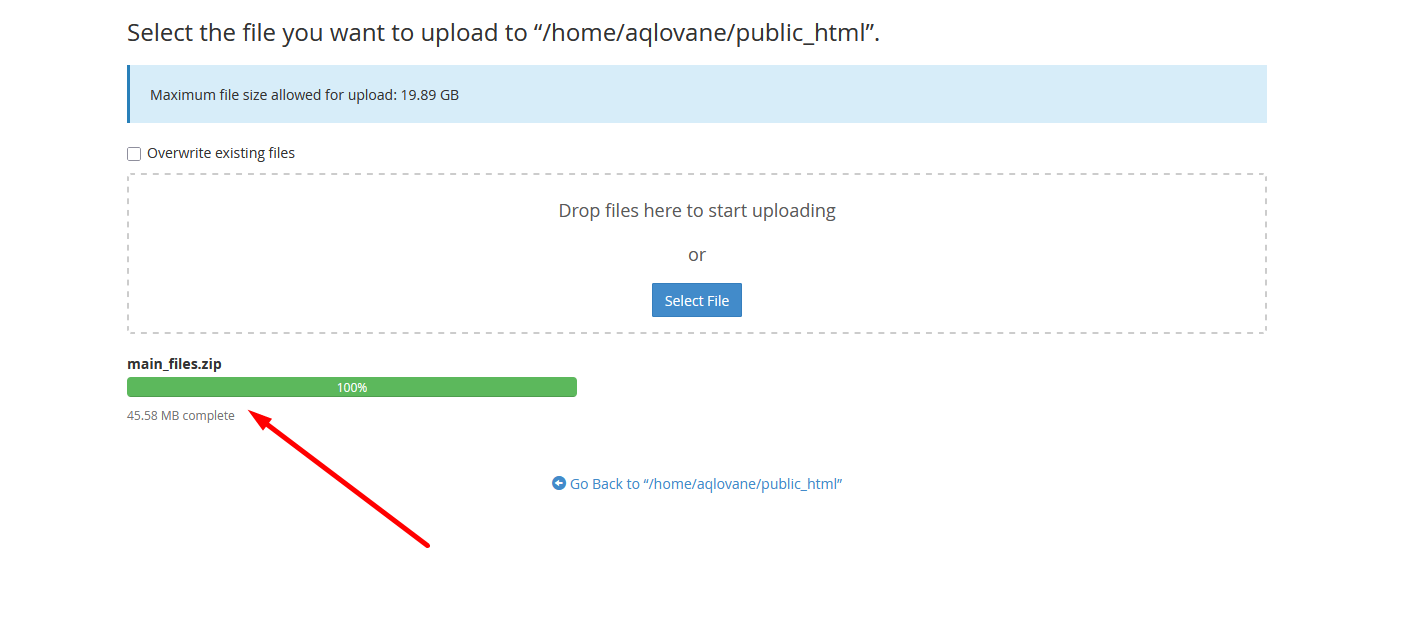
Step 3: Upload the zip file of the script to the public_html folder.
Step 4: Upload the zip file.

Step 5: Please wait while the ZIP file is being uploaded.
Step 6: Now extract the zipped file.
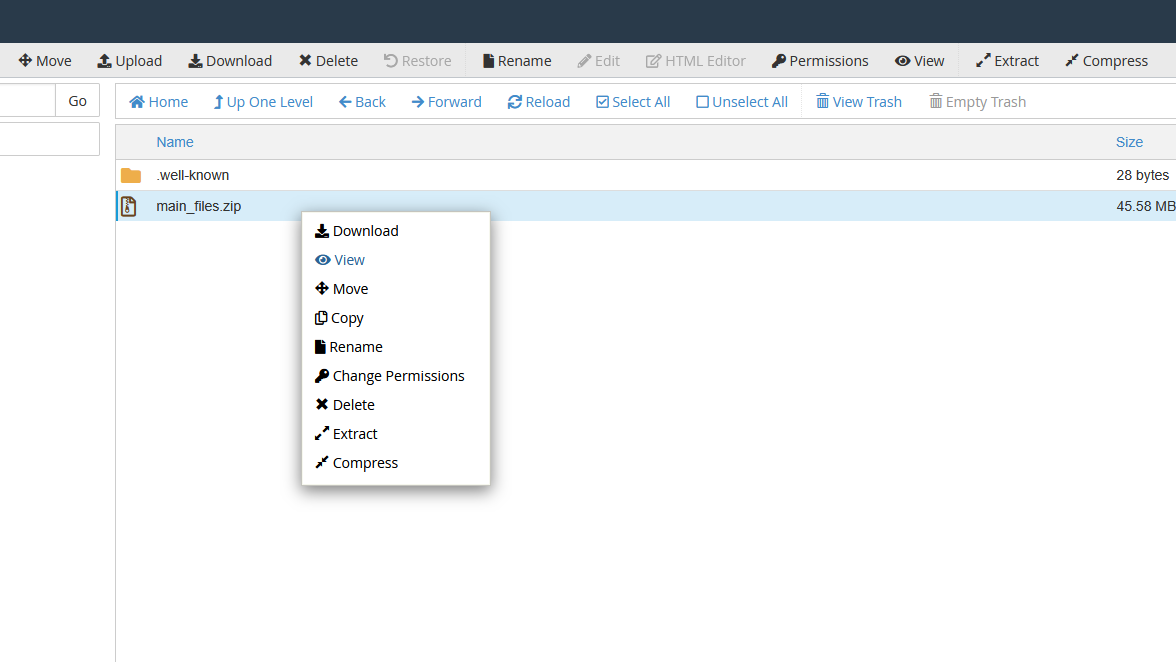
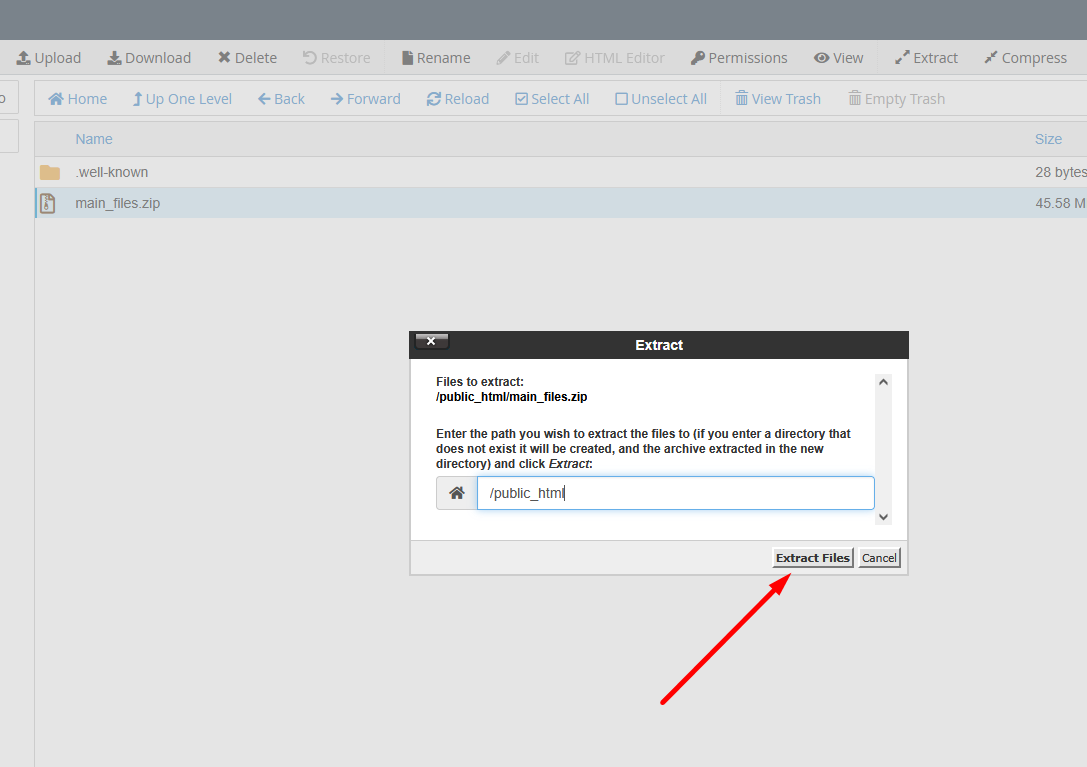
Step 7: Tap the Extract Files button to extract your files now.
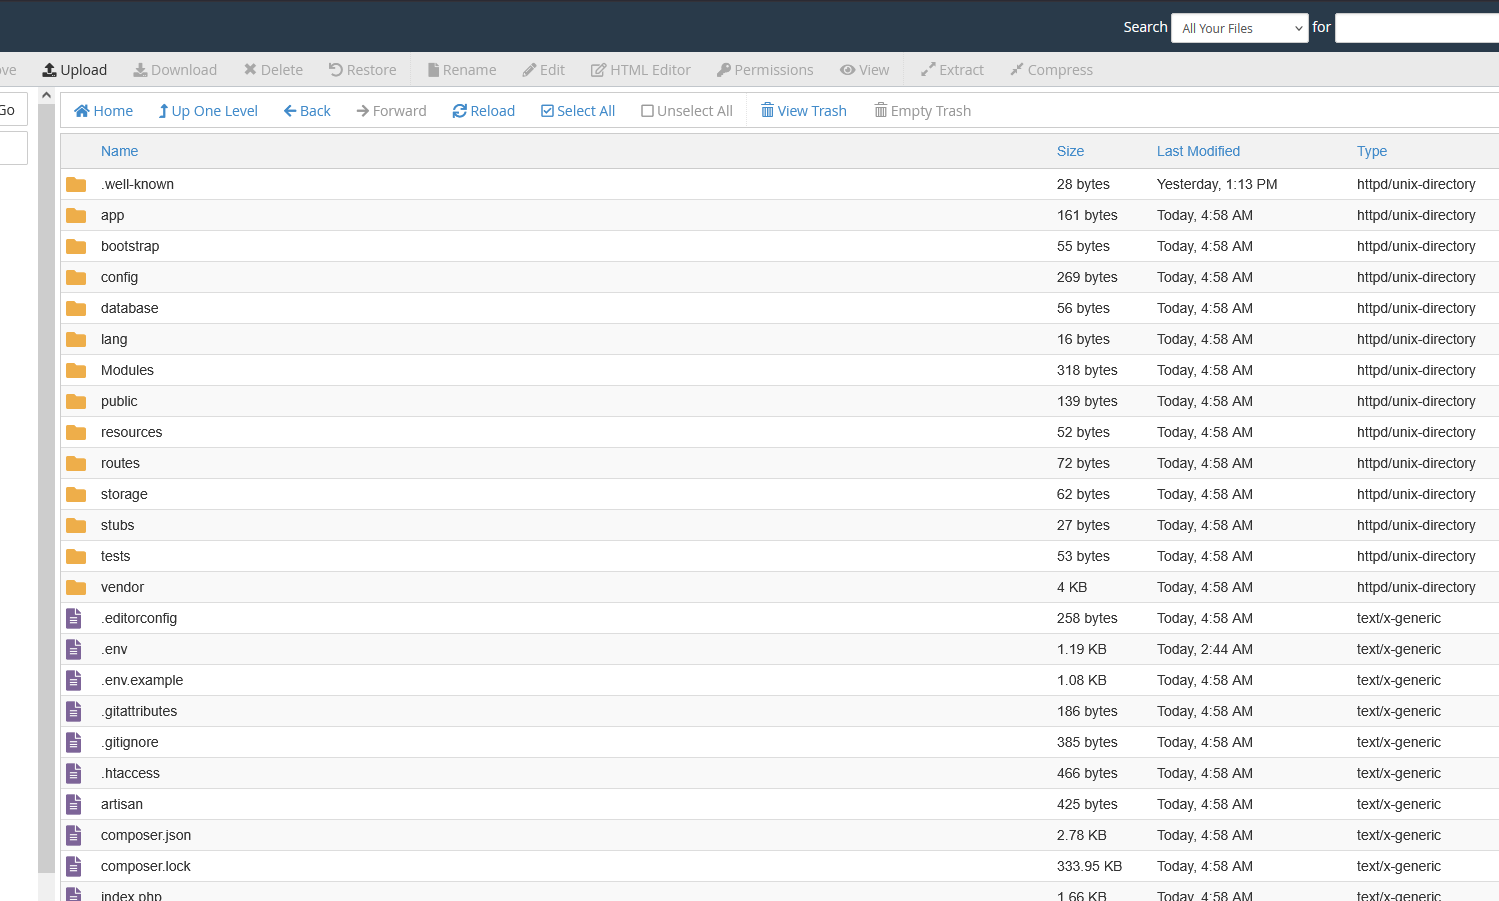
Step 8: After extracting the files, you will see all the files inside public_html folder.
Installer
Step 1: Go to http://your_domain.com You will see the welcome page of the installer. Click on Begin Installation button to continue
Step 2: You will see the requirements page. If your server meets the requirements, you will see a green tick mark. If not, you will see a red cross mark. You need to fix the issues before proceeding.
Step 3: Enter your database credentials. You need to enter the database name, username, and password that you created earlier. Click on Setup Database button to test the connection. Also check the database host and port. You will see a warning about demo data installtion. If you want to setup a demo data install then select demo install or if you want to setup a fresh install then select fresh install. After that just click on Setup Database
Step 4: When you click the Setup Database button, the system will check the database connection and attempt to set up the database. If existing data or tables are found, a warning message will appear. In that case, you can either create a new database or reset the current one. To reset the existing database, select the Yes, I want to clear the database checkbox.
If the database is empty, it will proceed to create the necessary tables and insert either demo or fresh data, based on your selection.
Step 5: After the database setup is complete, you will redirected to Account Setup Page. Enter your data and create a super admin for your site.
Step 6: Now setup your app name and timezone for your site. After that click on Set Configuration button.
Step 7: Now you will see the Mail Setup page. You need to enter your SMTP credentials to send emails from your site. If you don't want to setup SMTP now, you can skip this step and setup later from admin panel.
If you want to skip SMTP setup, just click on Skip SMTP Setup button. Then you will see the popup message, click Skip SMTP Setup button to skip the SMTP setup.
Step 8: Congratulations. You have successfully installed the script. Now you can login to your admin panel using the credentials you created earlier Or Visti your site.
Script Update Guide
We are constantly working to improve our script and release new updates. To keep your script up to date, follow these steps:
Step 1: Download latest version from codecanyon:
You will get the updated zip file. Extract the zip file. After extract you will find these files:

These are file paths of the updated files. You need to upload these files to your server.
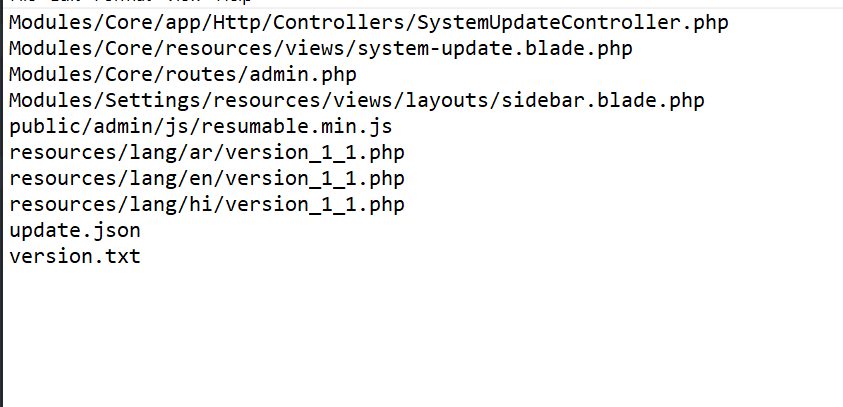
You can upload these files using FTP or cPanel file manager. Make sure to add or overwrite the existing files.
Update Version 1.2.0
Step 1: Download the update package for version 1.2.0 from codecanyon.
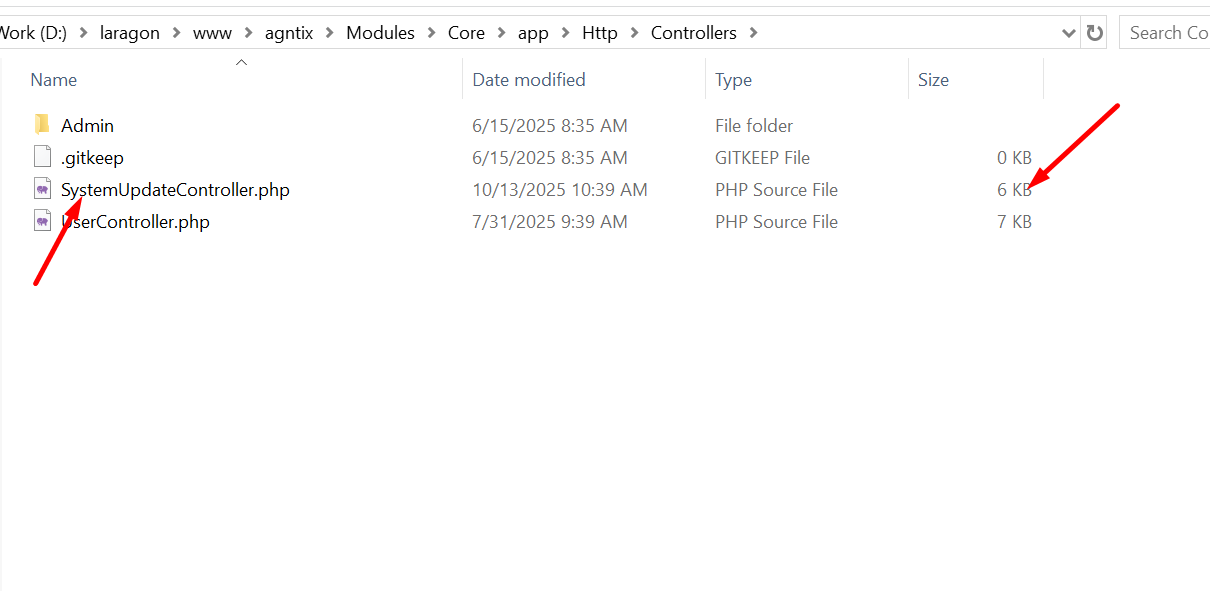
Step 2: You will get main_files folder after extracting the zip file.
Step 3: Now replace the following file to your server, where your project installed. You will get this file under projectpath/Modules/Core/app/Http/Controllers/SystemUpdateController.php
Step 4: Now go to Settings > System Update from your admin panel. Now browse or drop the update_v1.2.0.zip file here.
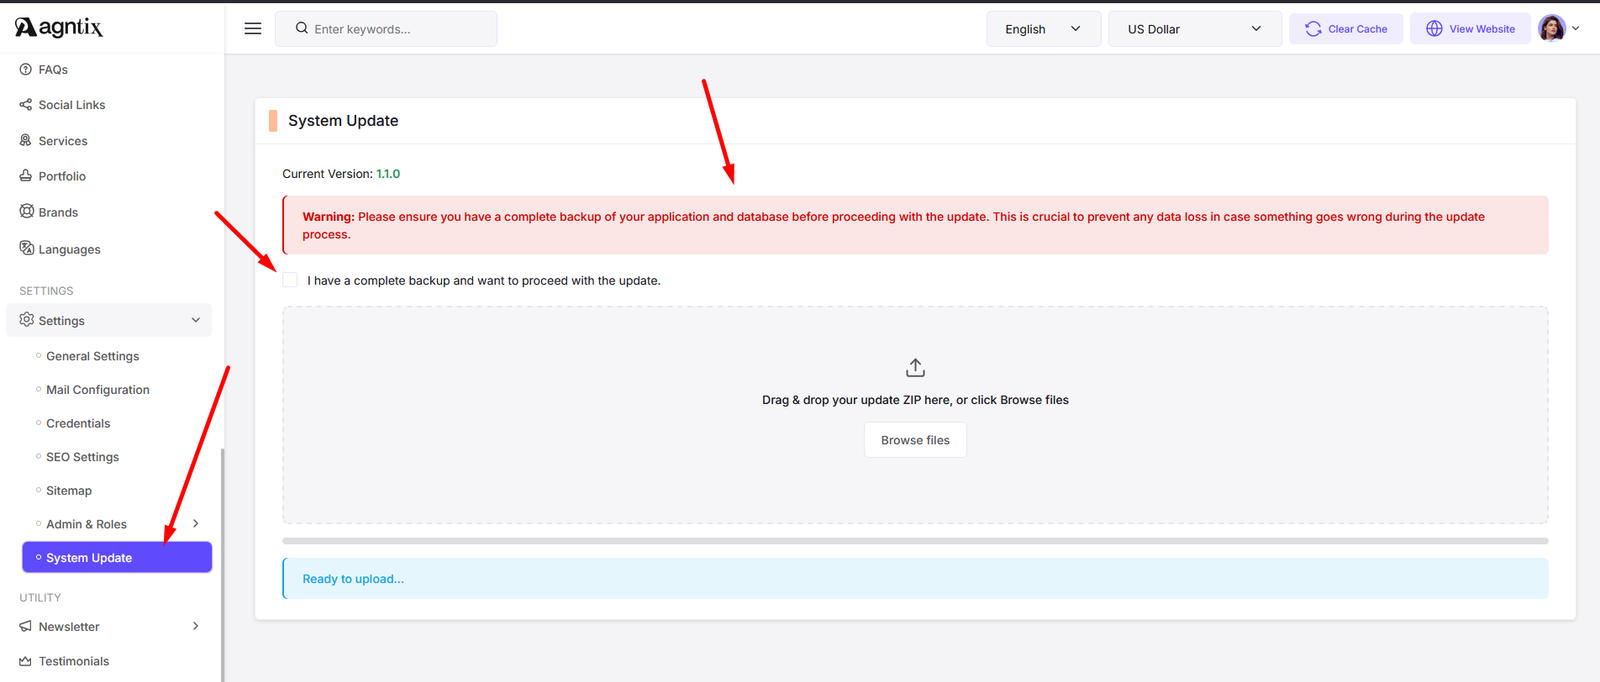
Your script will be updated to version 1.2.0 automatically.
Update Version 1.2.1
Step 1: Download the update package for version 1.2.1 from codecanyon.
Step 2: Now go to Settings > System Update from your admin panel. Now browse or drop the update_v1.2.1.zip file here.
Credentials
The default credentials of the script are:
Admin Login
URL: https://yourdomain.com/admin/login
Login Email: admin@gmail.com
Login Password: password
User Login
URL: https://yourdomain.com/login
Login Email: user@gmail.com
Login Password: password
Features
Agntix has the following features.
- Powered by Laravel 12 - A modern and robust PHP framework
- Frontend powered by Bootstrap 5 - Clean, responsive, and user-friendly design
- Intuitive and well-structured code - Easy to navigate and customize
- Fully responsive and eye-catching UI - Seamlessly adapts to all devices
- Advanced security - Protects against SQL injection, XSS, and CSRF attacks
- Multiple homepage layouts - Choose from various pre-built designs
- E-commerce functionality - Fully integrated e-commerce functionality
- Product Sales - Sell products directly from your website
- Order Management - Manage customer orders with ease Payment Methods - Stripe, PayPal, Cash On DeliveryService management - Easily create and manage service offerings
- Portfolio management - Showcase projects with a sleek portfolio system
- Team management module - Organize and display team members effortlessly
- Blog management - Create and manage blog posts with ease
- Brand management - Highlight your brand partners and affiliations
- Pricing Plan management - Offer flexible pricing plans for your services
- Testimonials management - Display client feedback and success stories
- FAQ management - Provide answers to frequently asked questions
- Menu management - Customize navigation menus for better user experience
- Page Builder - Create custom pages with a user-friendly interface
- Admin Role & Permission - Control access and permissions for different user roles
- SEO Setup - Optimize your site for search engines with built-in SEO tools
- Email Configuration - Set up email notifications and communications
- Sitemap Generation - Automatically generate sitemaps for better indexing
- Cookie Consent - Simplify compliance with cookie laws
- Contact form with Google reCAPTCHA - Secure and spam-free communication
- SEO-friendly URLs - Optimized for search engines
- Newsletter subscription - Grow your audience with an integrated newsletter system
- Maintenance Mode - Temporarily disable the site for updates or maintenance
- Easy Translations - Translate your site in your desired language with ease
- Google Analytics Integration - Track your website's performance and user behavior
- Google Tag Manager Integration - Manage all your tracking codes in one place
- Google reCAPTCHA Integration - Protect your forms from spam and abuse
- Tawk.to Live Chat Integration - Engage with your visitors in real-time
Admin Options
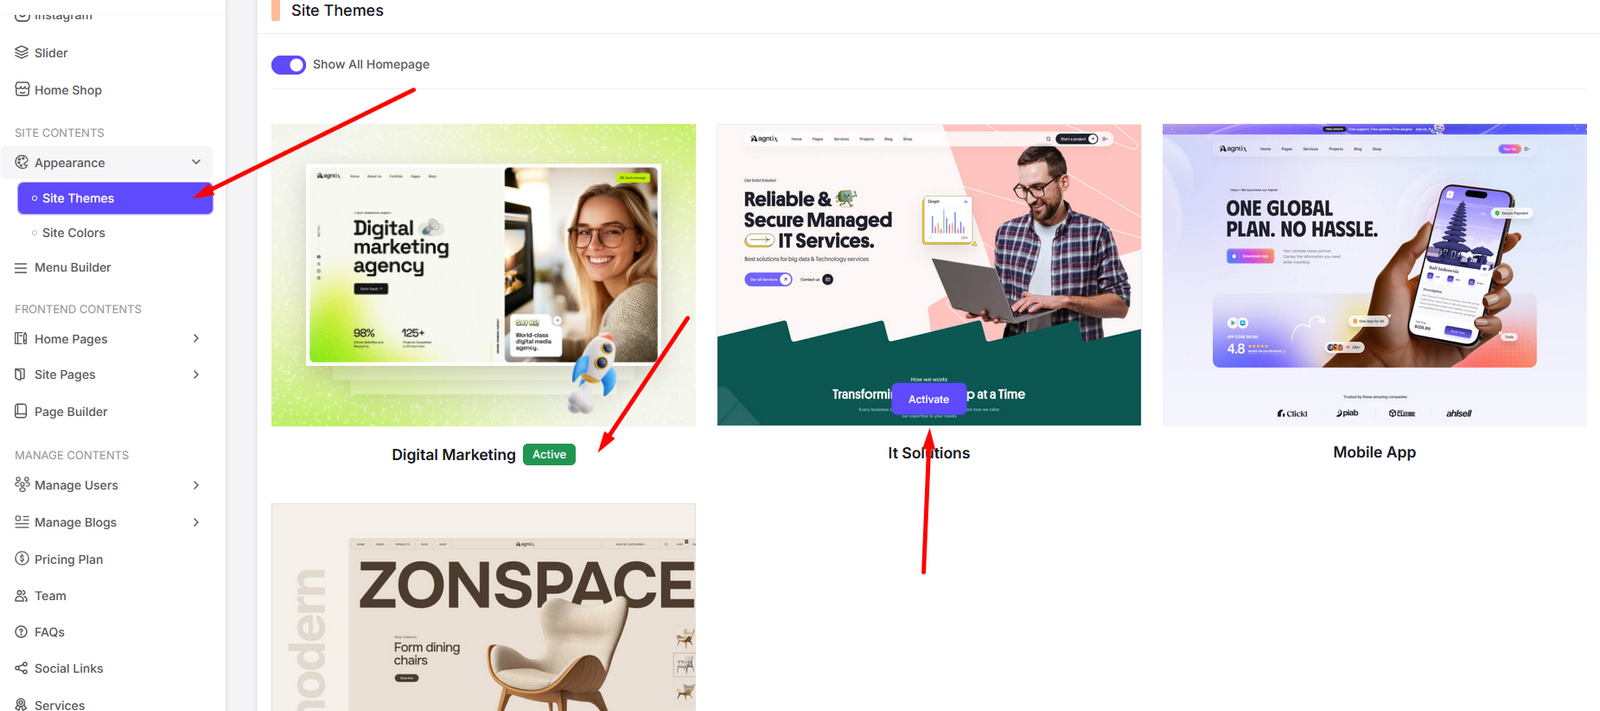
Change Theme
Follow the steps as instructed in the images below: Appearance Site Themes
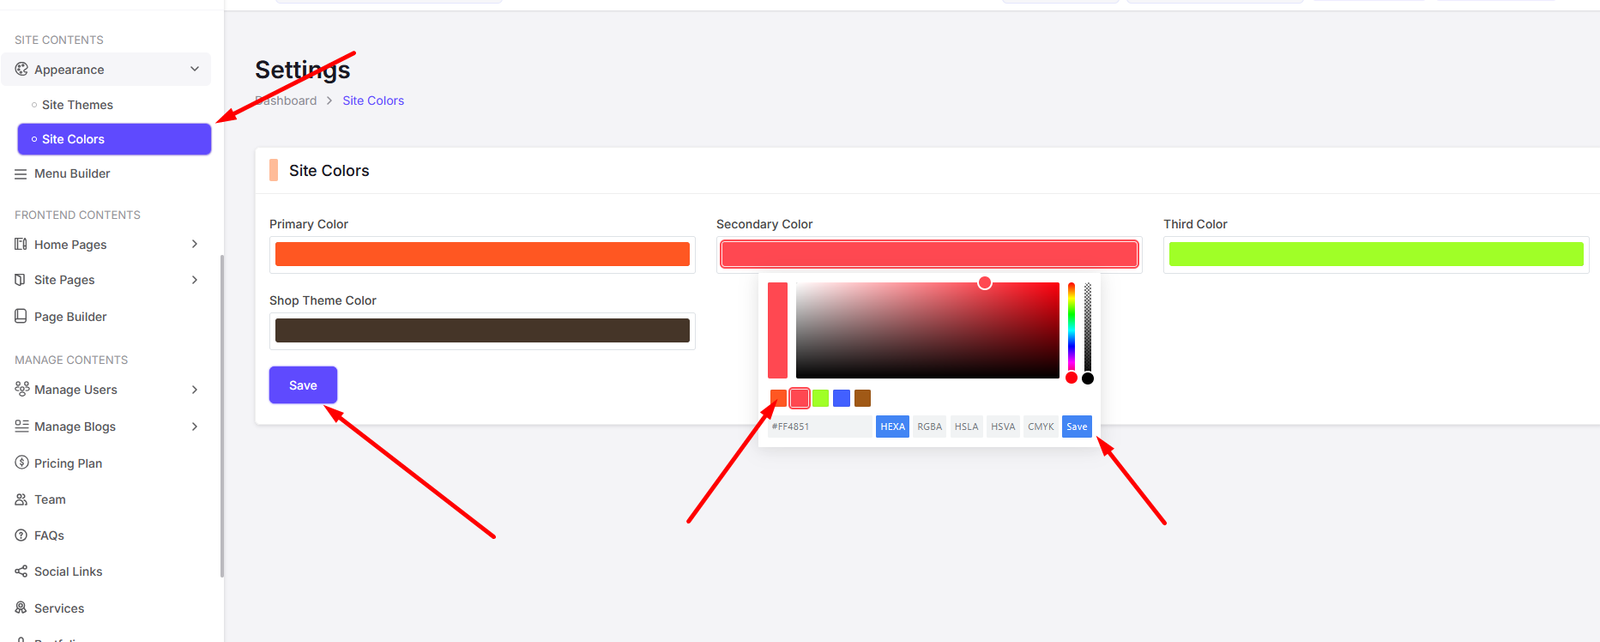
Site Color
Follow the steps as instructed in the images below: Appearance Site Colors
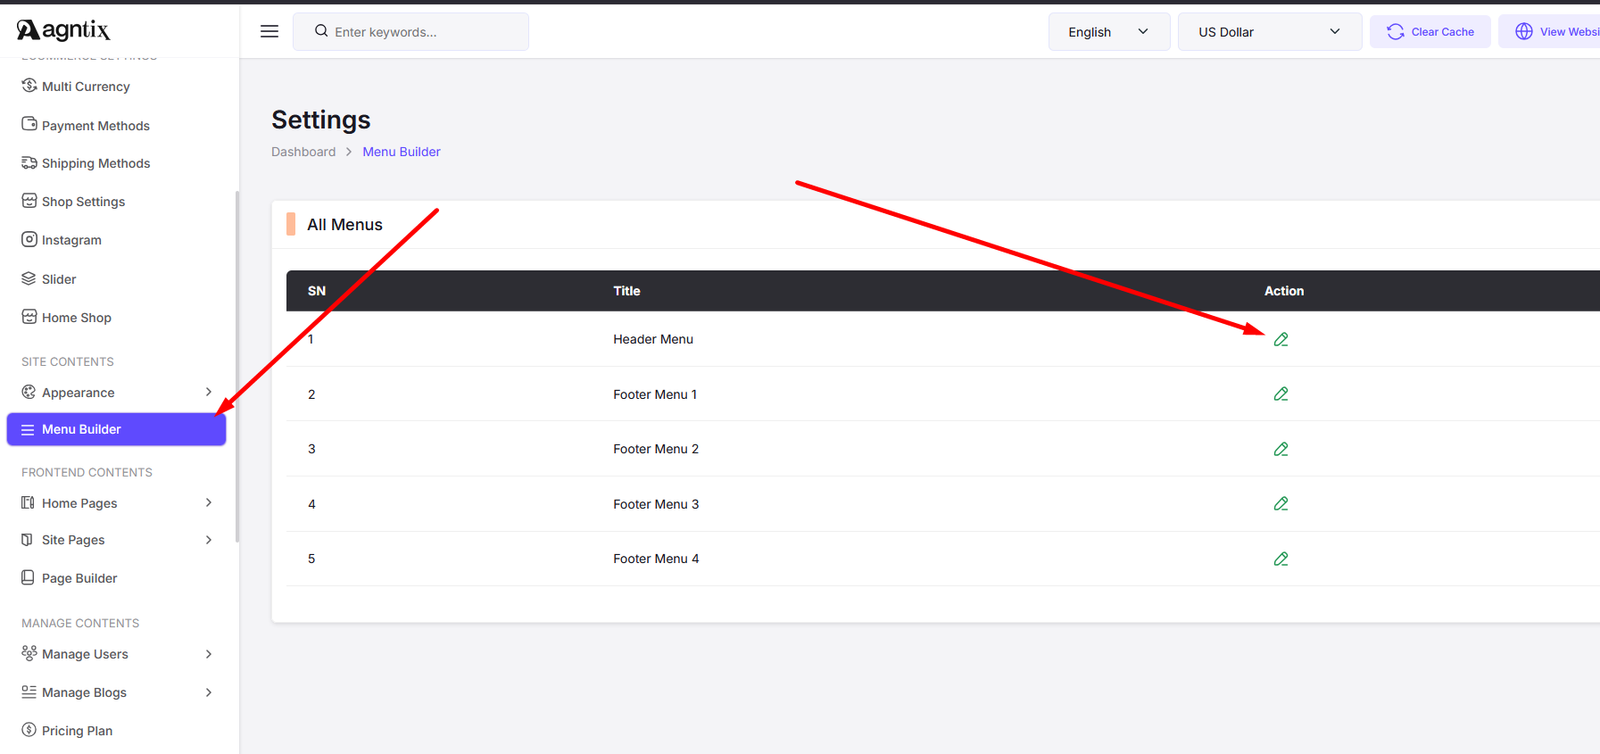
Menu Builder
Navigate to Menu Builder to manage your site's navigation menus.
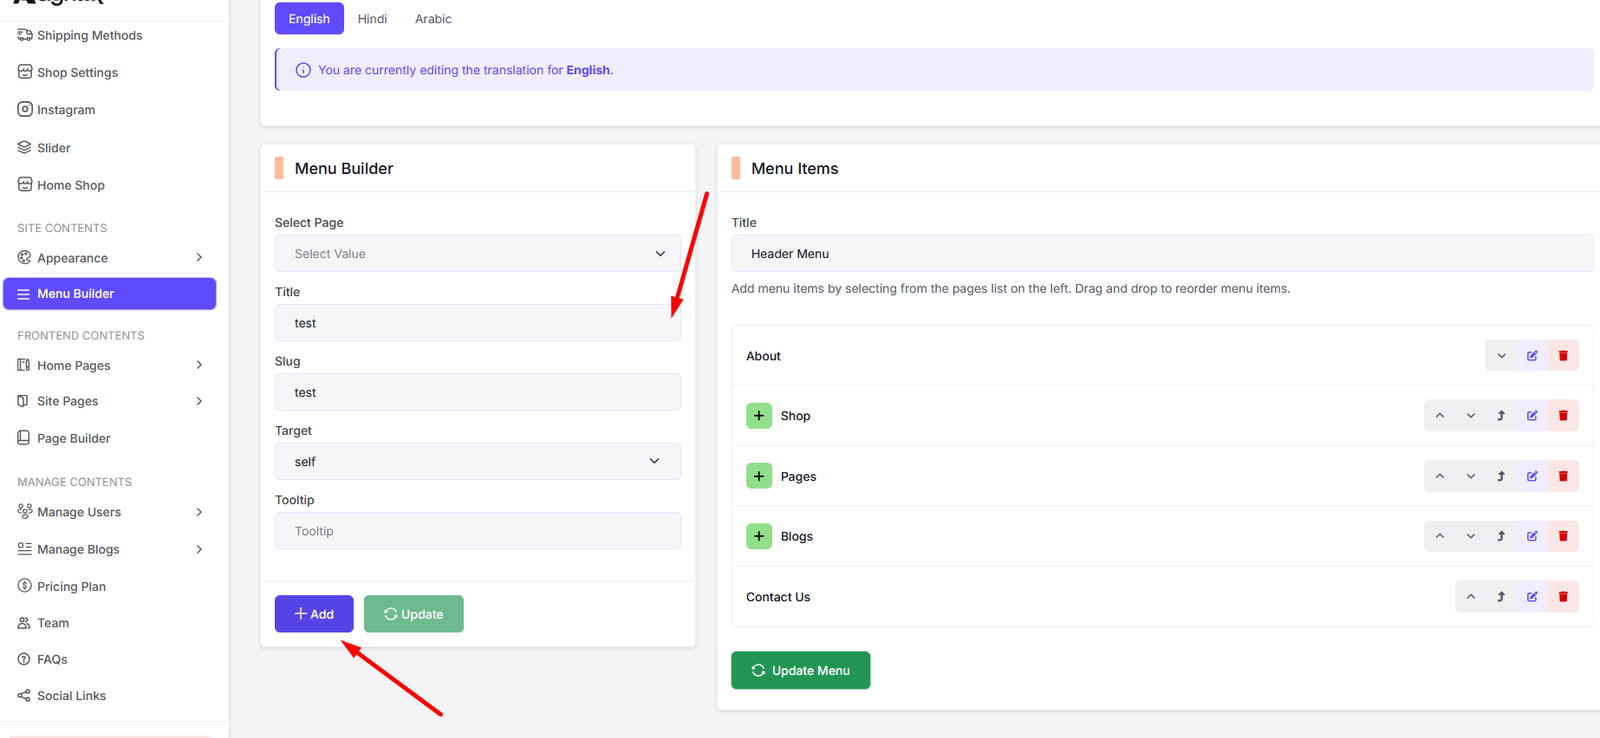
After click edit button you will see the menu builder page. Here you can add, edit, and delete menu items. You can also change the order of the menu items by dragging and dropping them.
There are some action buttons available for each menu item. Which are: up, down, inside, outsite, edit and delete.
- Up: Moves the menu item up in the list.
- Down: Moves the menu item down in the list.
- Inside: Moves the menu item inside the parent menu item.
- Outside: Moves the menu item outside the parent menu item.
- Edit: Opens the edit menu item modal where you can change the menu item name, URL, and icon.
- Delete: Deletes the menu item from the list.

Also you can add custom page if you want.
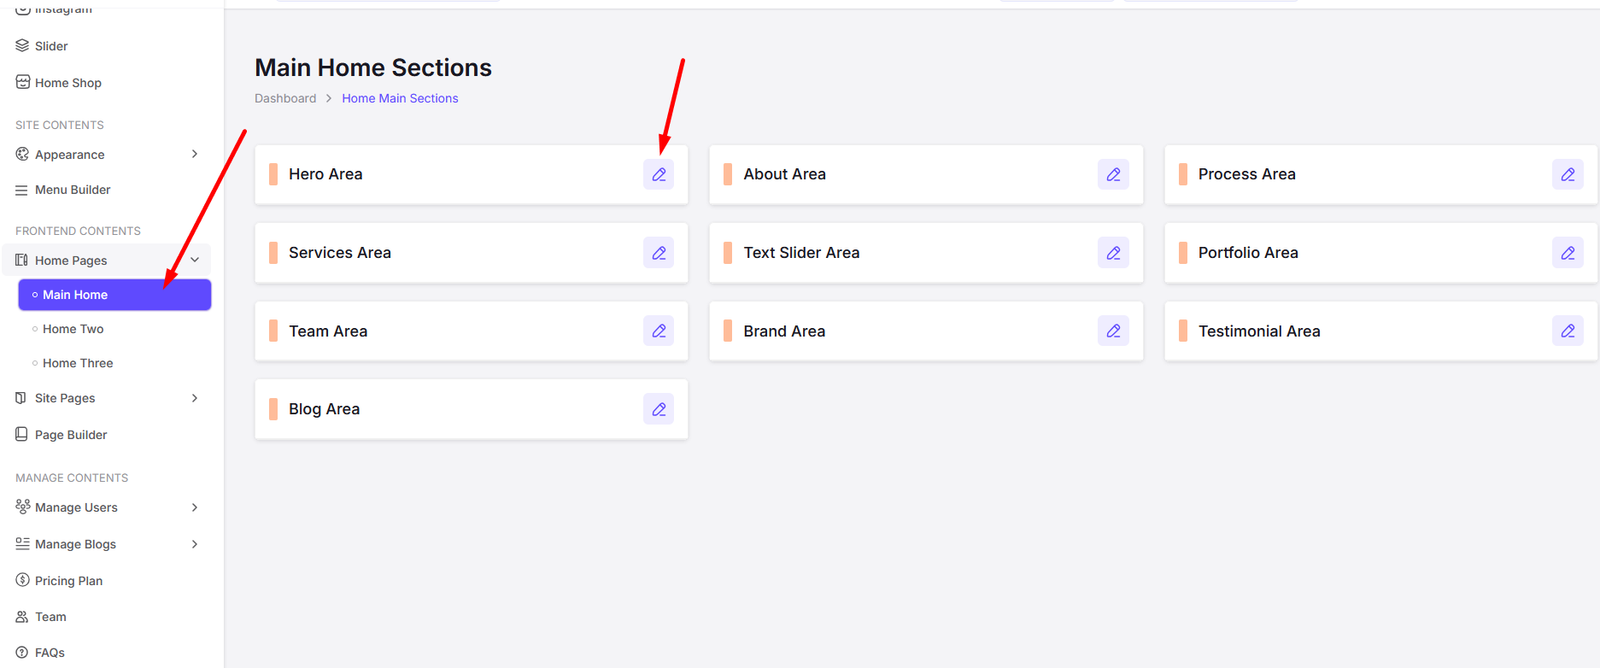
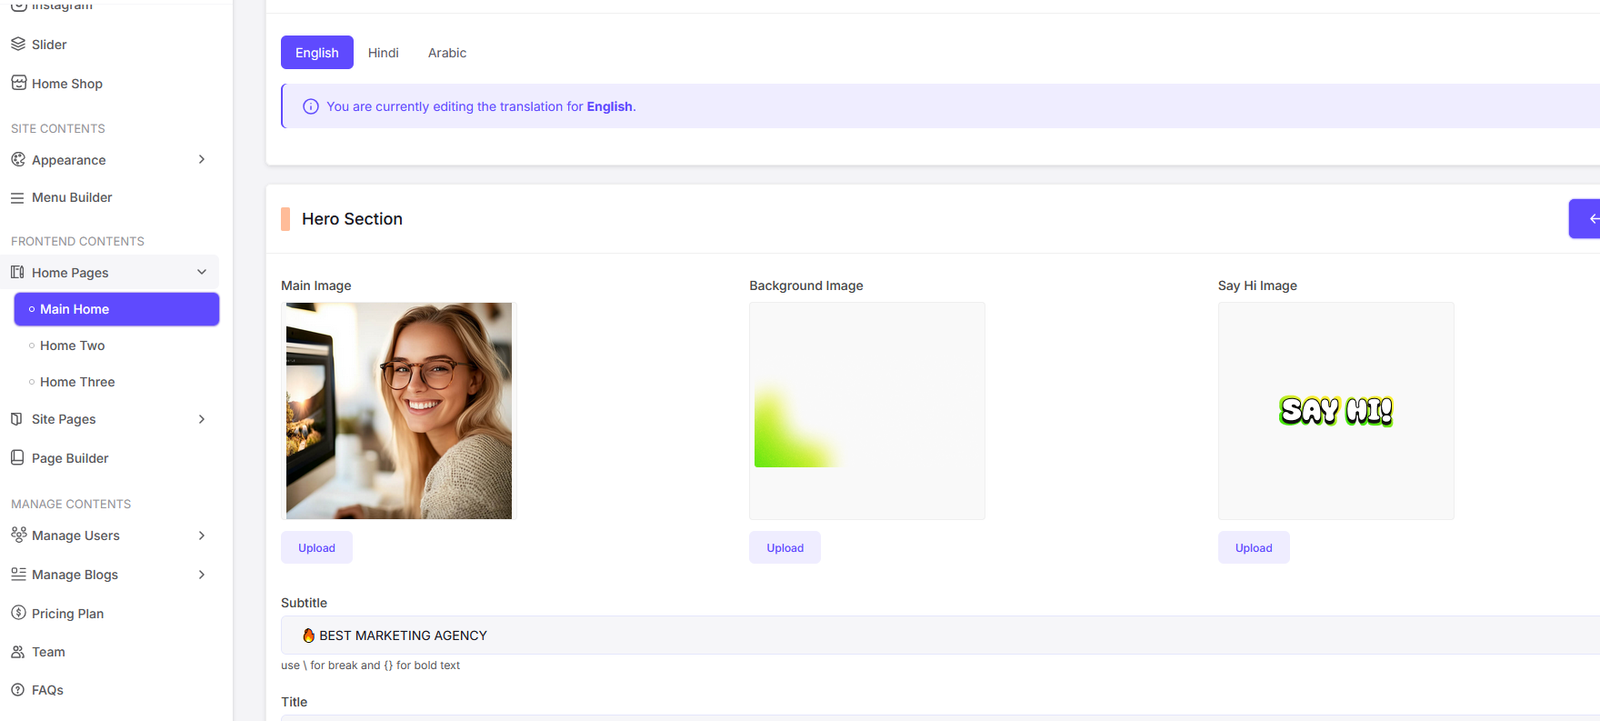
Frontend Contents
Navigate to Frontend Contents to manage your site's frontend content.
You can manage home page contents from here. Also if you want to disable any section from the page, you can do it from here. Just turn off the status button of that section and it will be disabled from the frontend.
There are 4 home page layouts available. you can choose any pages and edit contents of that page.
- Main Home
- Home Two
- Home Three
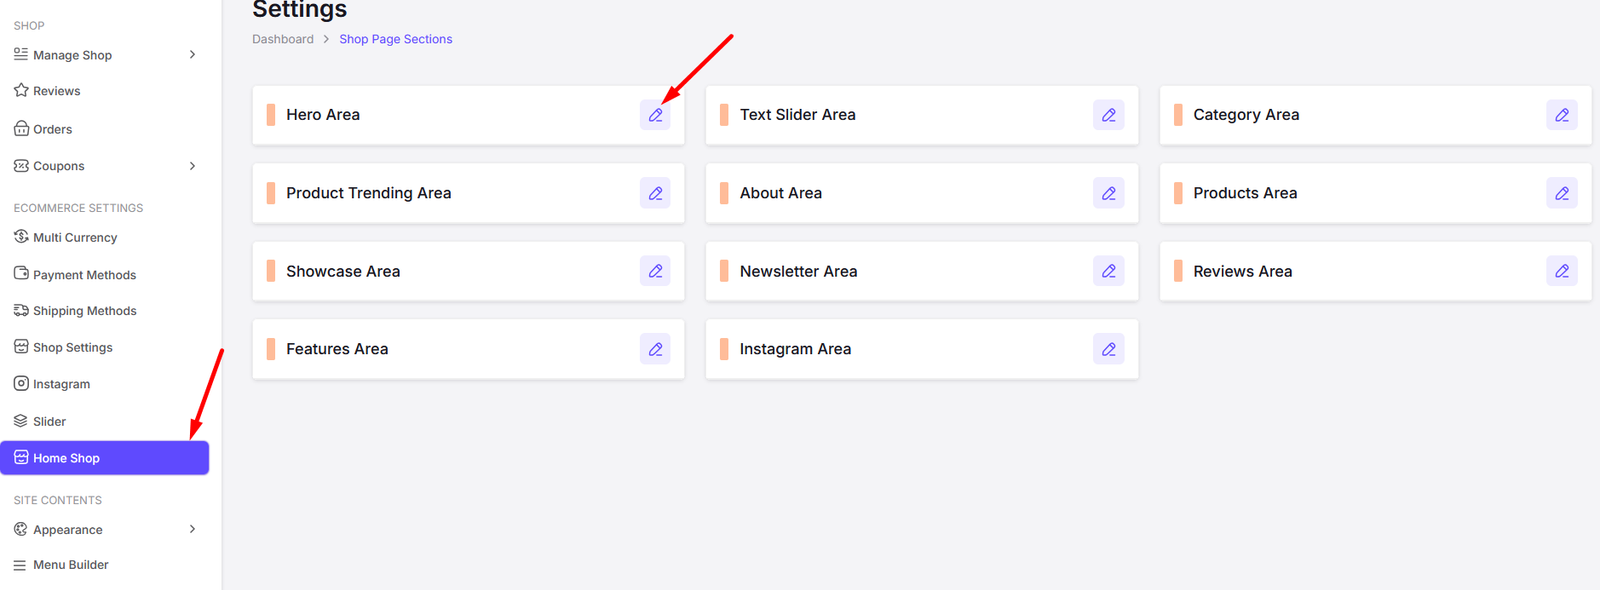
- Home Shop
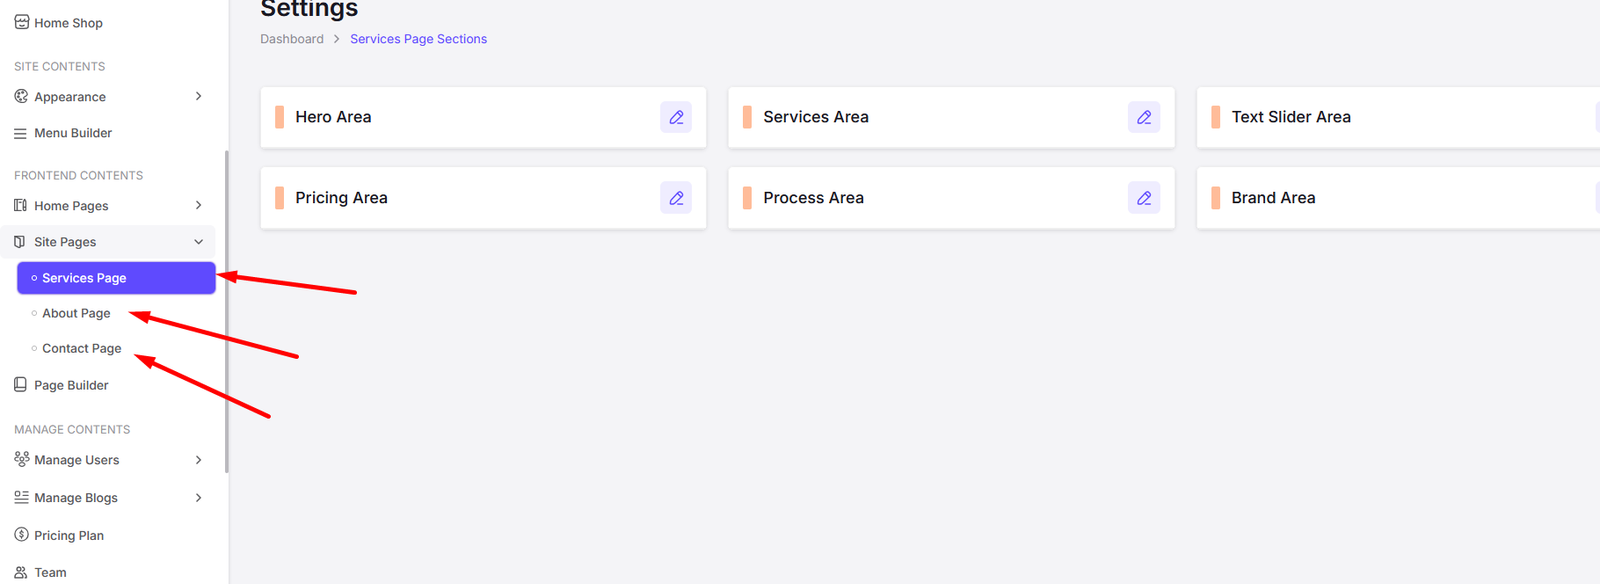
You can manage the homepage, about page, contact page, and other pages from here.
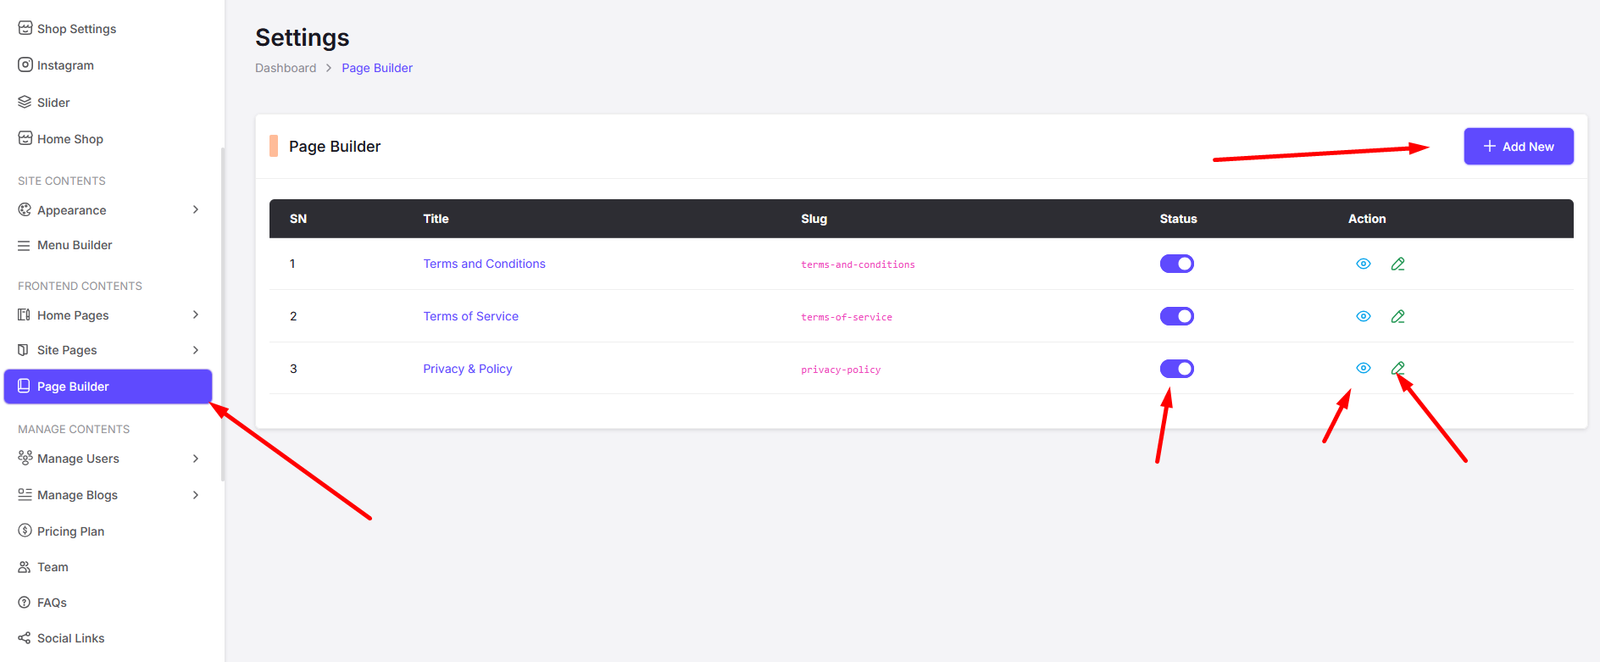
Page Builder
Navigate to Page Builder to create custom pages for your site.
You can create custom pages using the page builder. Just click on the Add New Page button and you will see the page builder interface. You can add sections, blocks, and elements to your page.
Also you can edit, view or disable any page from here.
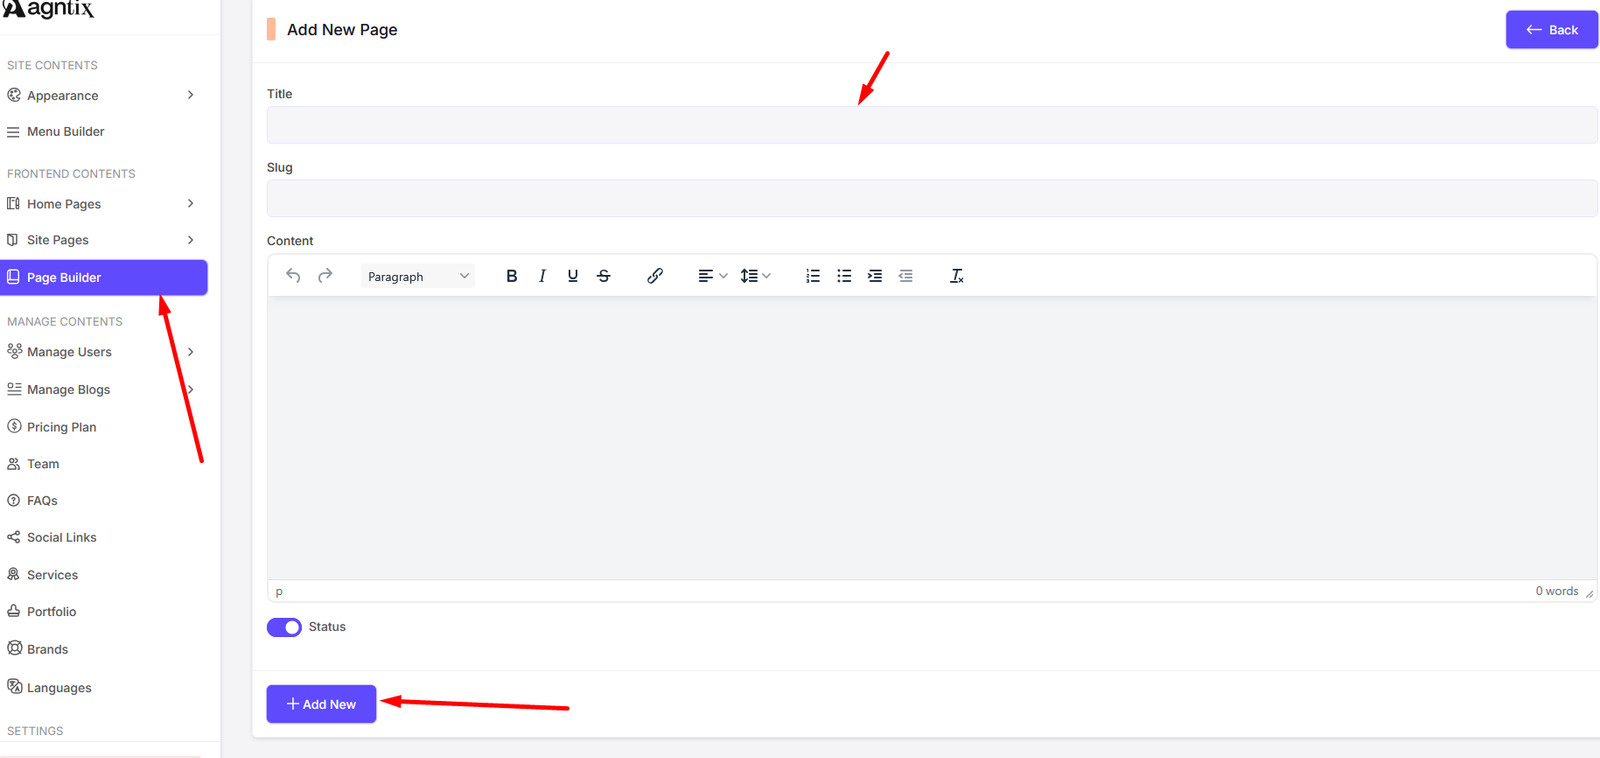
Add New Page
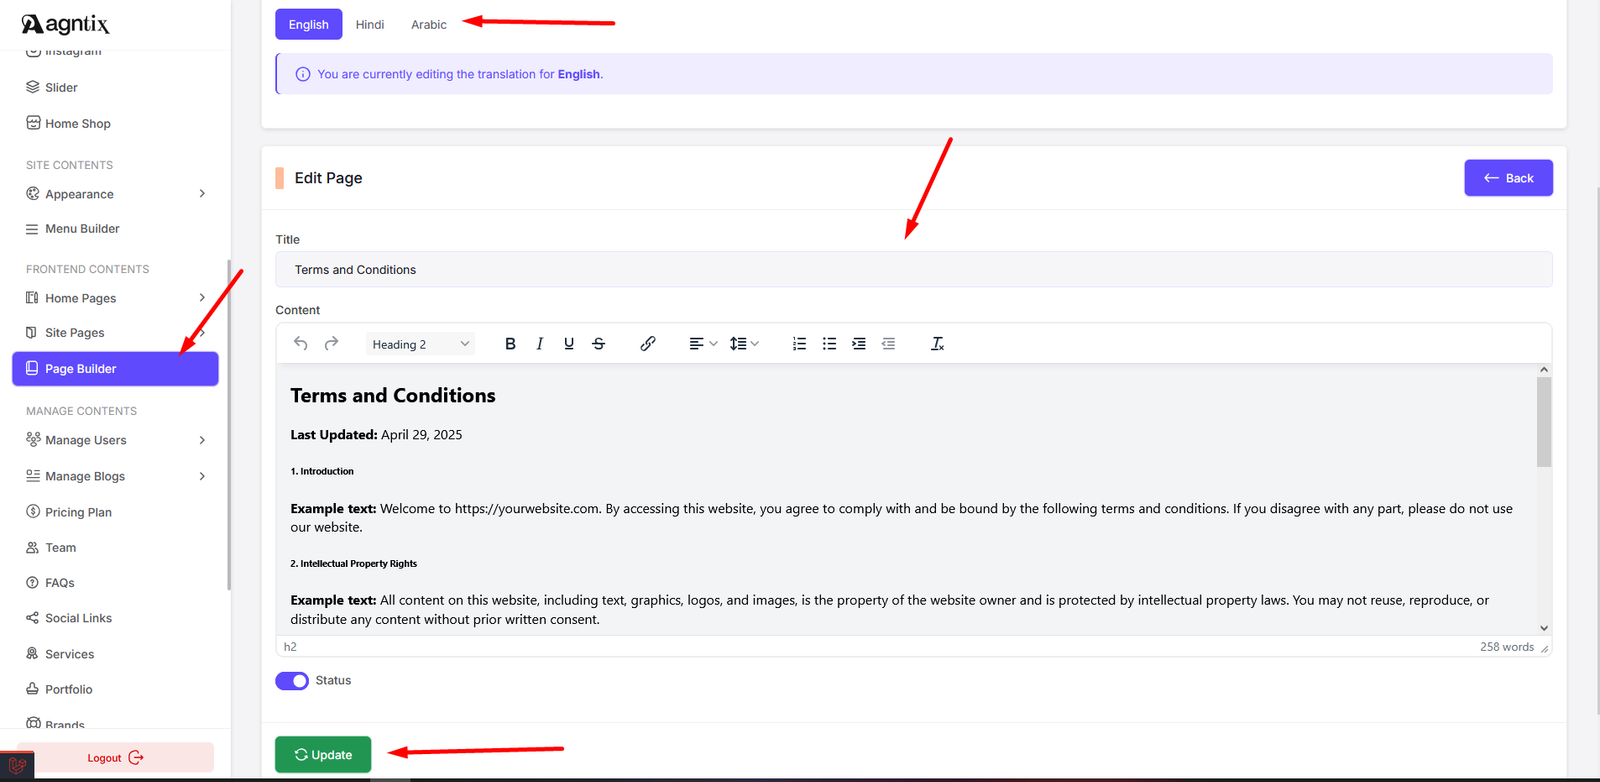
Edit Page
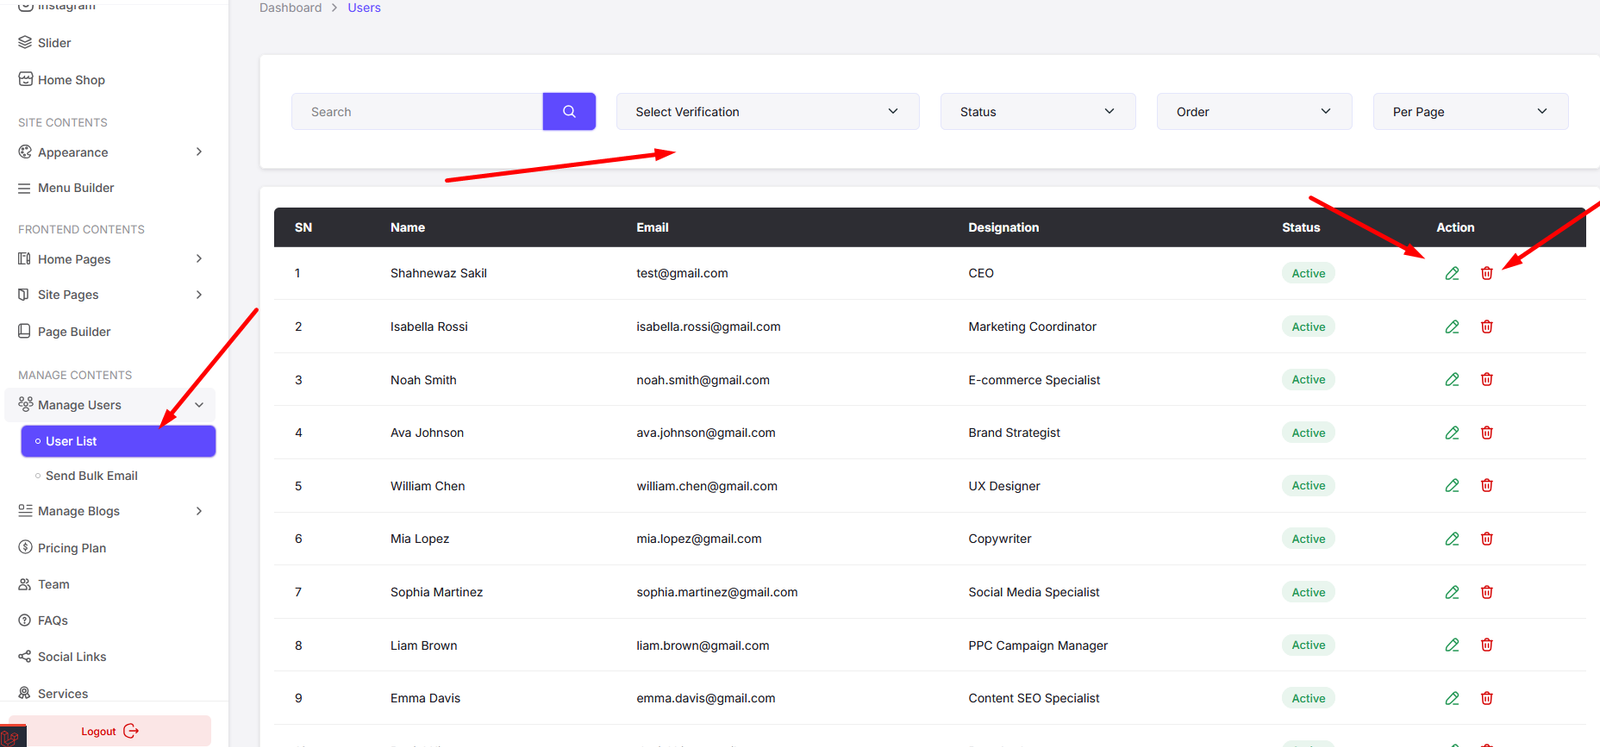
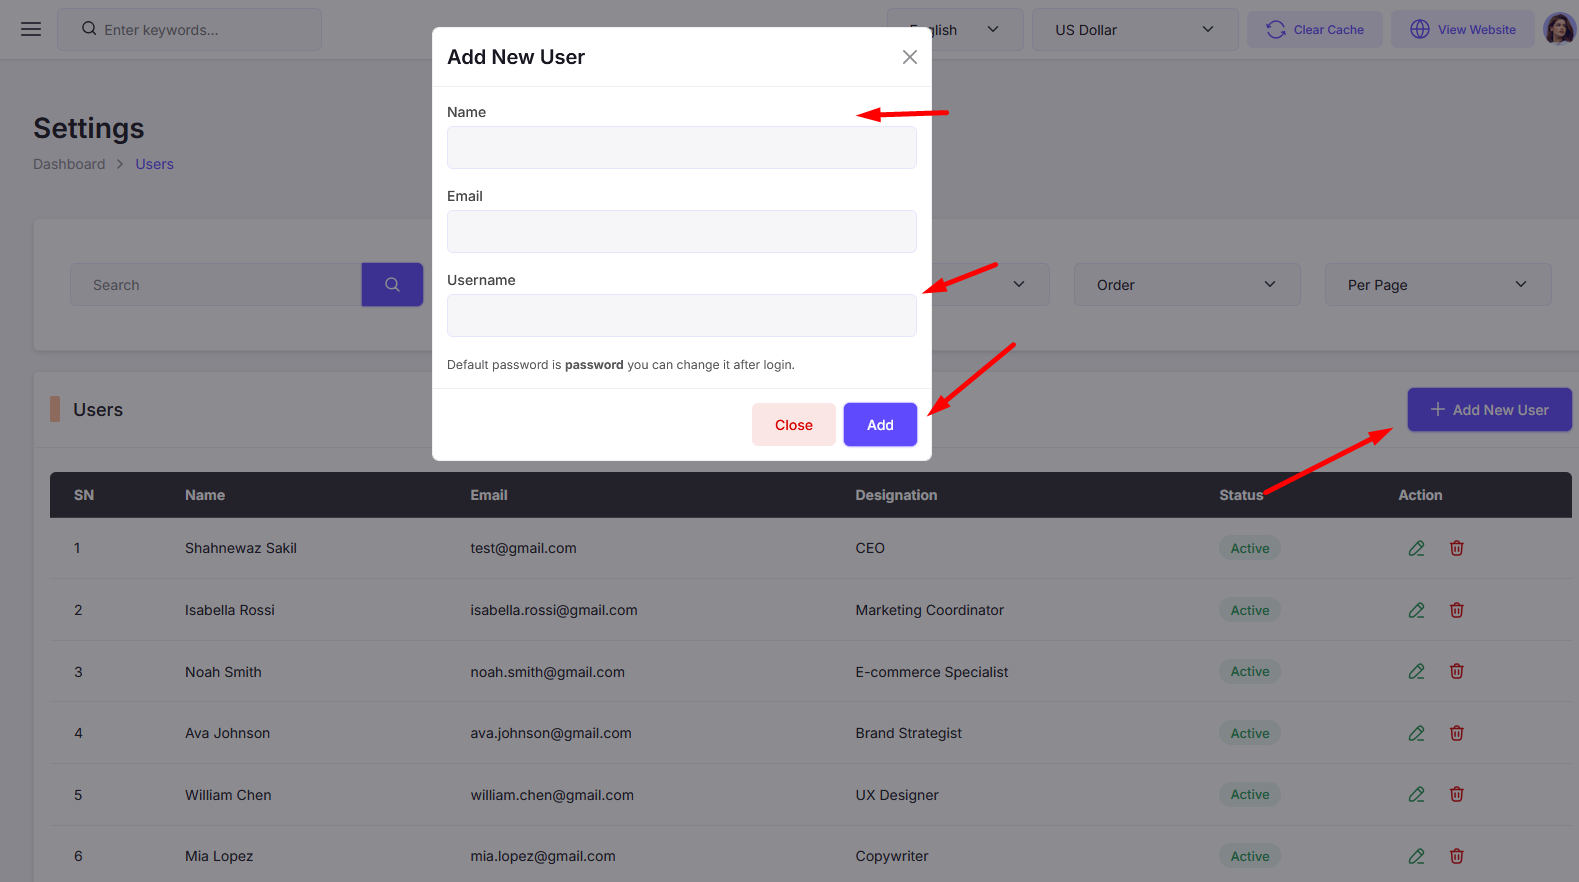
Manage Users
Navigate to Manage Users to manage your site's users.
You can view, edit, and delete users from here. Also you can search users by their name or email address, verified status, order etc.
Add User
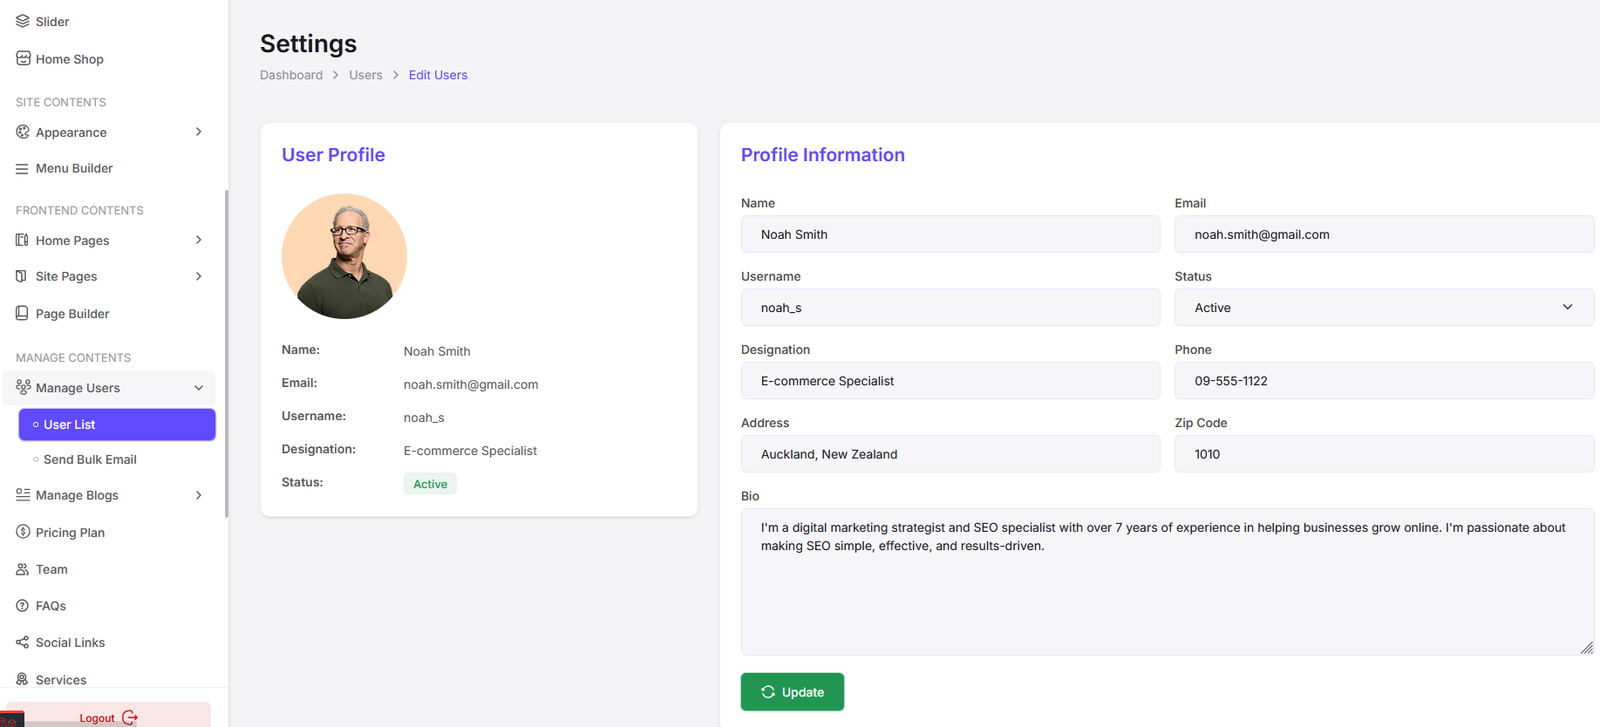
Edit User
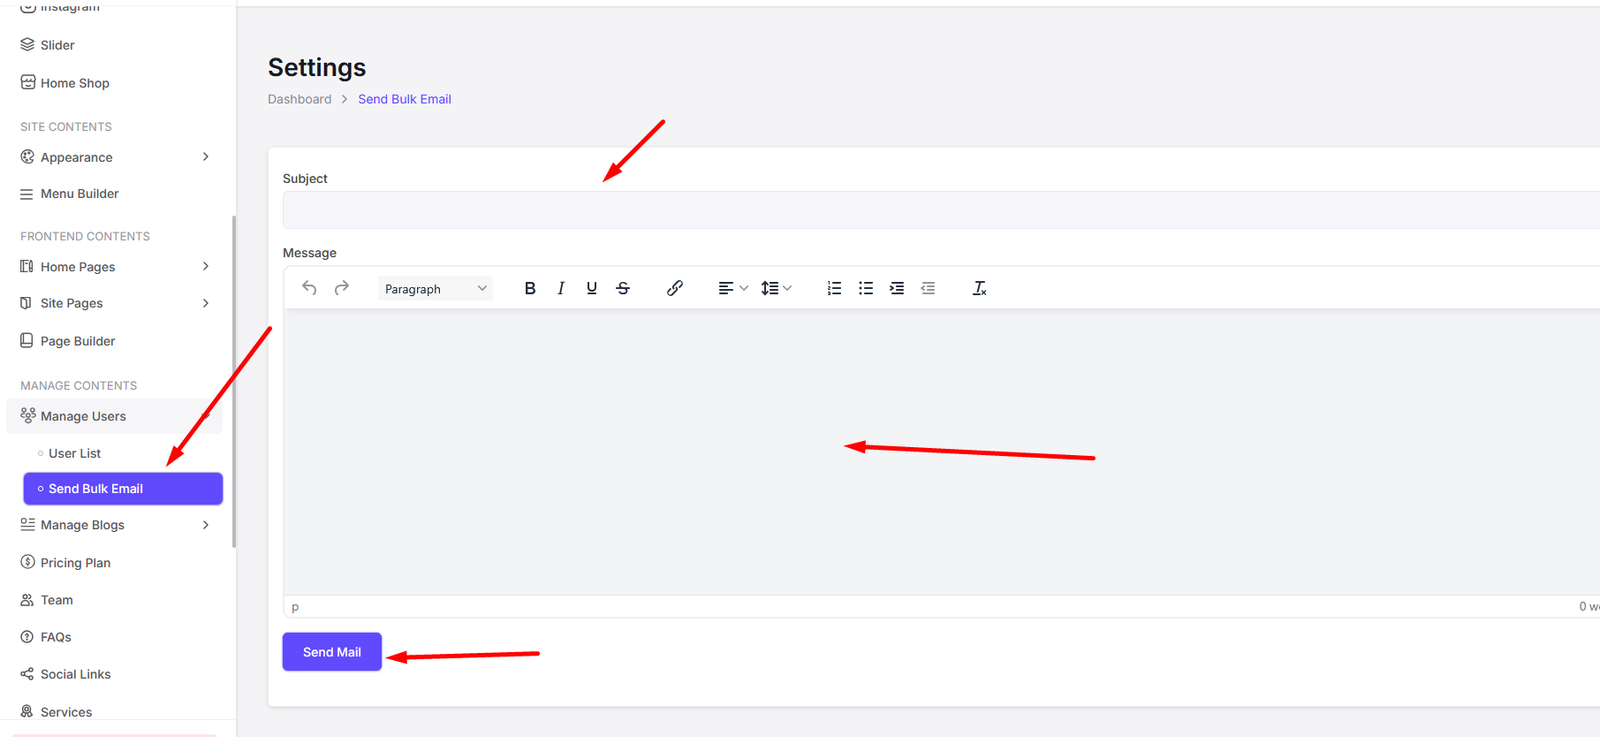
Send Bulk Mail
Note: You need to setup SMTP before sending bulk mail. Navigate to Settings Mail Configurations to setup SMTP.
Manage Blogs
Navigate to Manage Blogs to manage your site's blogs.
Blog Categories
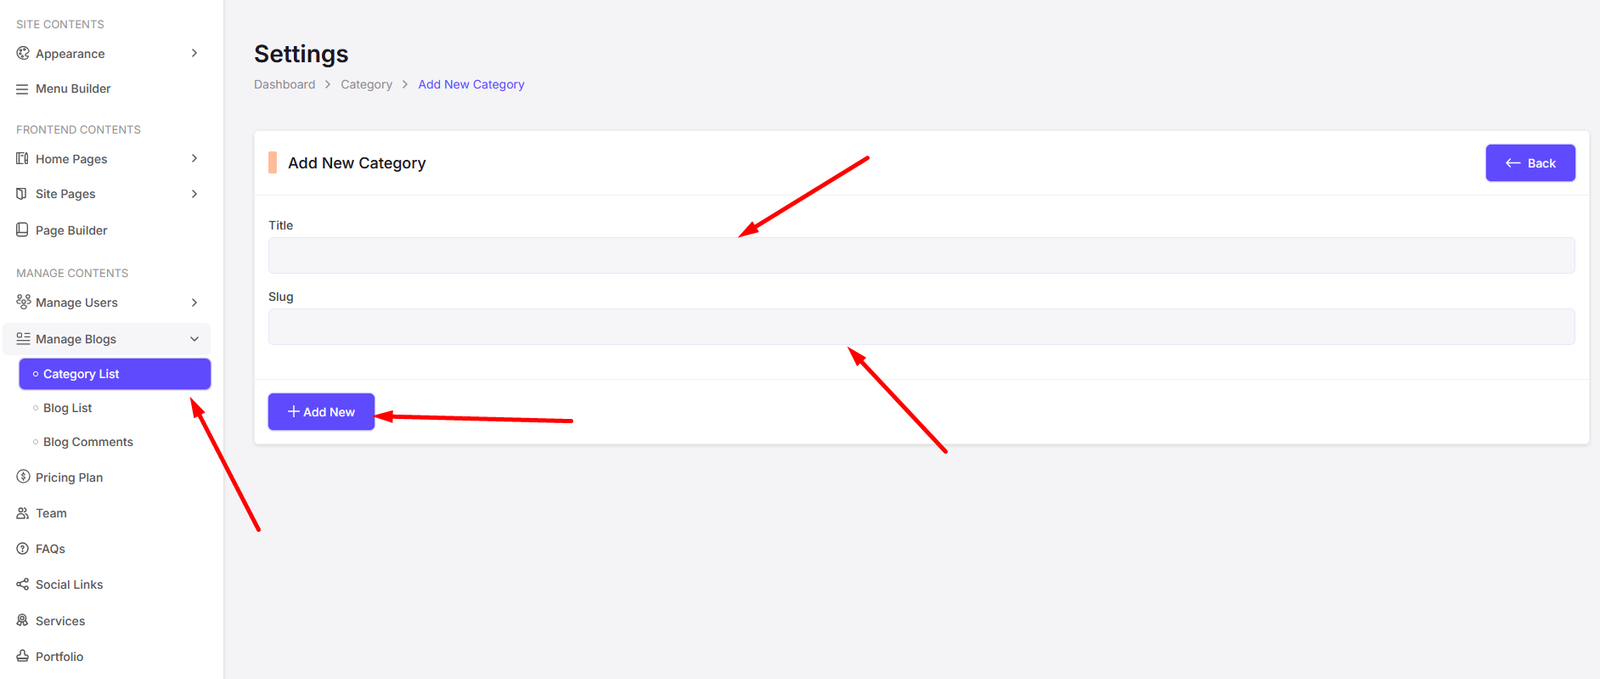
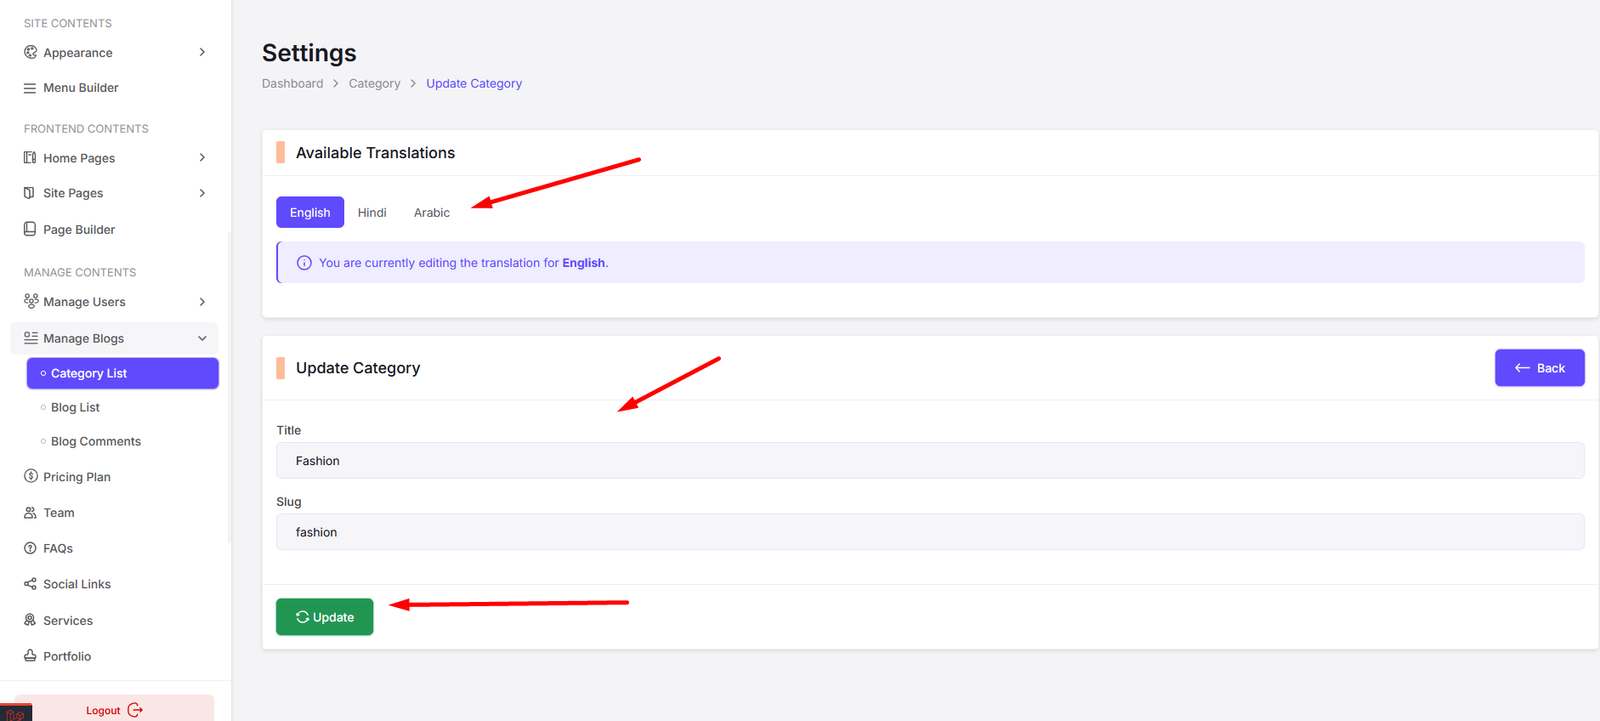
You can manage blog categories from here. You can add, edit, and delete blog categories.
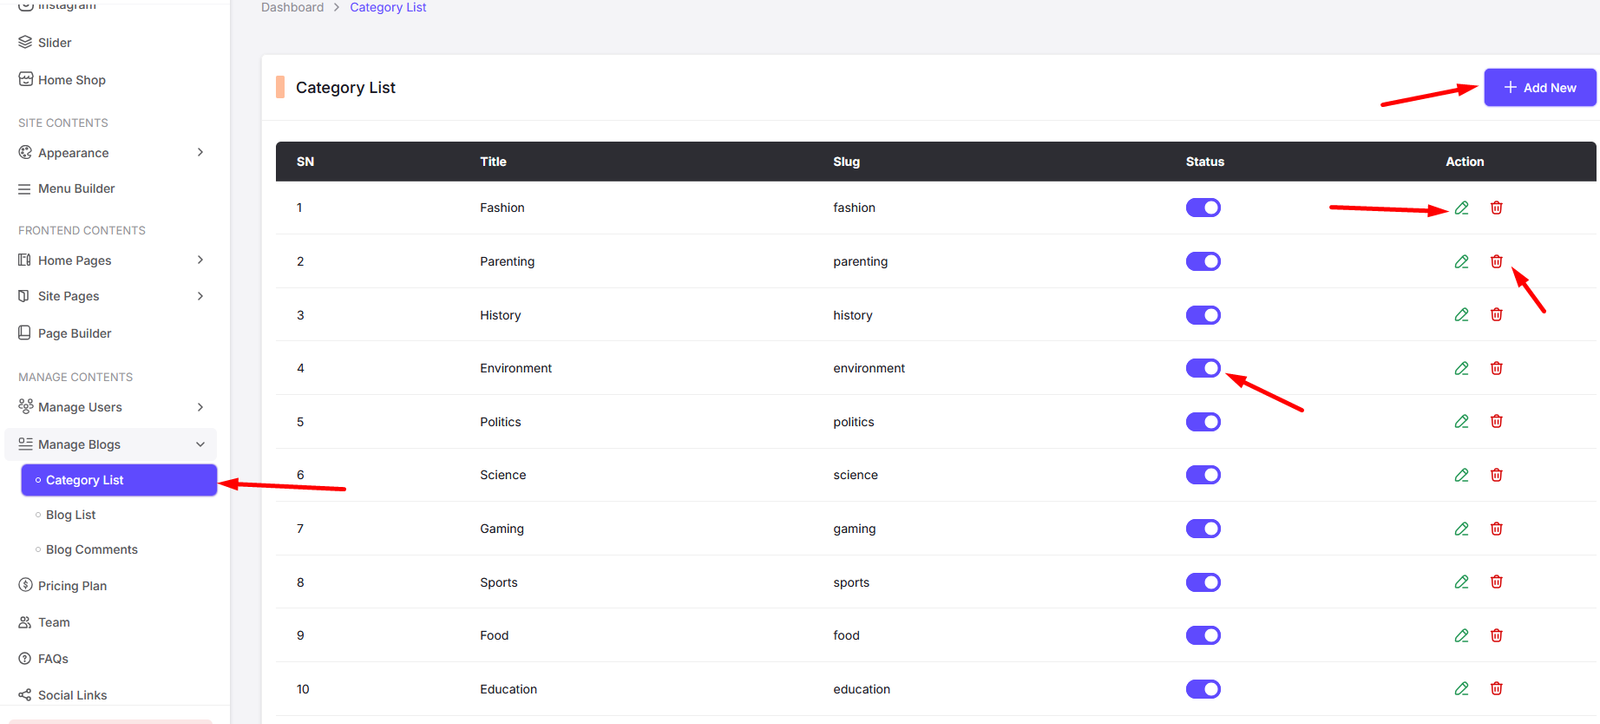
Add Category
Edit Category
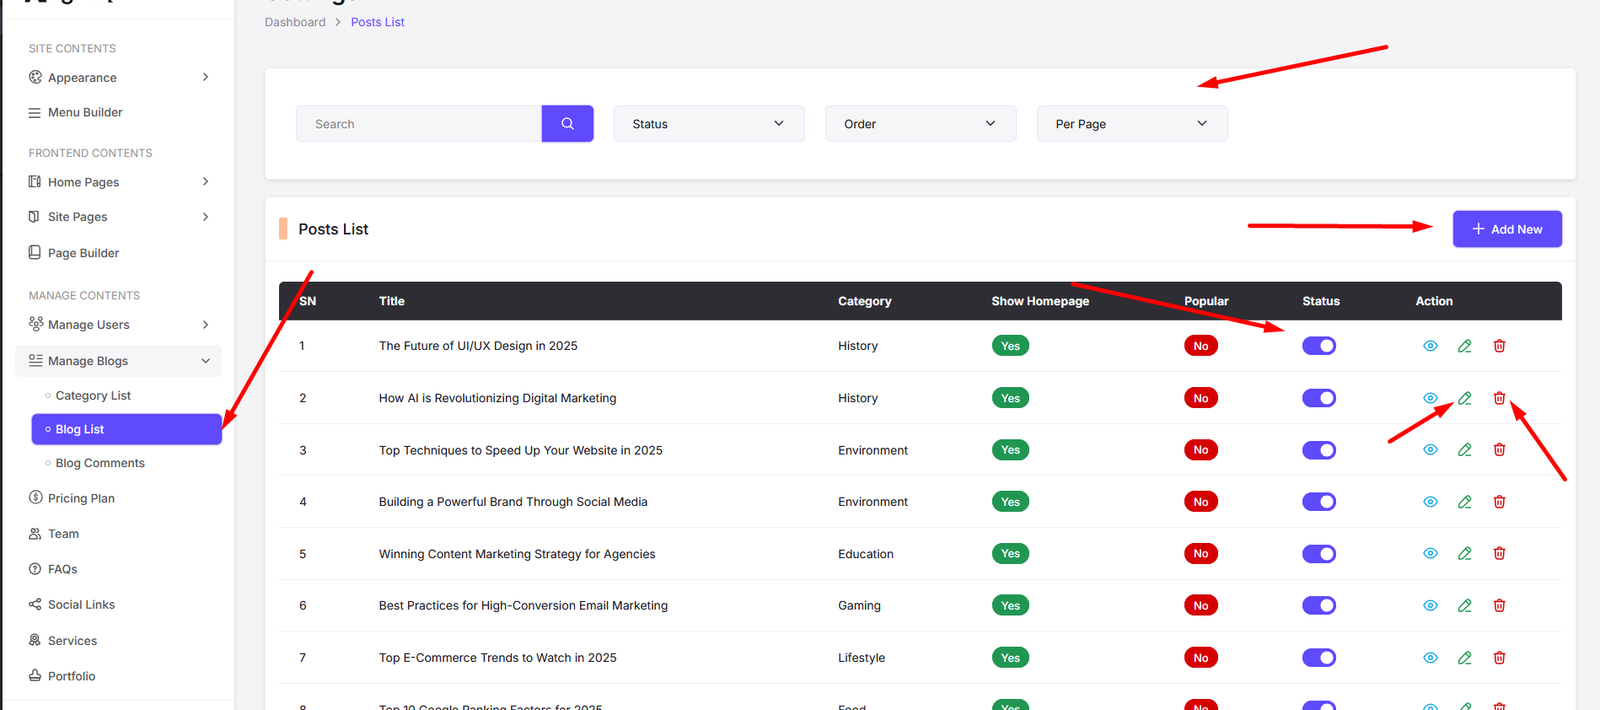
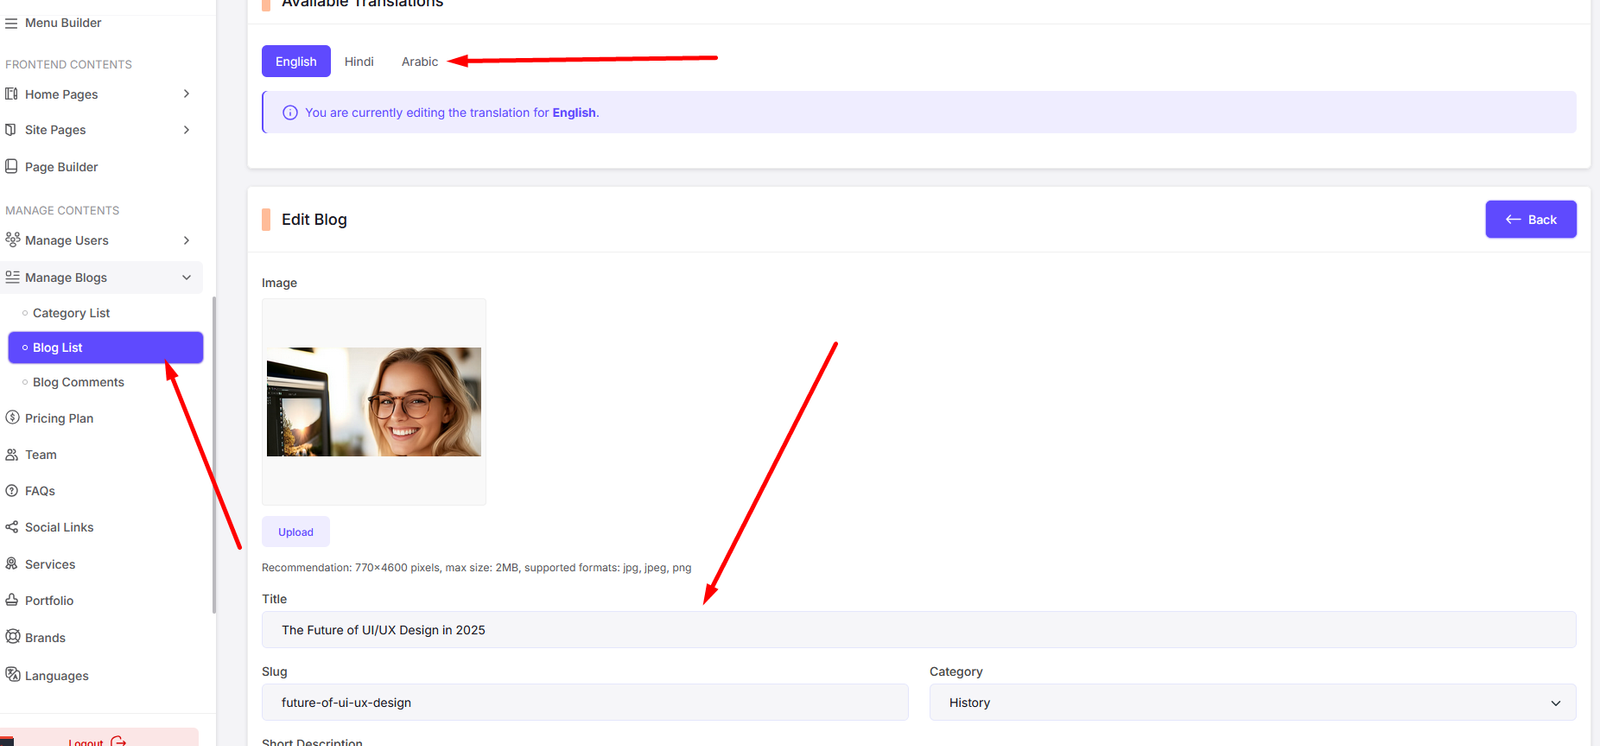
Blogs
You can manage blogs from here. You can add, edit, and delete blogs.
Add Blog

Edit Blog
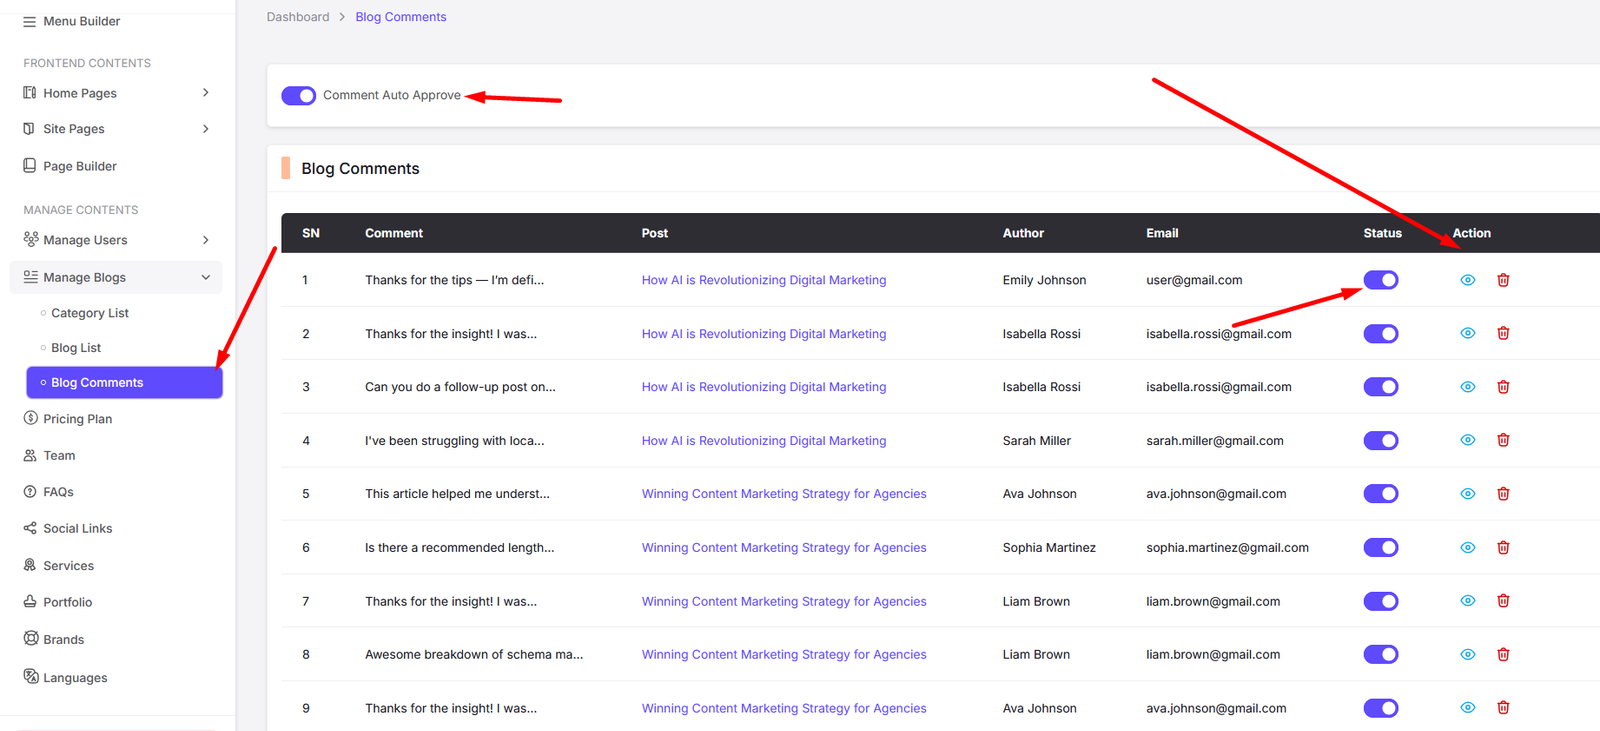
Blog Comments
You can manage blog comments from here. You can view, edit, and delete blog comments. Also you can change comment status from here.
Also you can enable auto approve comments from the settings page. If you enable auto approve comments, then all the comments will be approved automatically without admin approval.
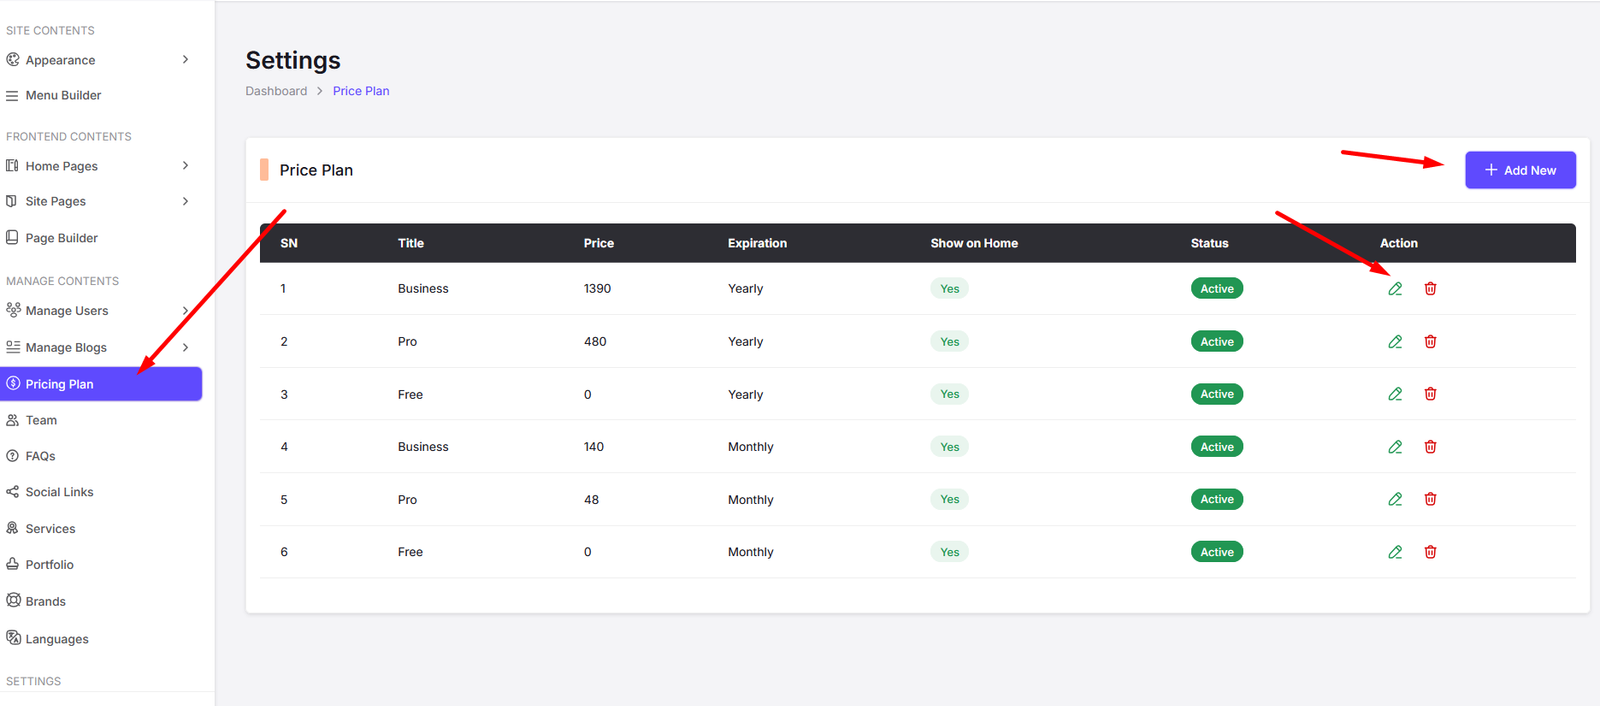
Pricing Plans
Navigate to Pricing Plans to manage your site's pricing plans.
You can add, edit, and delete pricing plans from here. Also you can change the order of the pricing plans by dragging and dropping them.
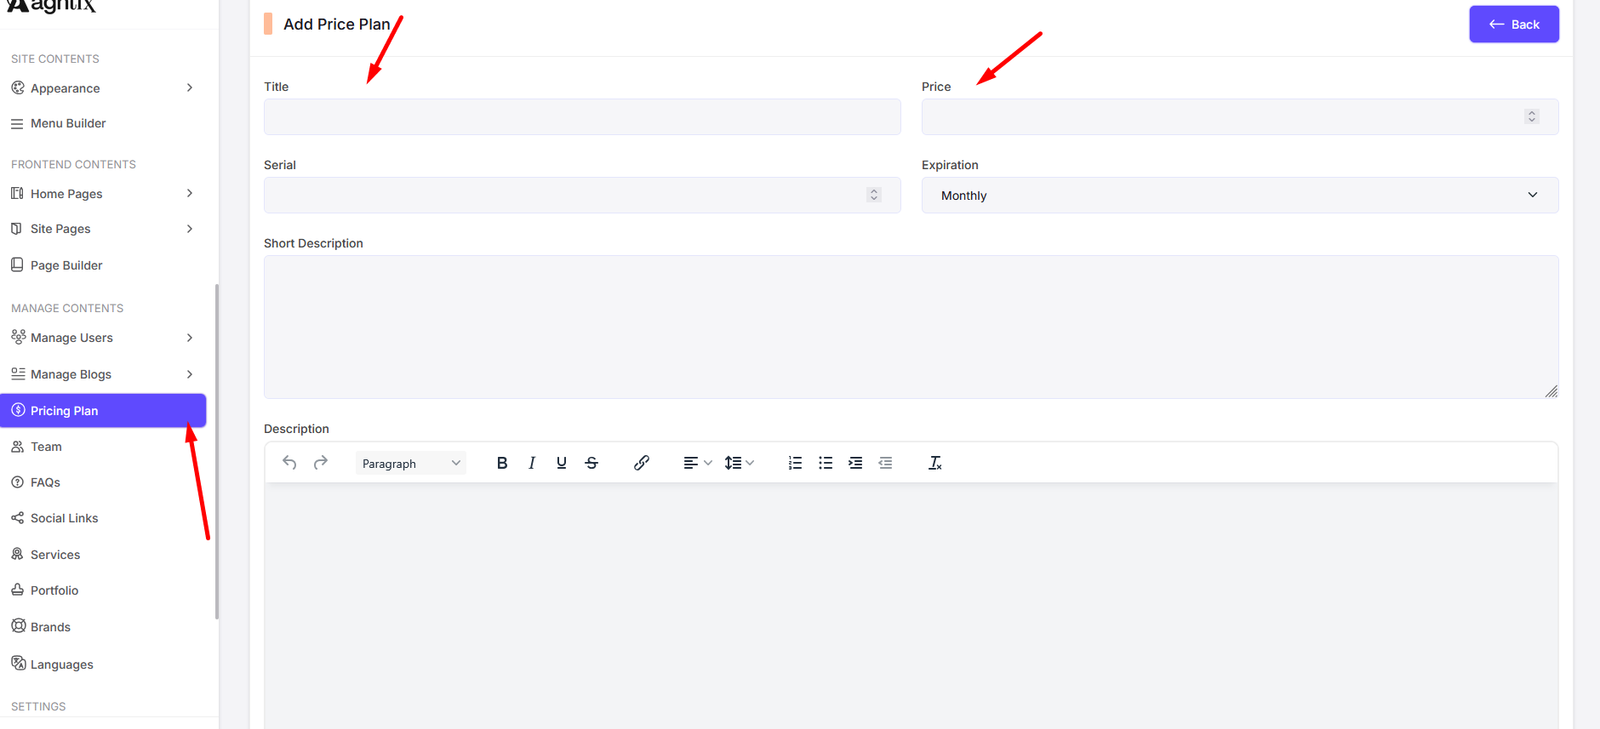
Add Pricing Plan
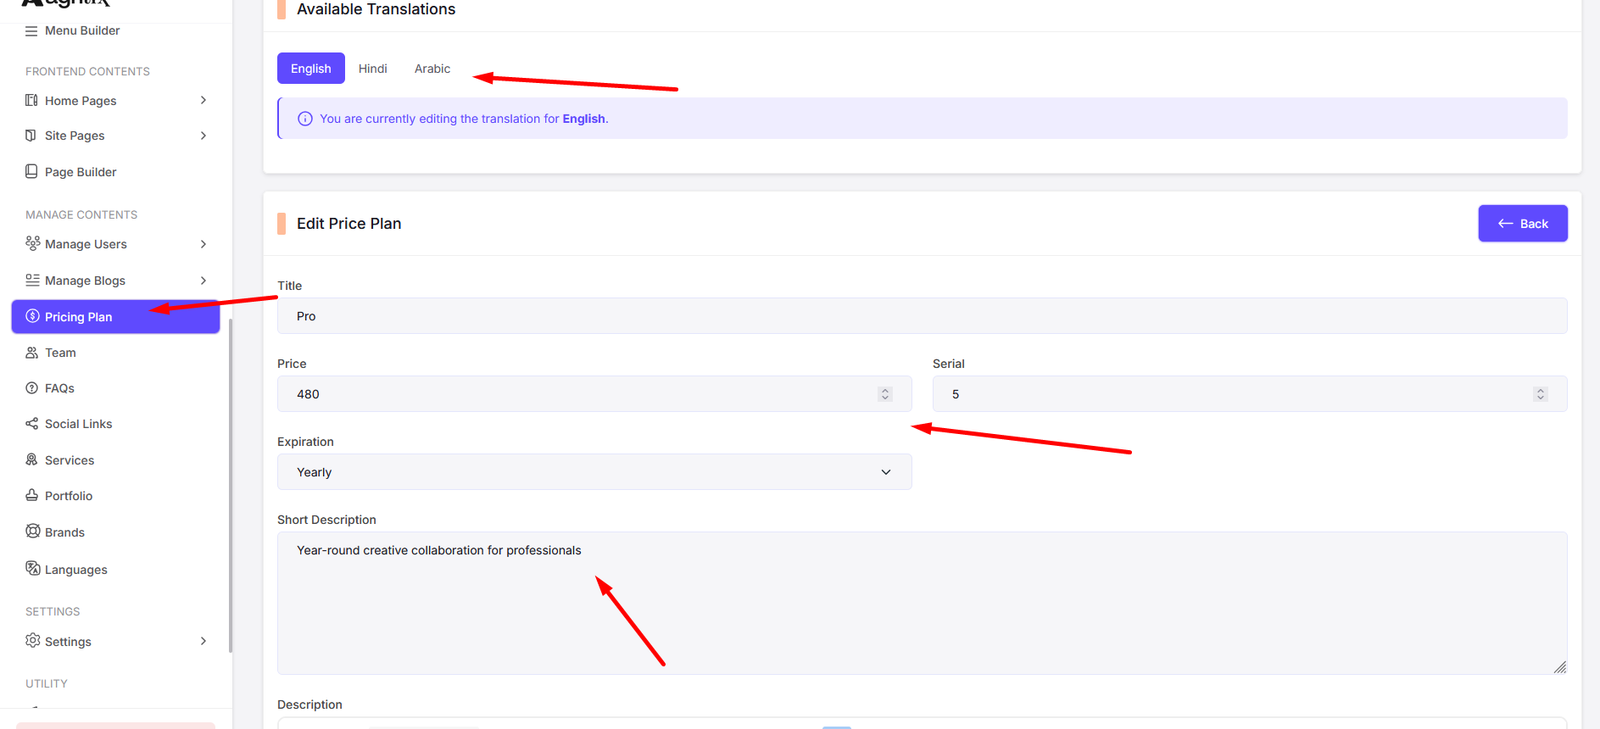
Edit Pricing Plan
Manage Team
Navigate to Team to manage your site's team members.
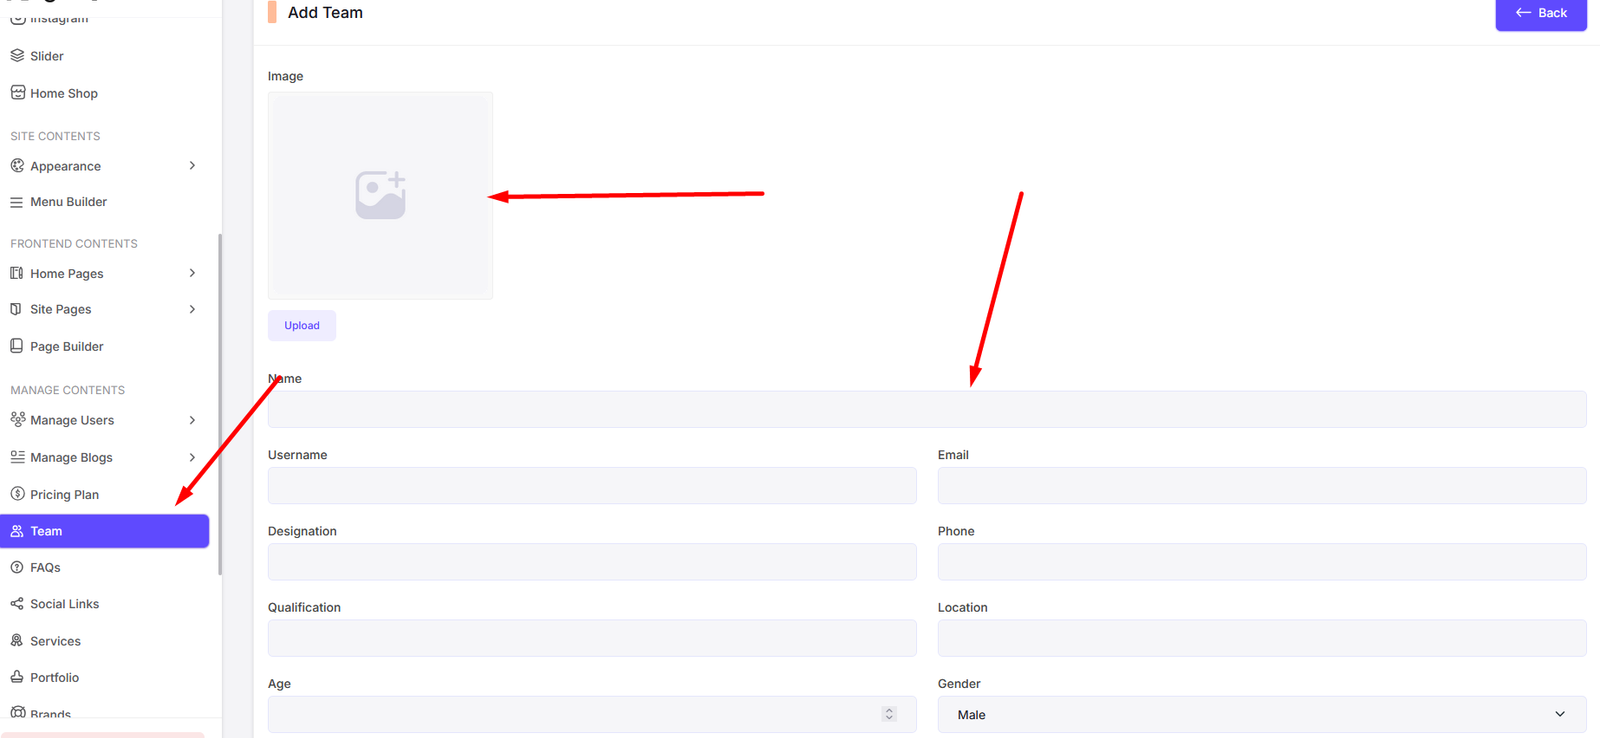
You can add, edit, and delete team members from here.
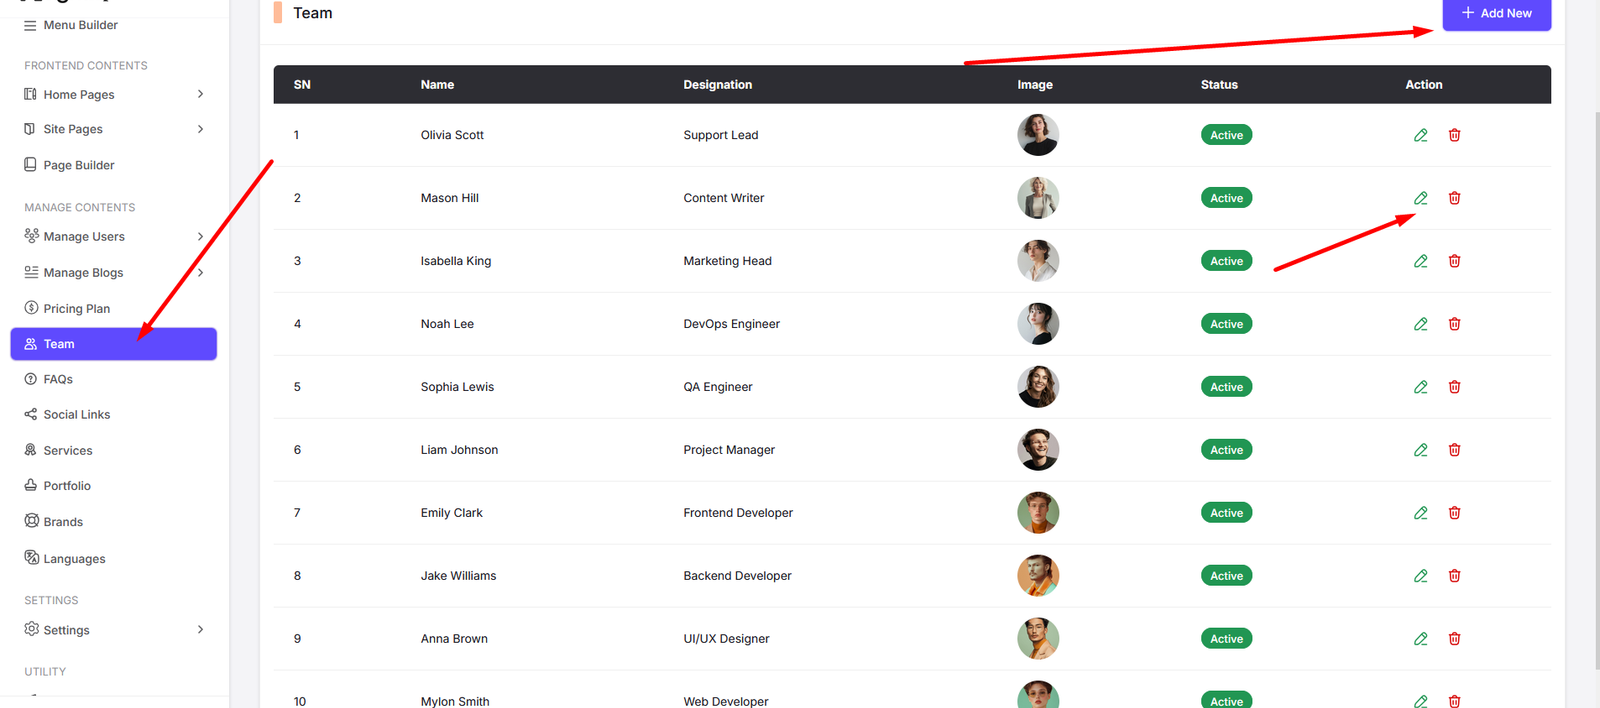
Add Team Member
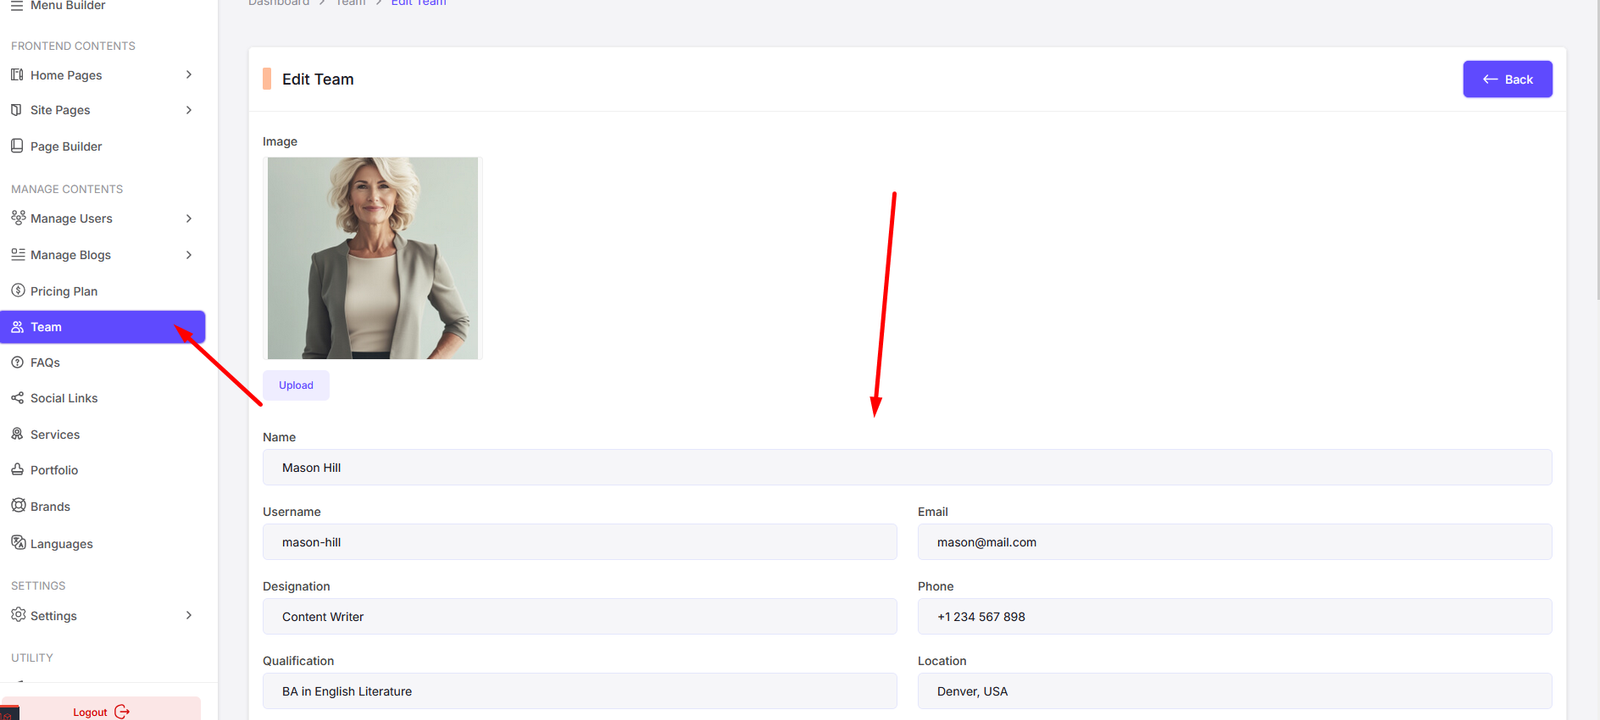
Edit Team Member
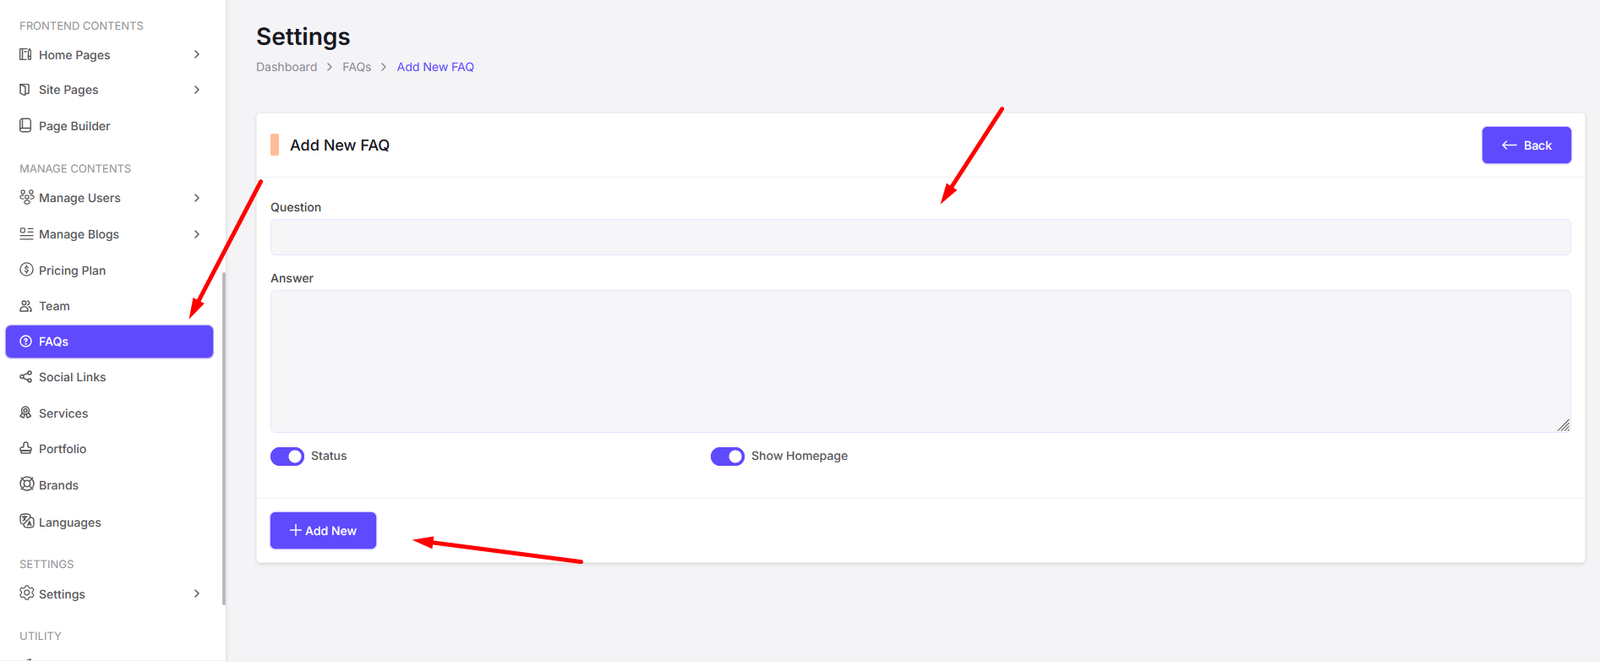
FAQs
Navigate to FAQs to manage your site's frequently asked questions.
You can add, edit, and delete FAQs from here.
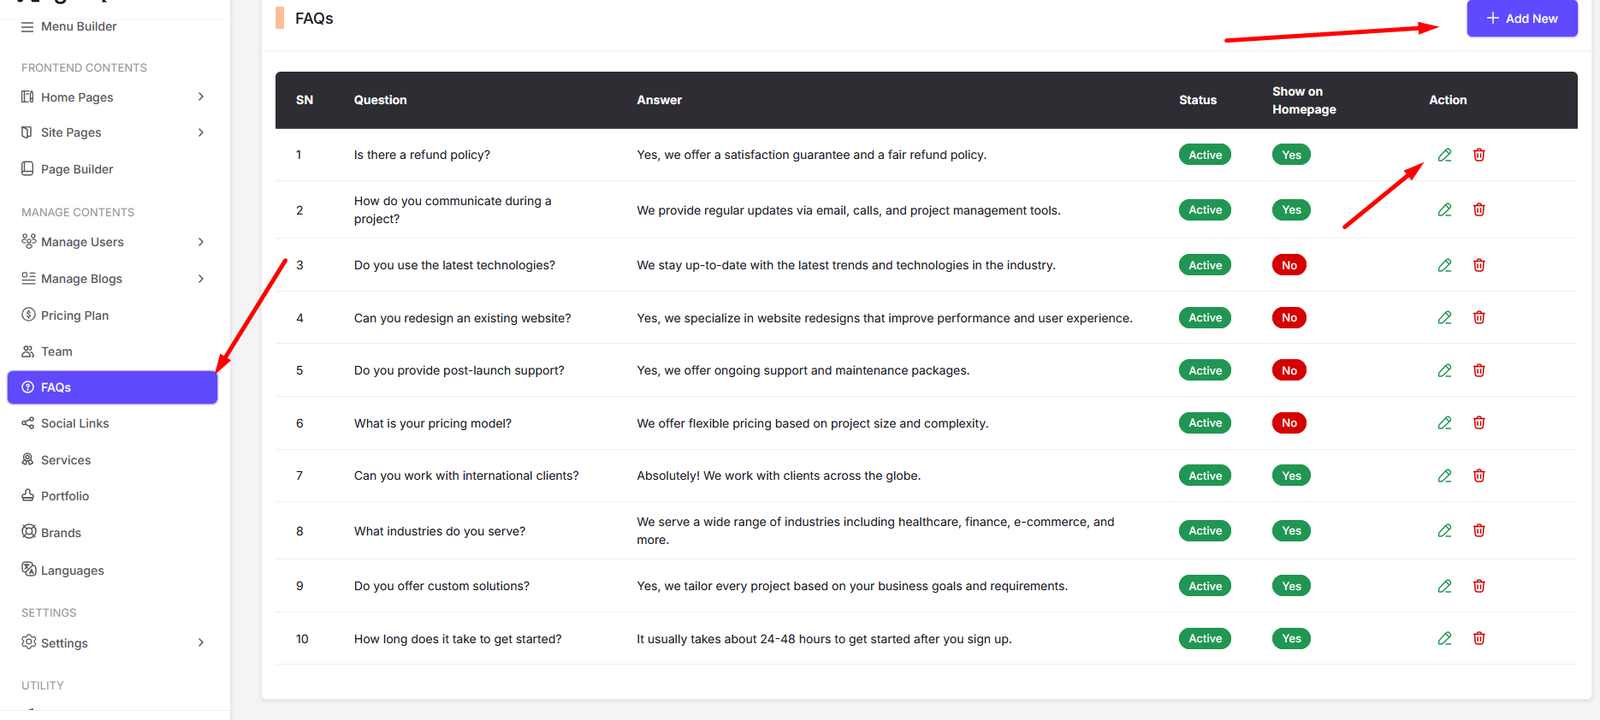
Add FAQ
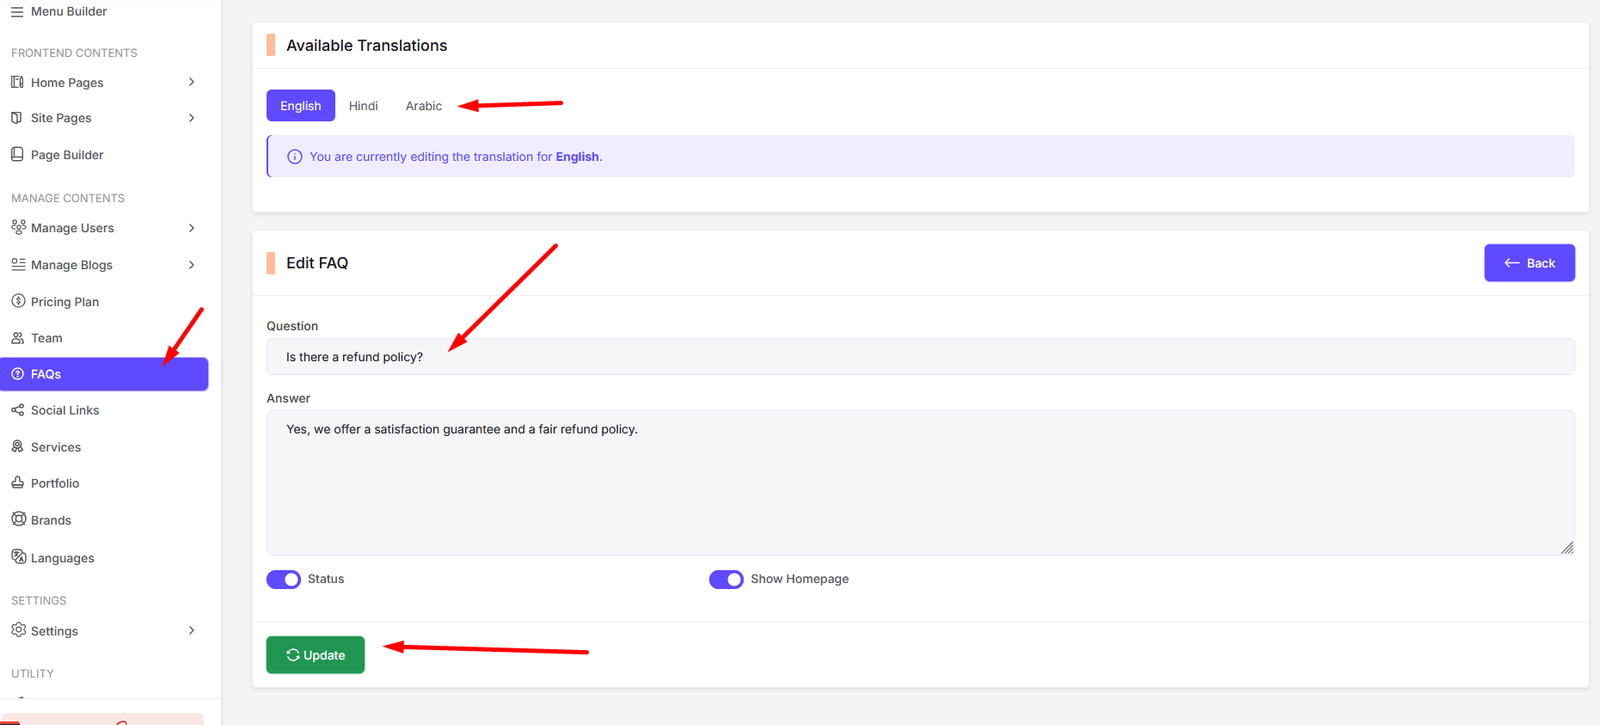
Edit FAQ
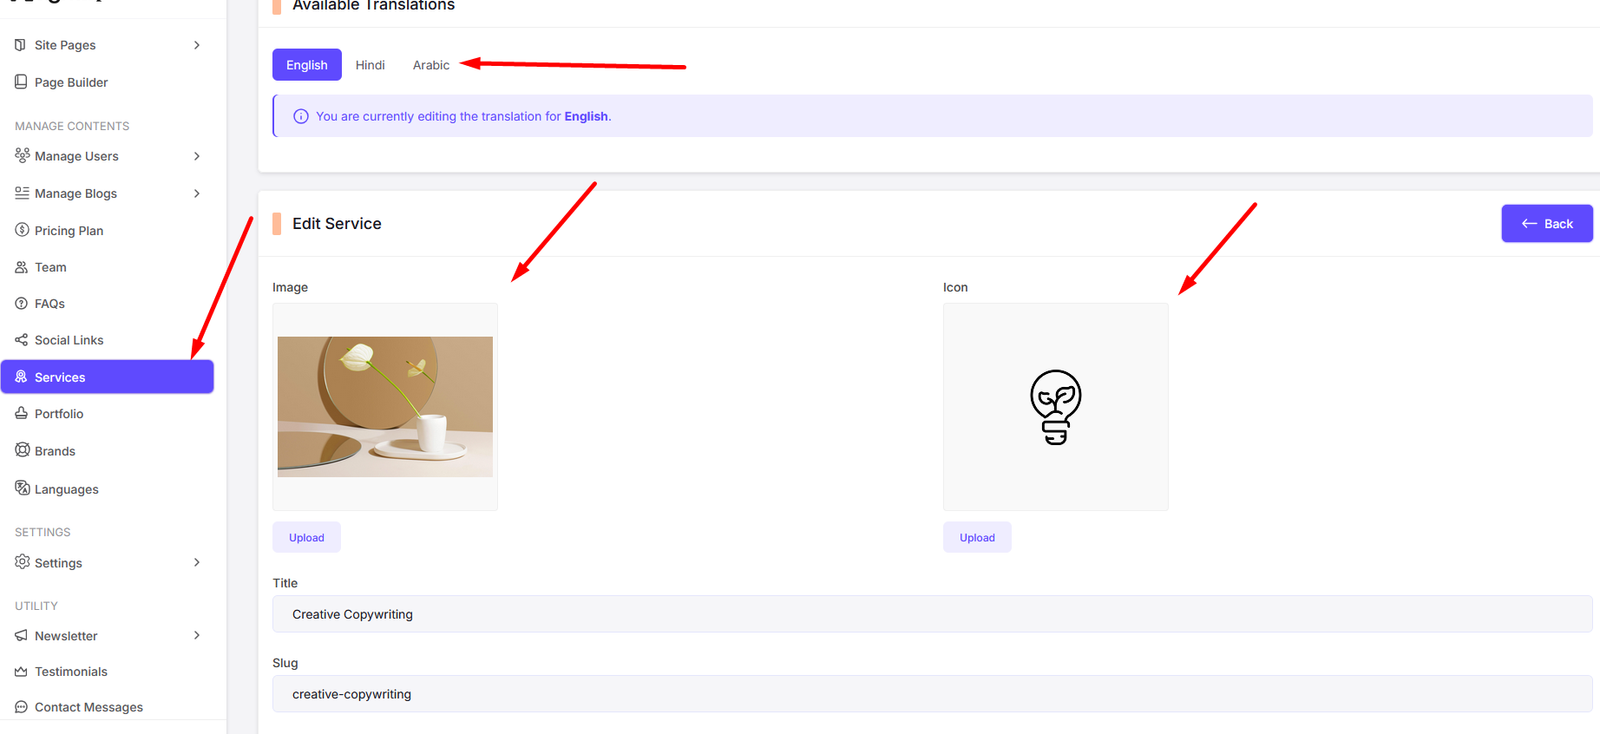
Services
Navigate to Services to manage your site's services.
You can add, edit, and delete services from here.
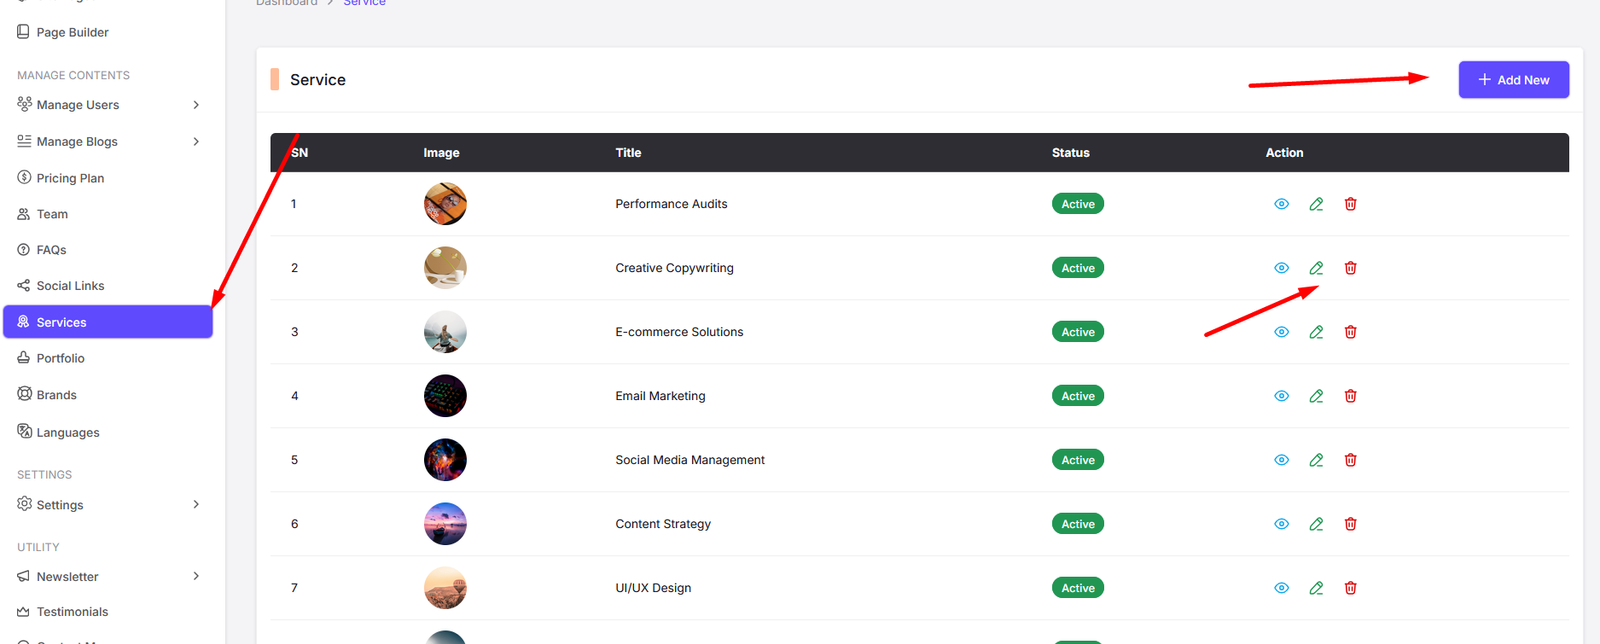
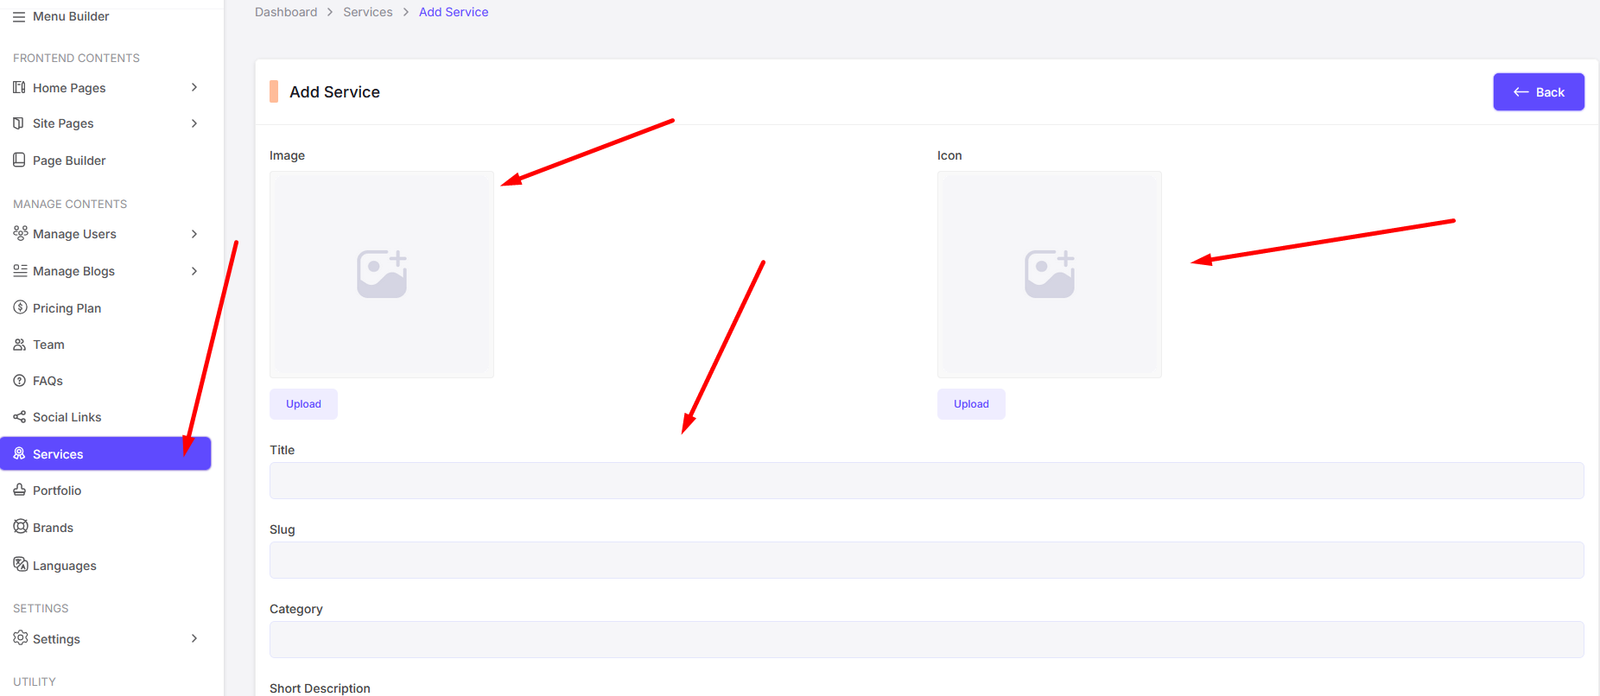
Add Service
Edit Service
Portfolio
Navigate to Portfolio to manage your site's portfolio.
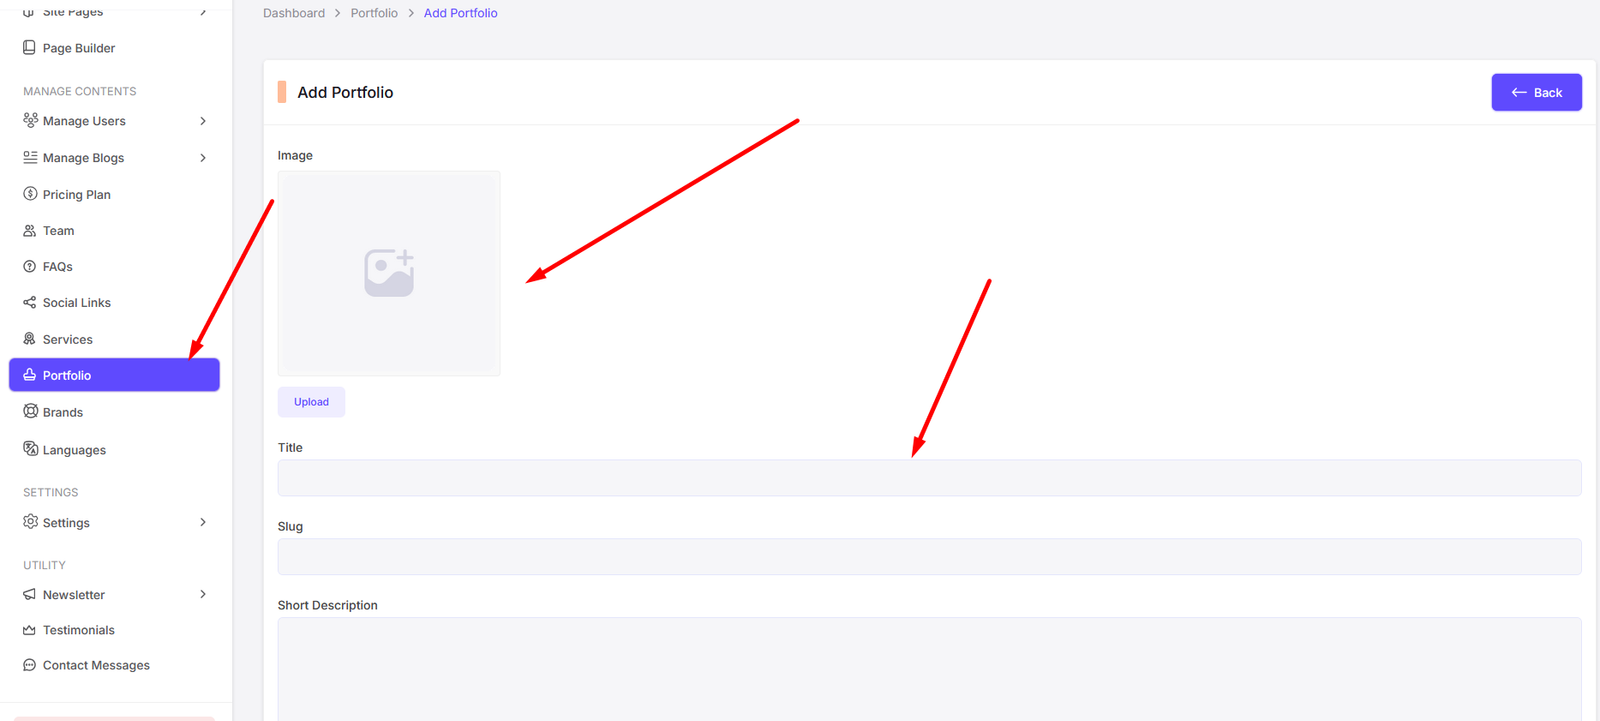
You can add, edit, and delete portfolio items from here.
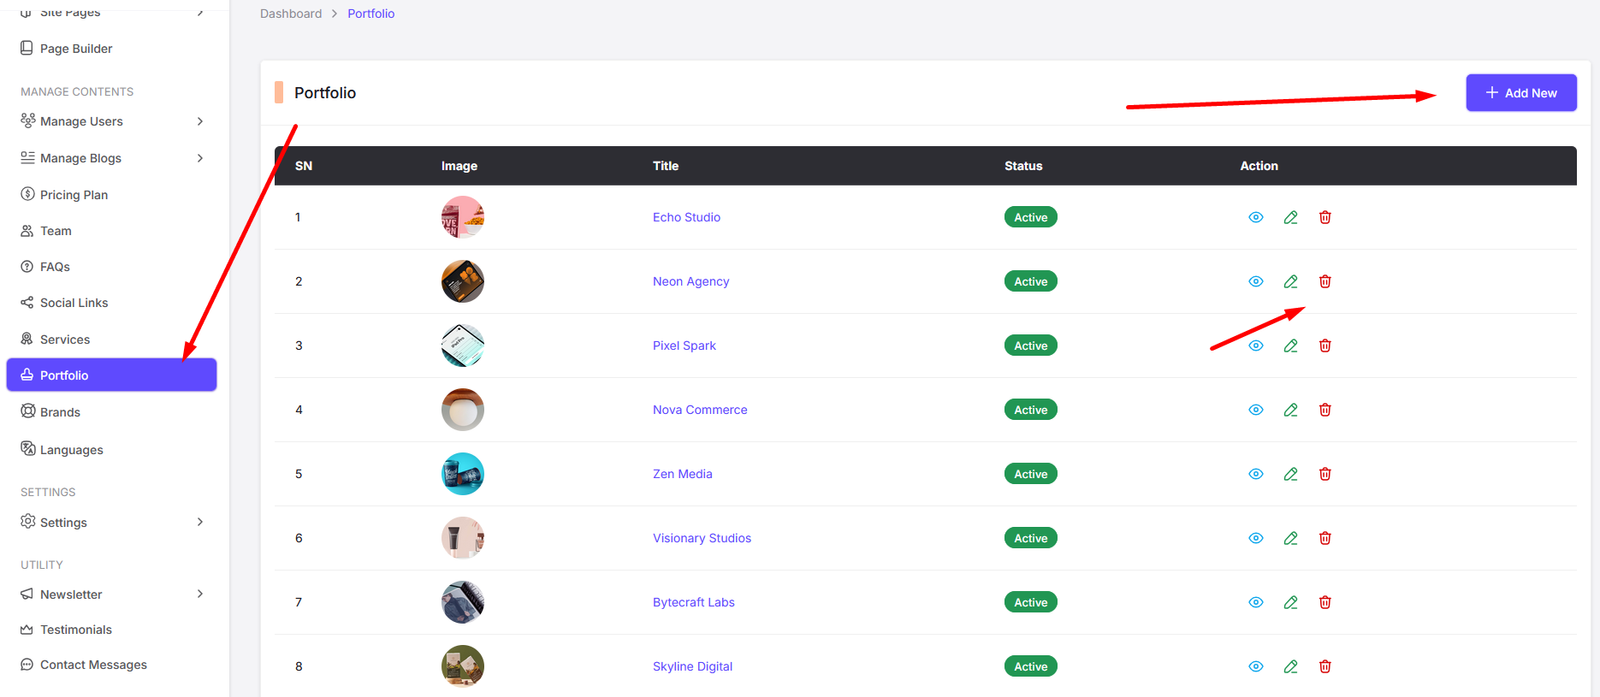
Add Portfolio
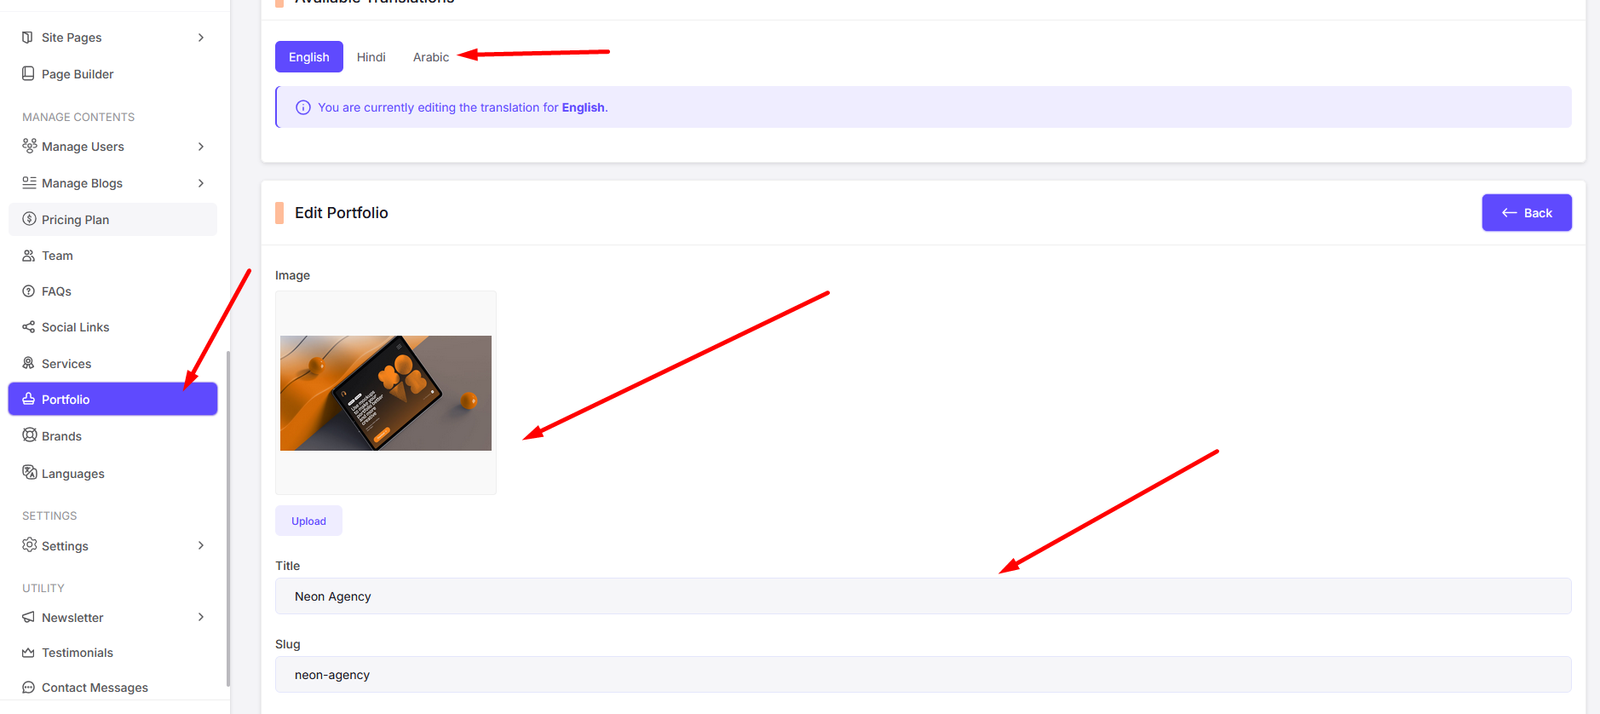
Edit Portfolio
Brands
Navigate to Brands to manage your site's brand partners.
You can add, edit, and delete brand partners from here.
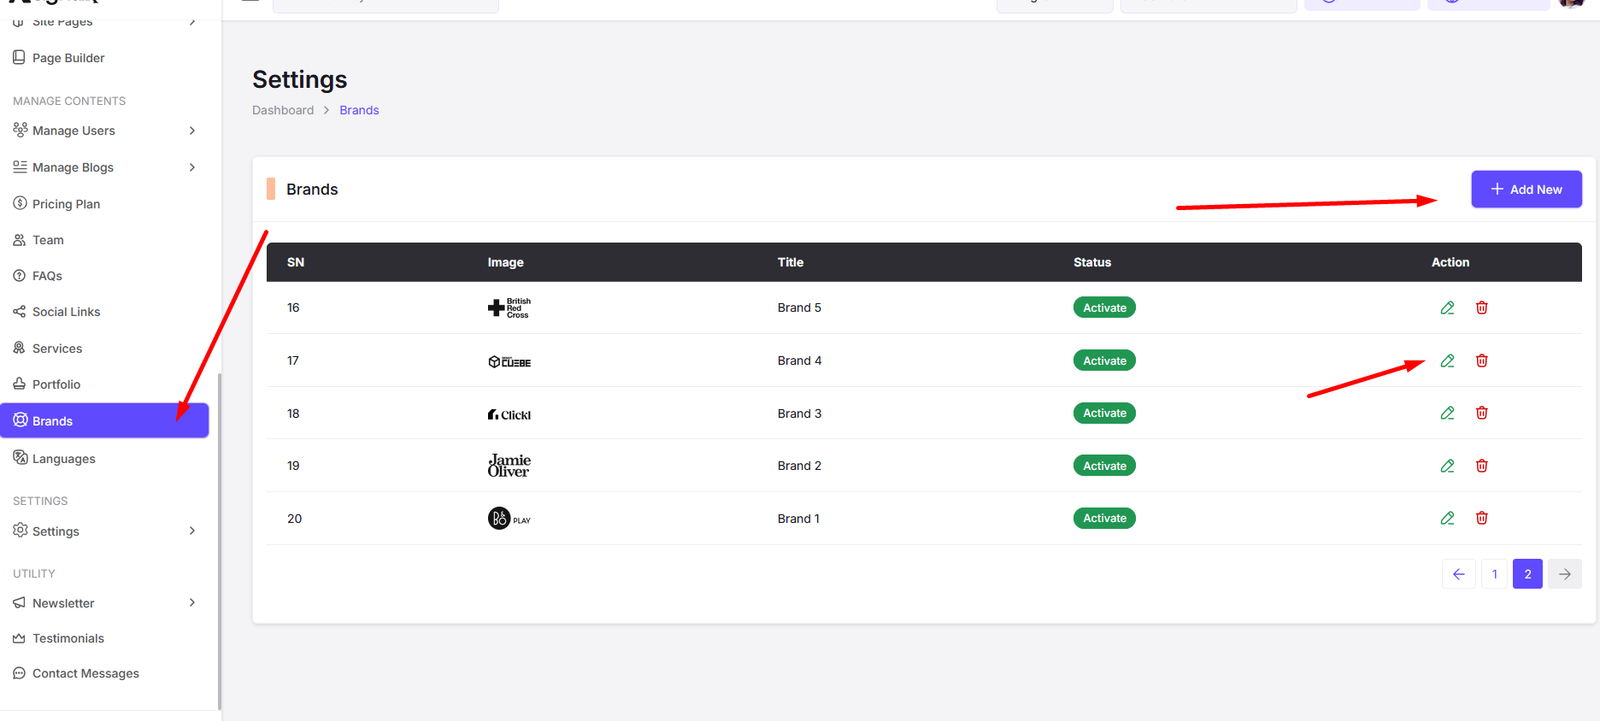
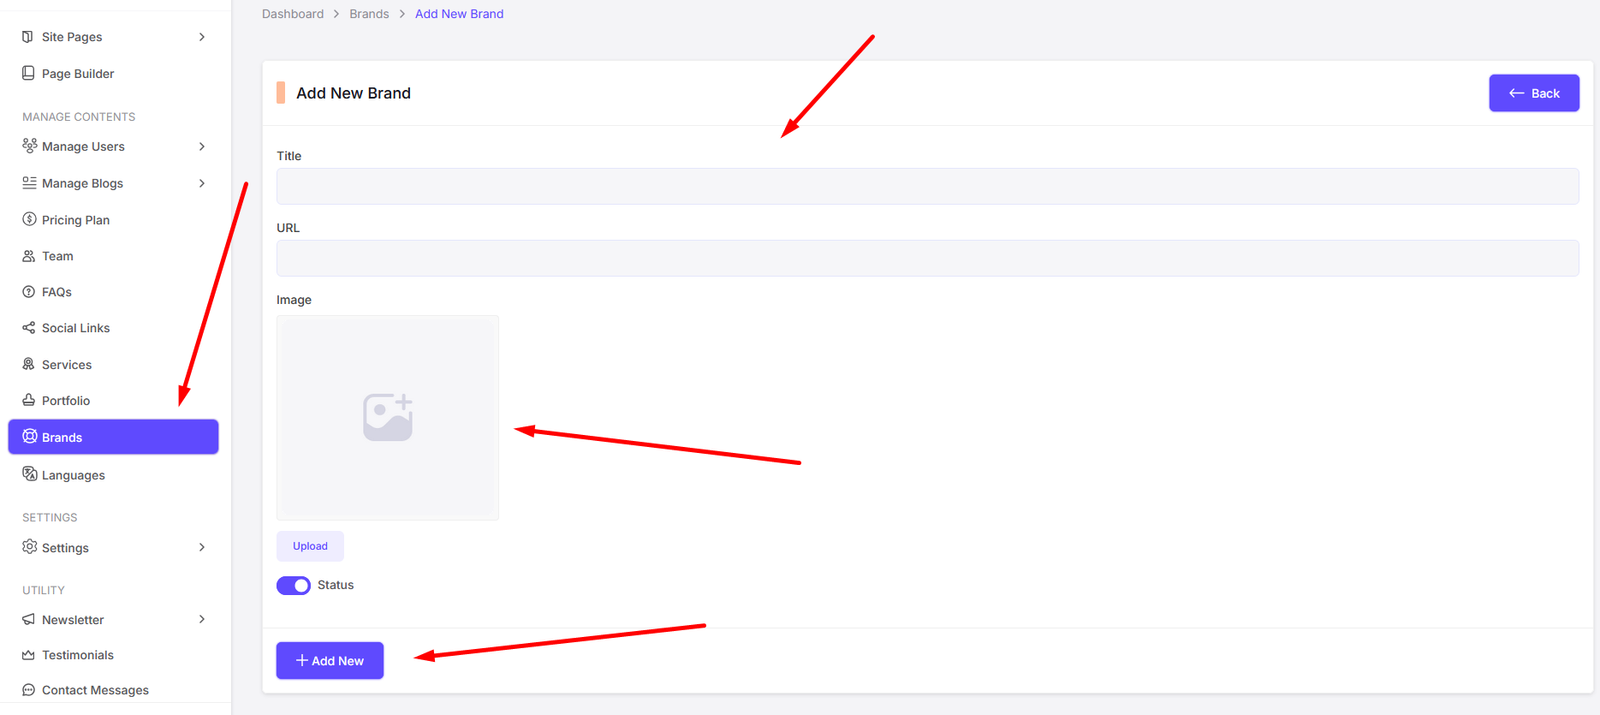
Add Brand
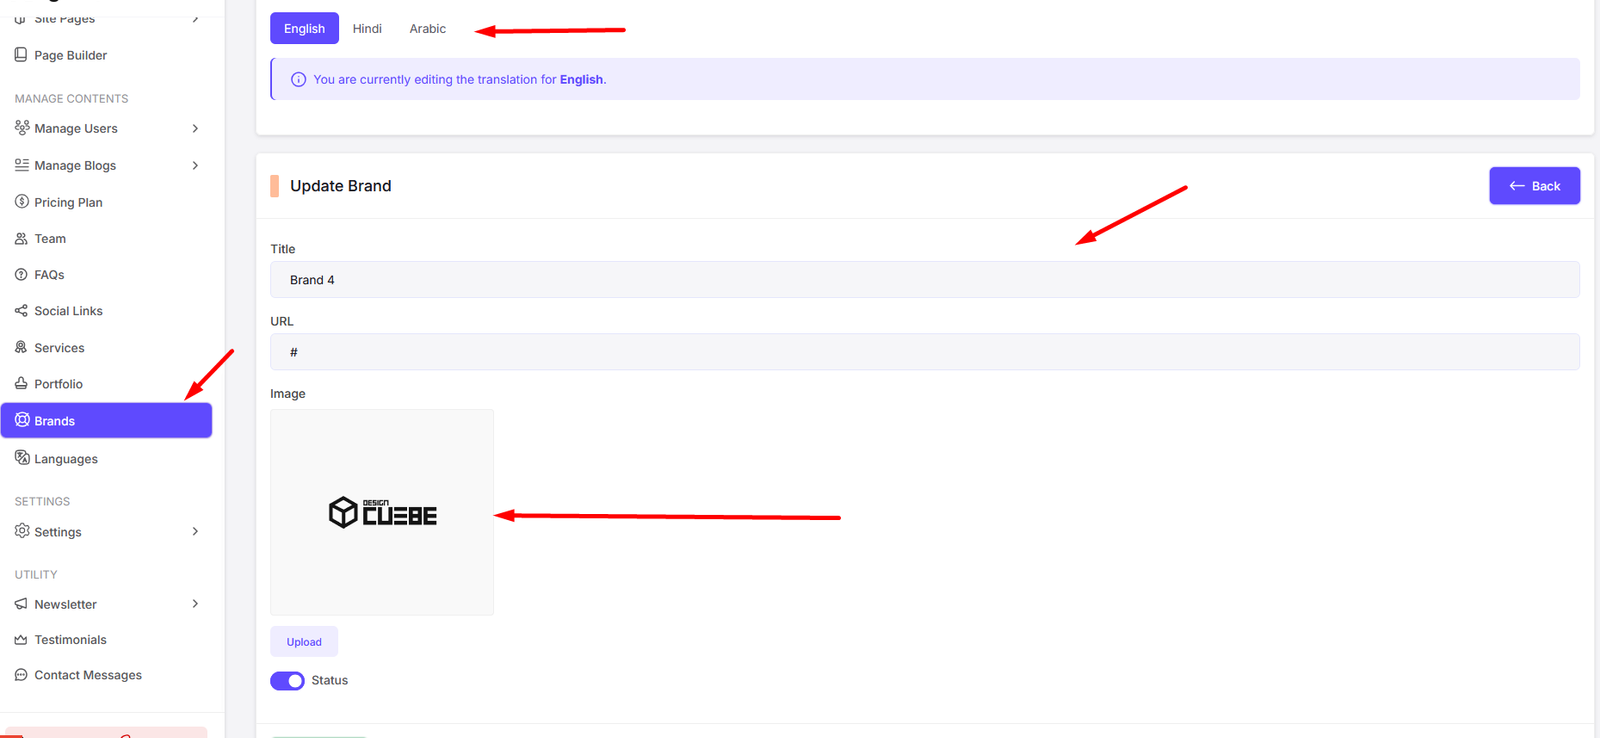
Edit Brand
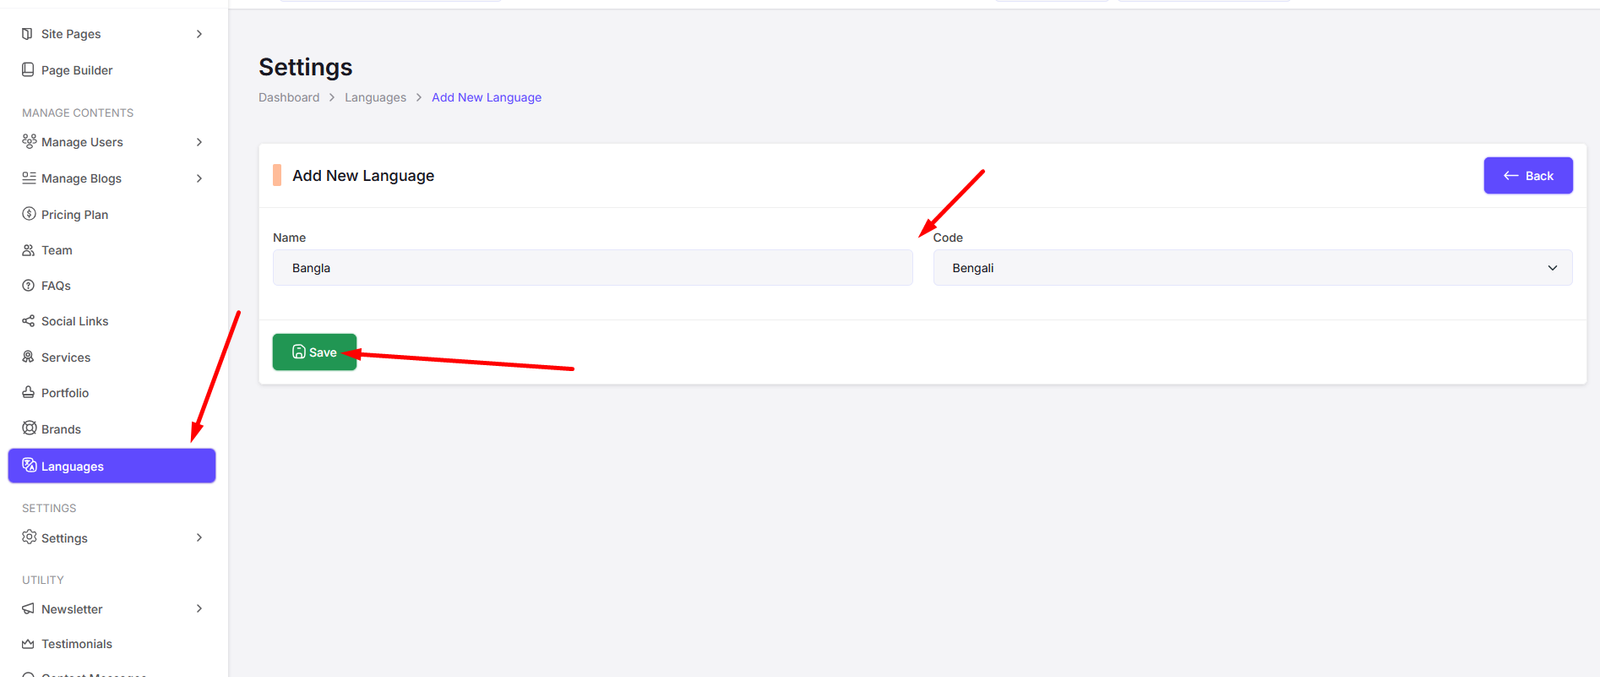
Translations
Navigate to Language to manage your site's languages & translations.
You can edit languages & translations of your site from here. You can add, edit, delete languages. Also you can change the default language of your site from here. Also you can change the translations for each language.
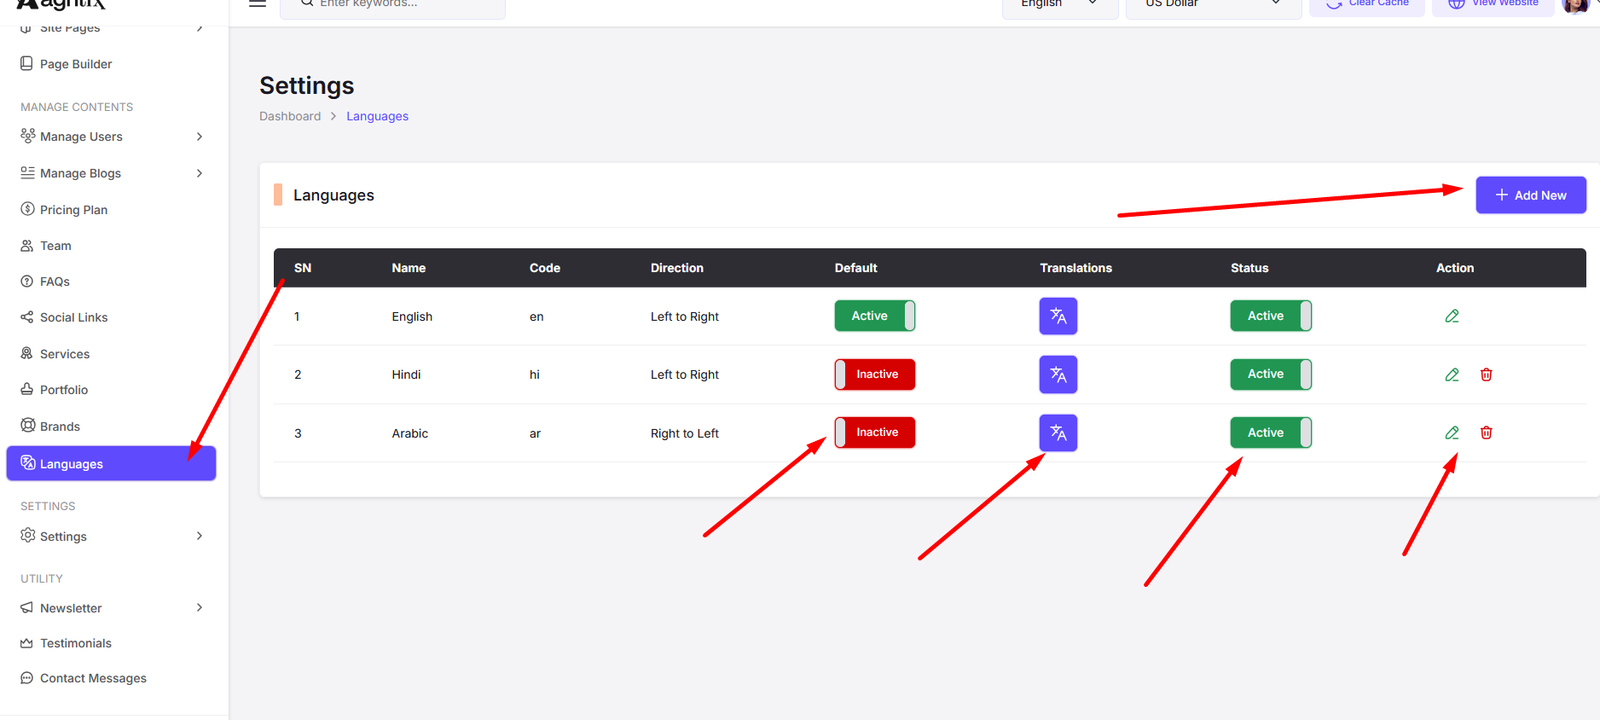
Add Language from here
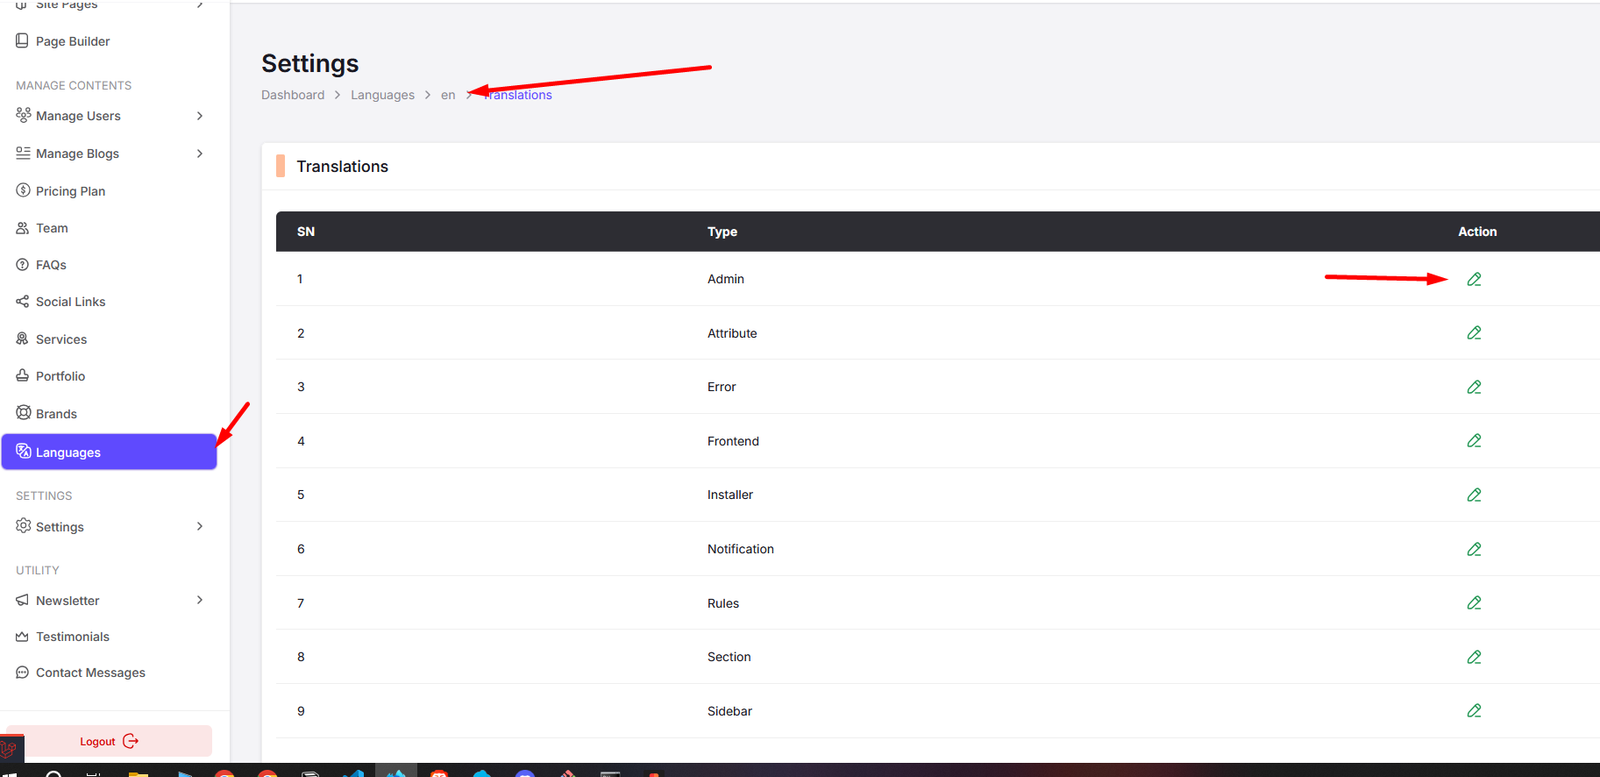
Edit Translations for language

Click the Edit Button and it will take to the translation editor.
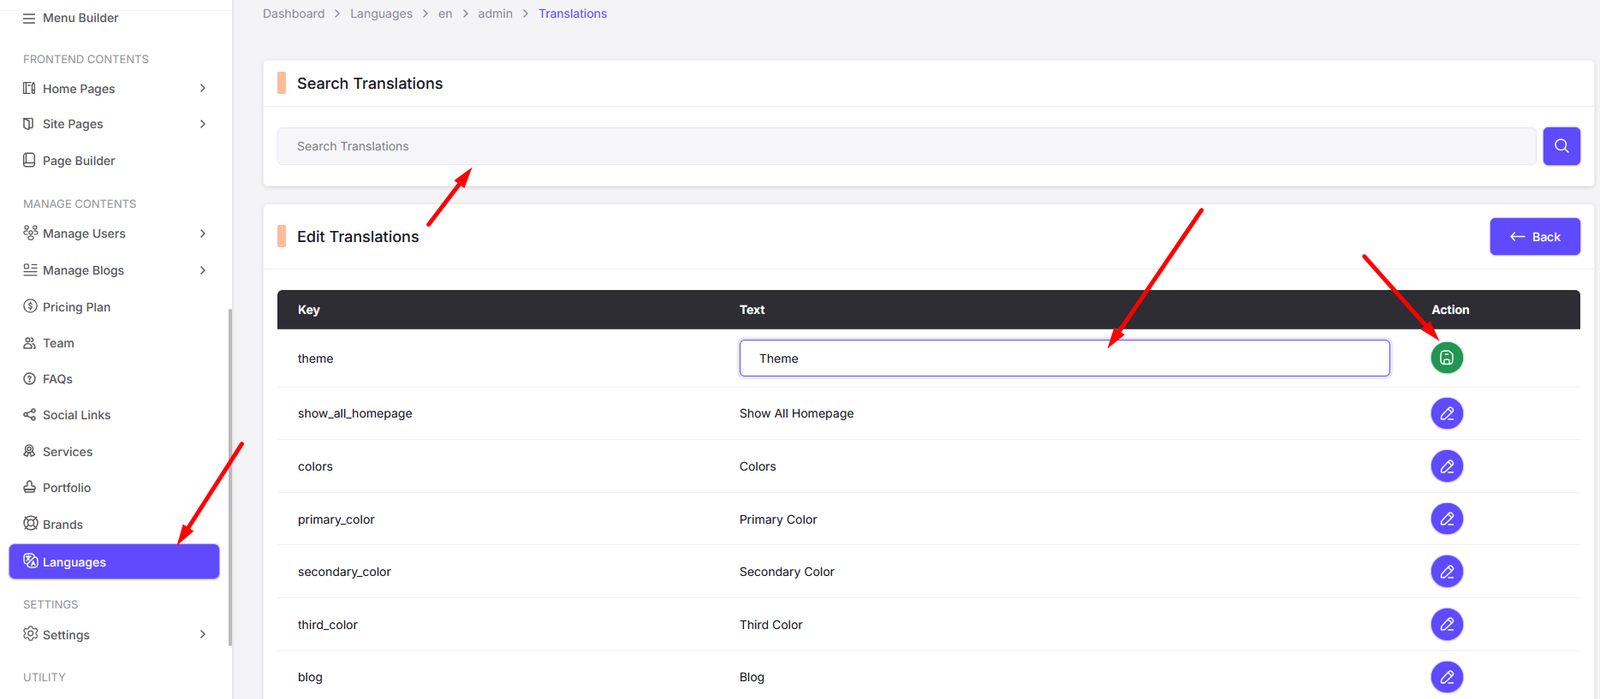
Click the Edit Button, then a input field will appear. You can add your text and click on save. Also You can Search Translations
Settings
Navigate to Settings to manage your site's settings.
You can manage your site's settings from here. Like General Settings, Mail Configurations, SEO Settings, Credentials Settings, Admin & Roles, and SEO Settings.
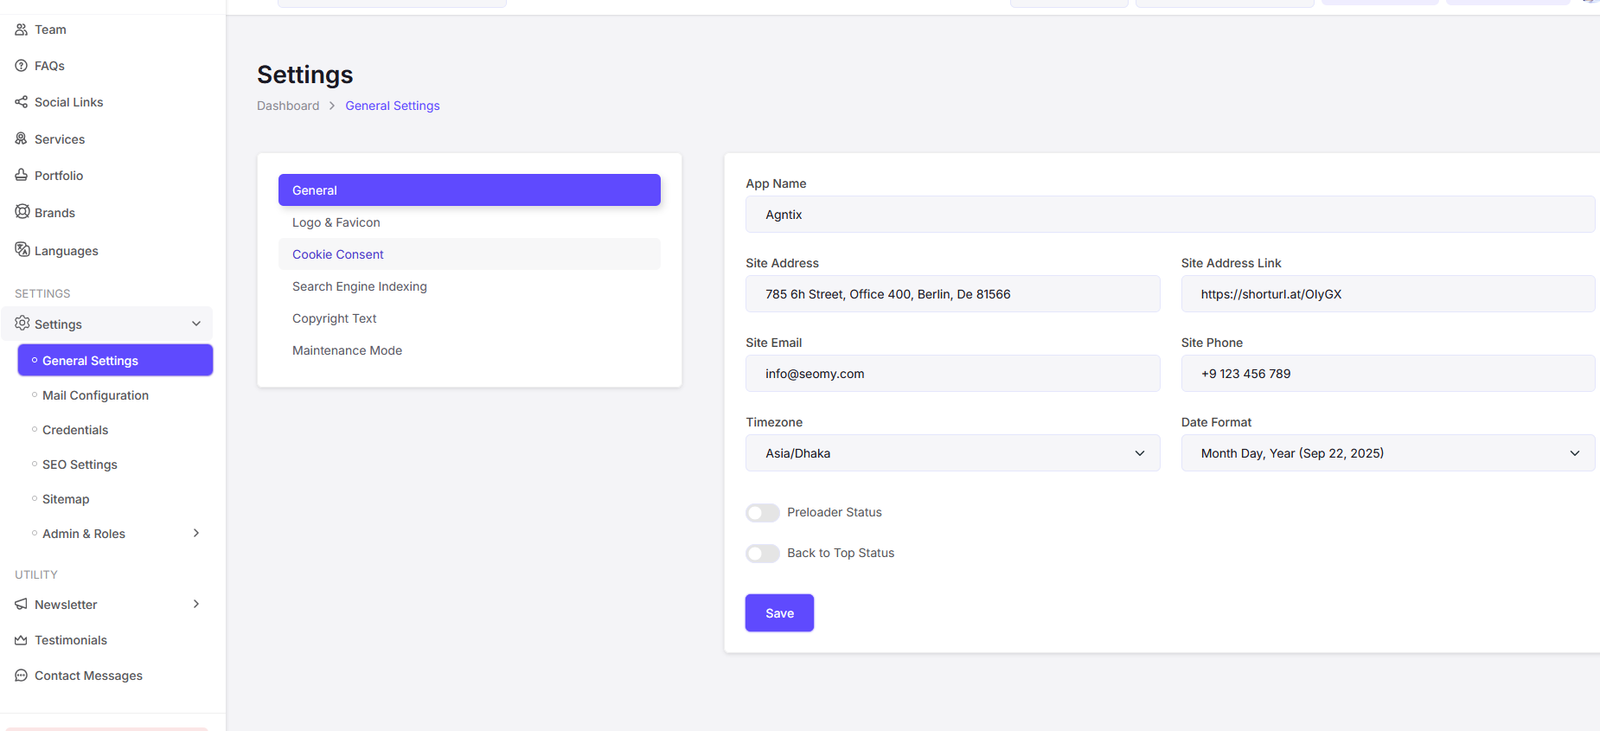
General Settings
You can update your site's App name, Site Address, email, phone, preloader status etc. from here.
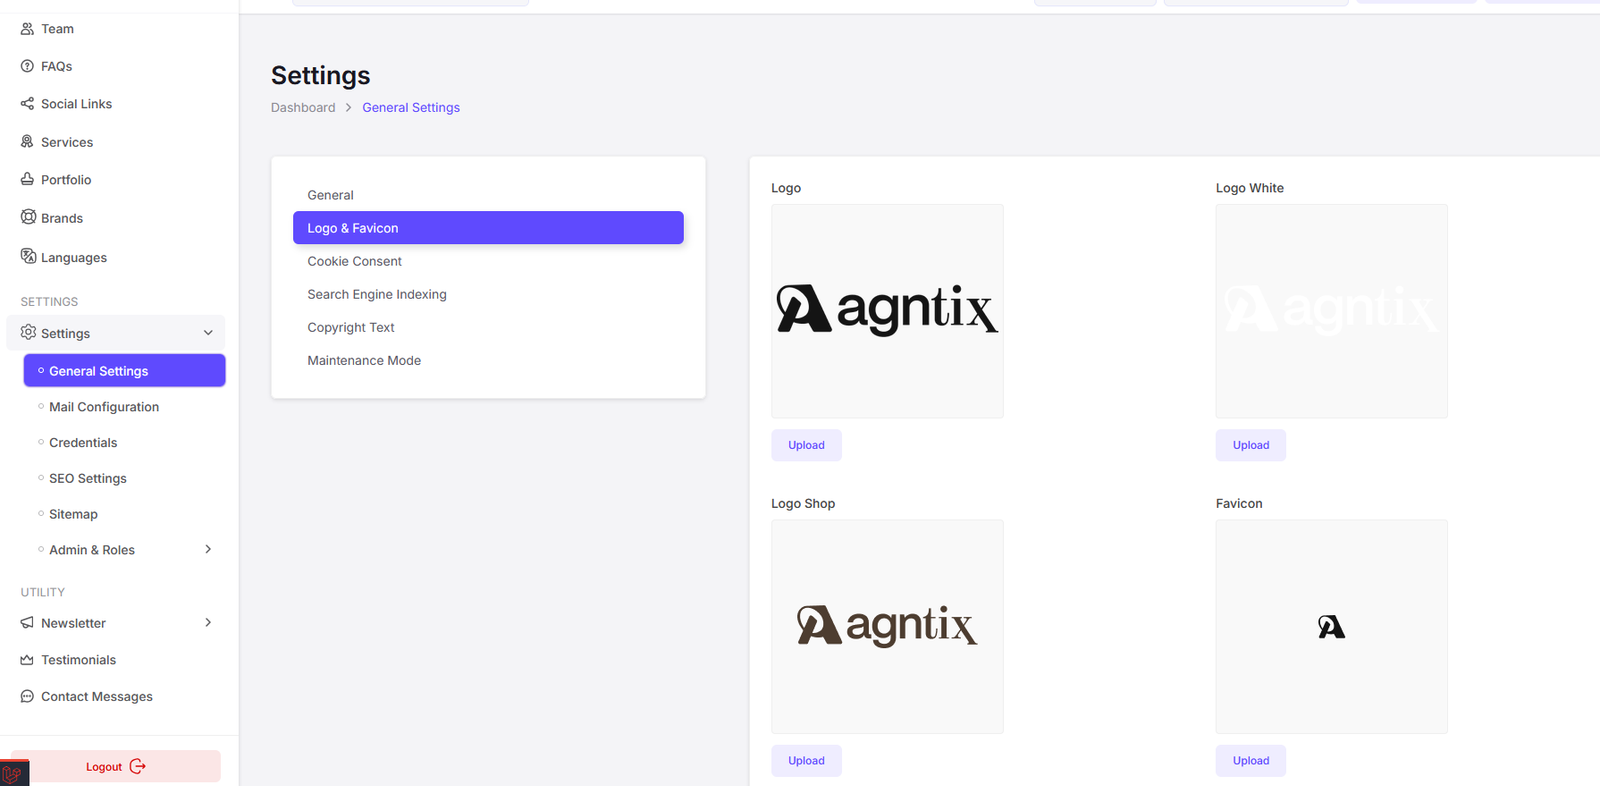
You can update your site's Logo & Favicon from here
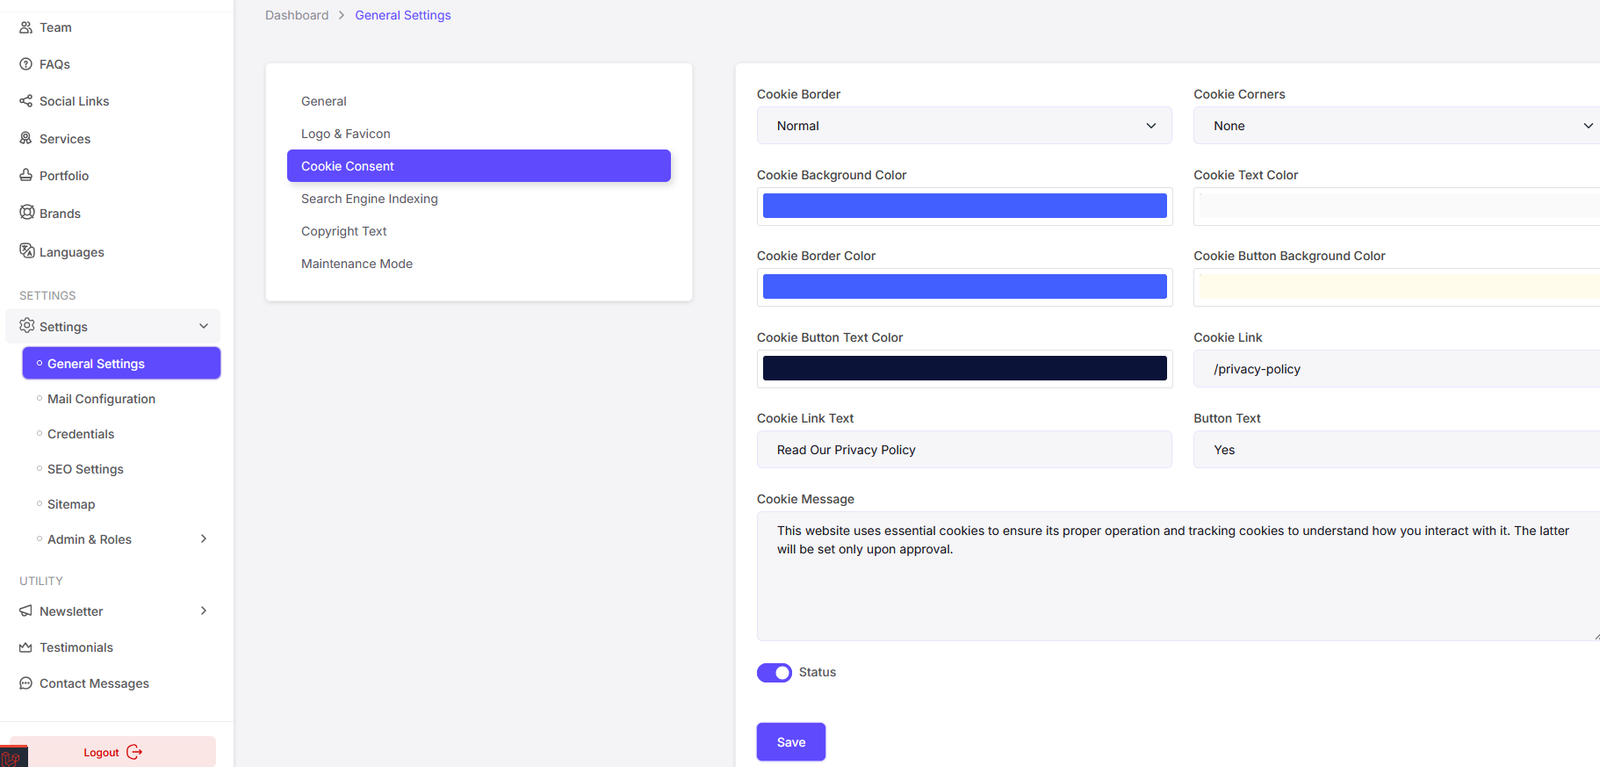
You can update your site's Cookie Consent from here
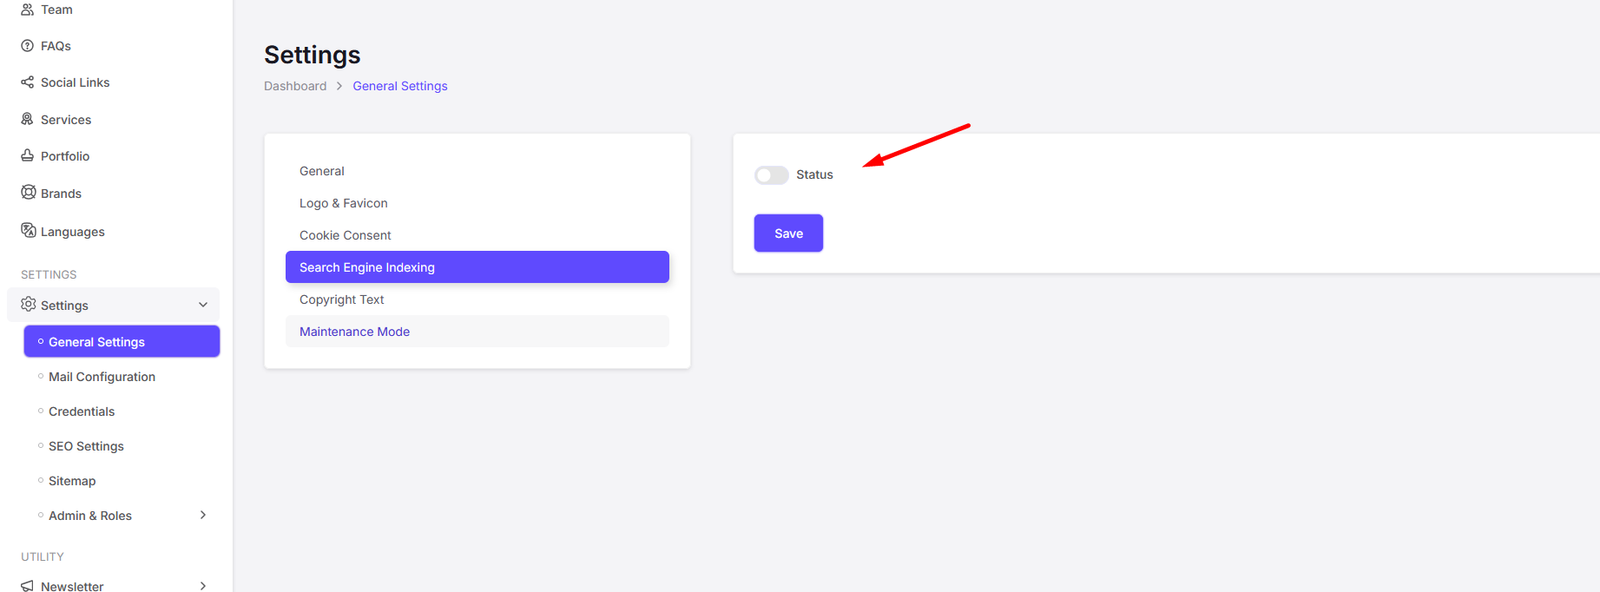
You can update your site's Search Engine Index from here
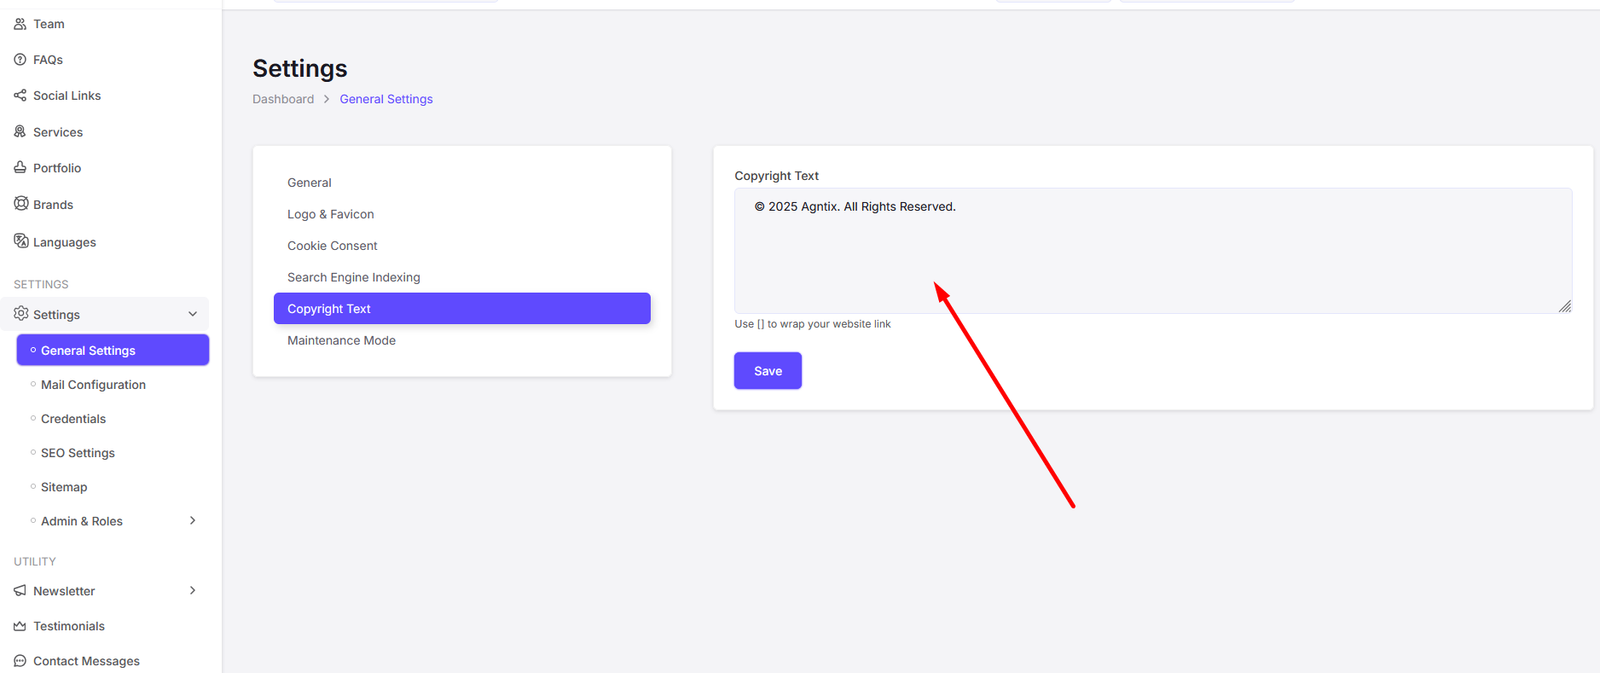
You can update your site's Copyright Text from here
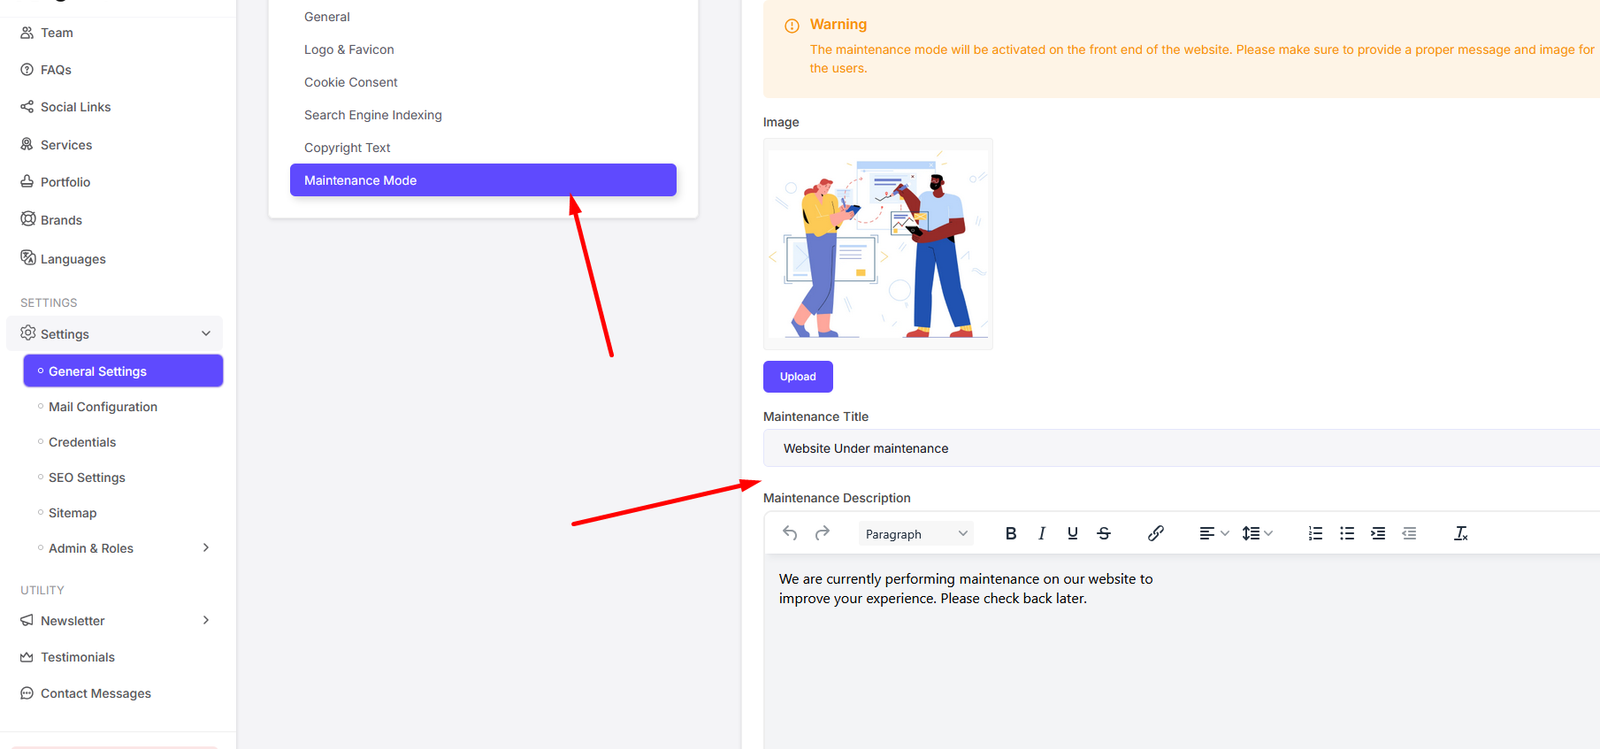
You can update your site's Maintenance Mode Settings from here
Mail Configuration
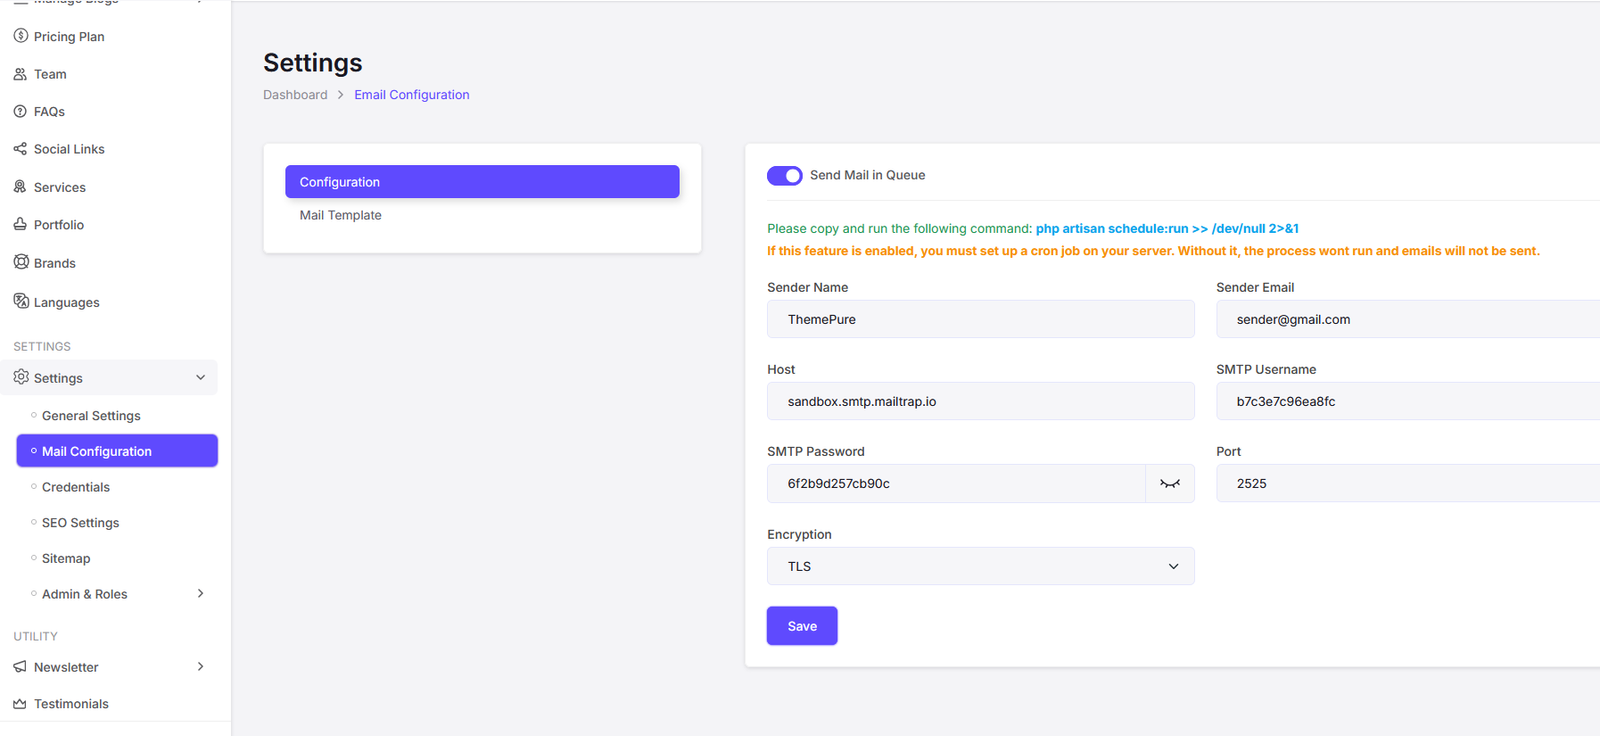
You can update your site's SMTP Settings from here
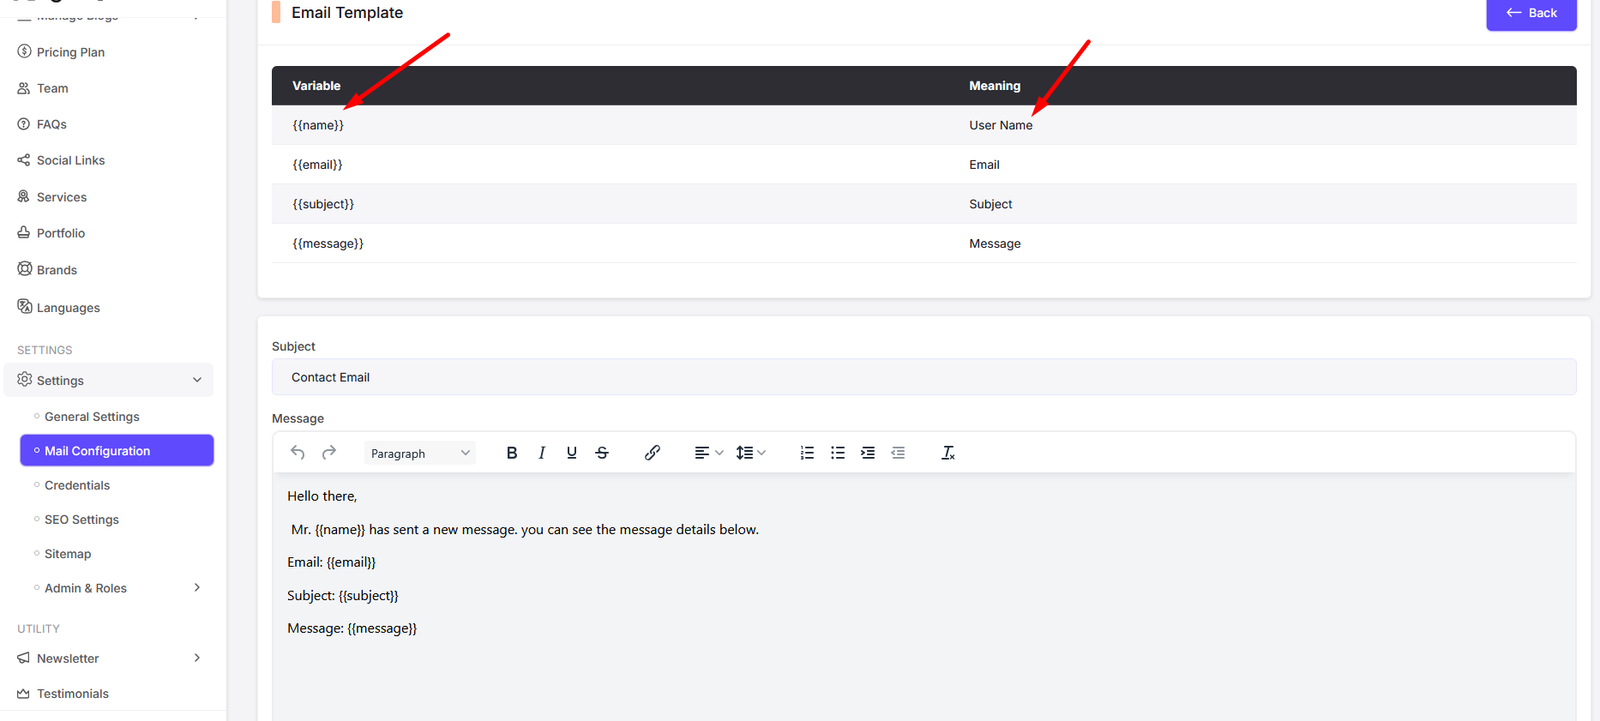
You can update your site's Mail Templates from here

Here you can see the variable and meaning of each variable. You can use these variables in your mail templates to send dynamic data.
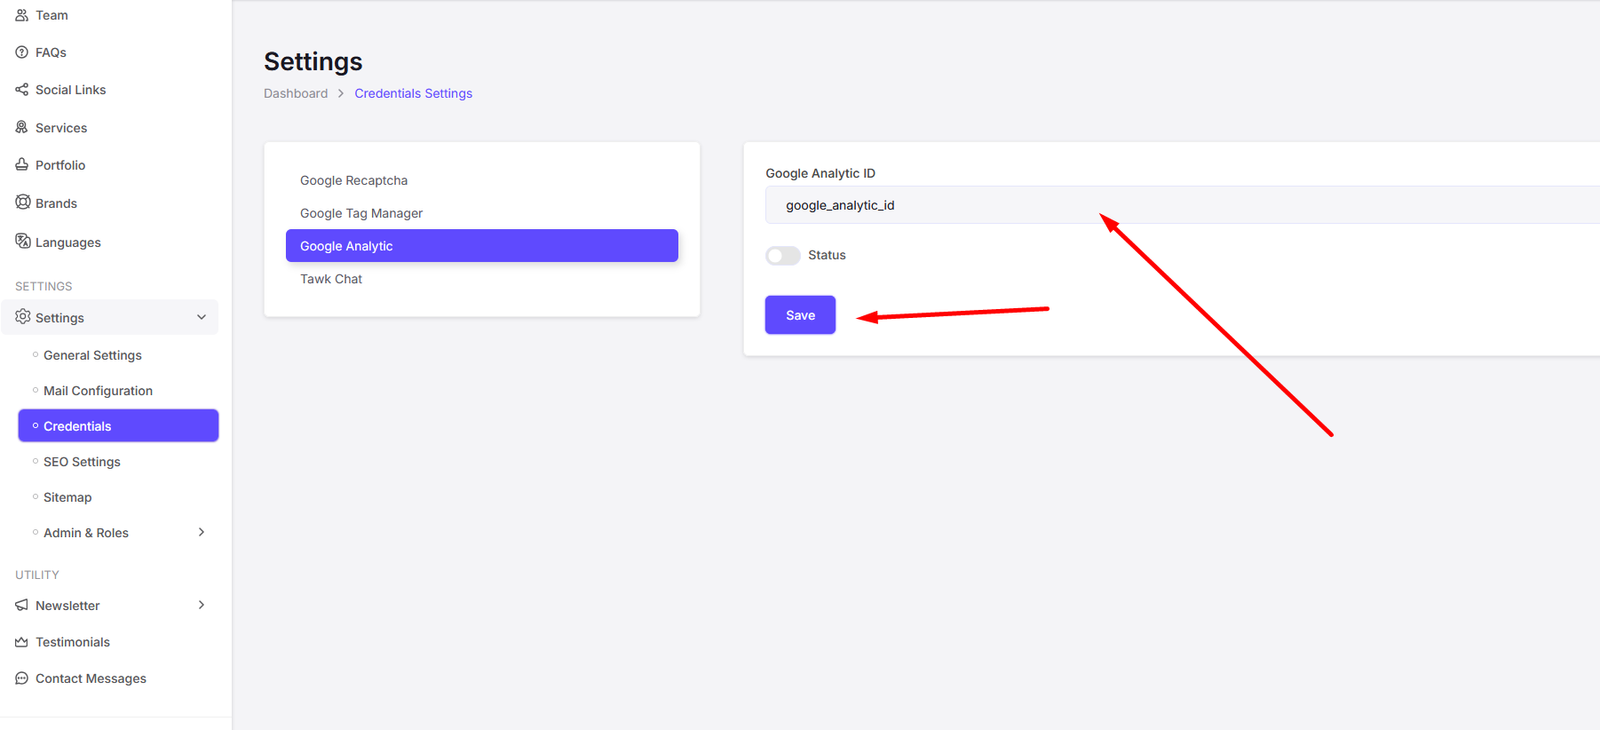
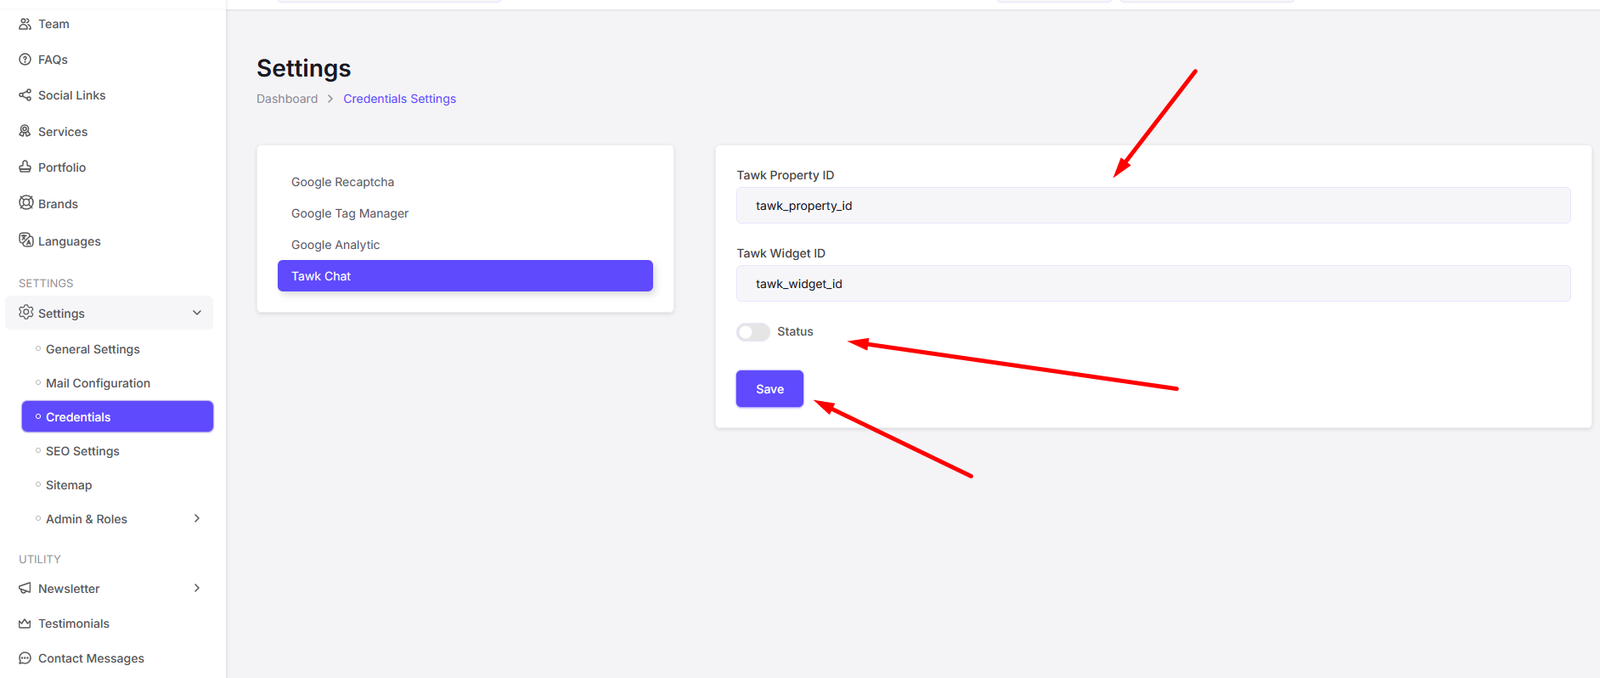
Credentials
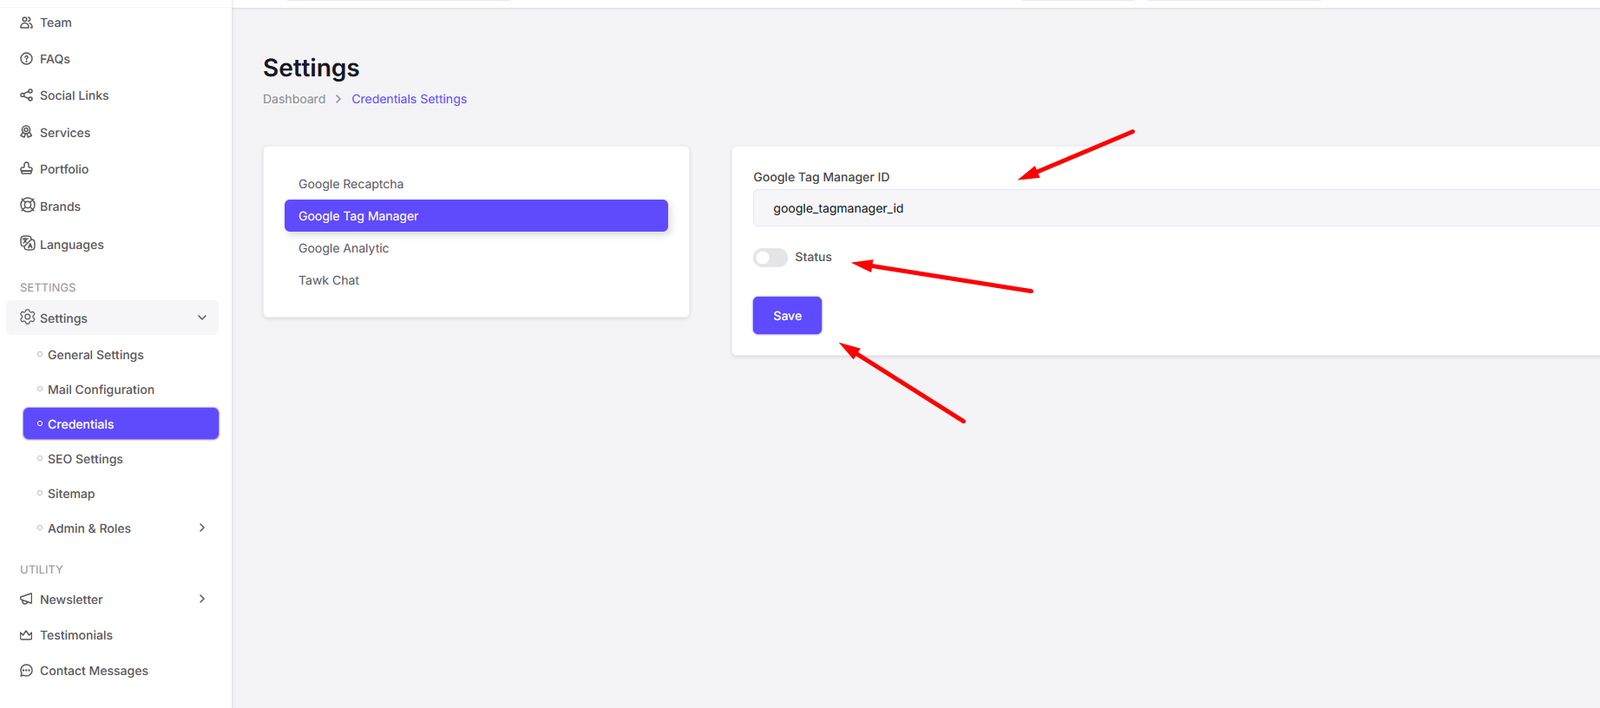
You can update your site's Credentials from here. This is used to store your site's credentials like Google Analytics, Google Tag Manager, Google reCAPTCHA, Twak Chat etc.

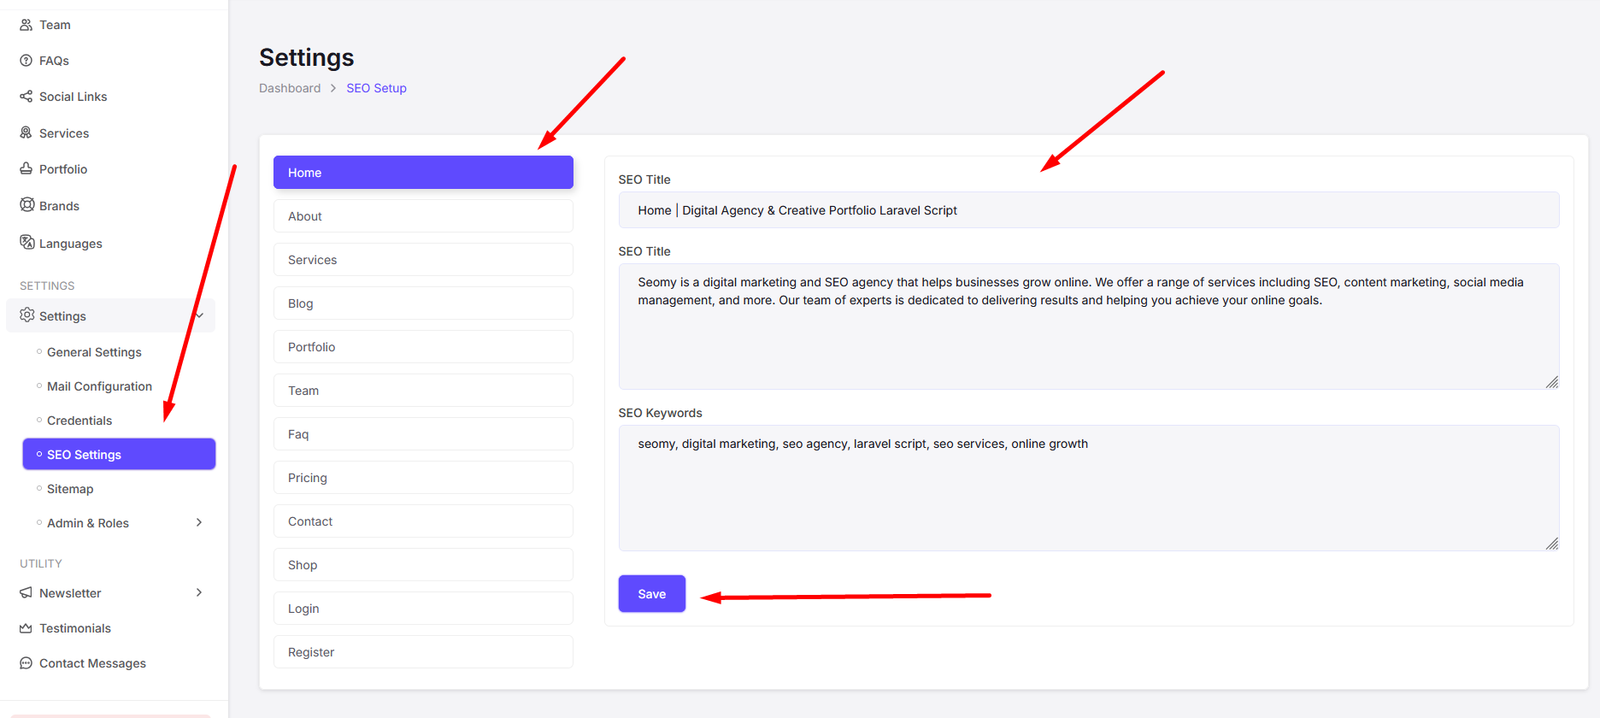
SEO Setup
You can update your site's SEO Settings from here. This is used to store your site's SEO settings like Meta Title, Meta Description, Meta Keywords.
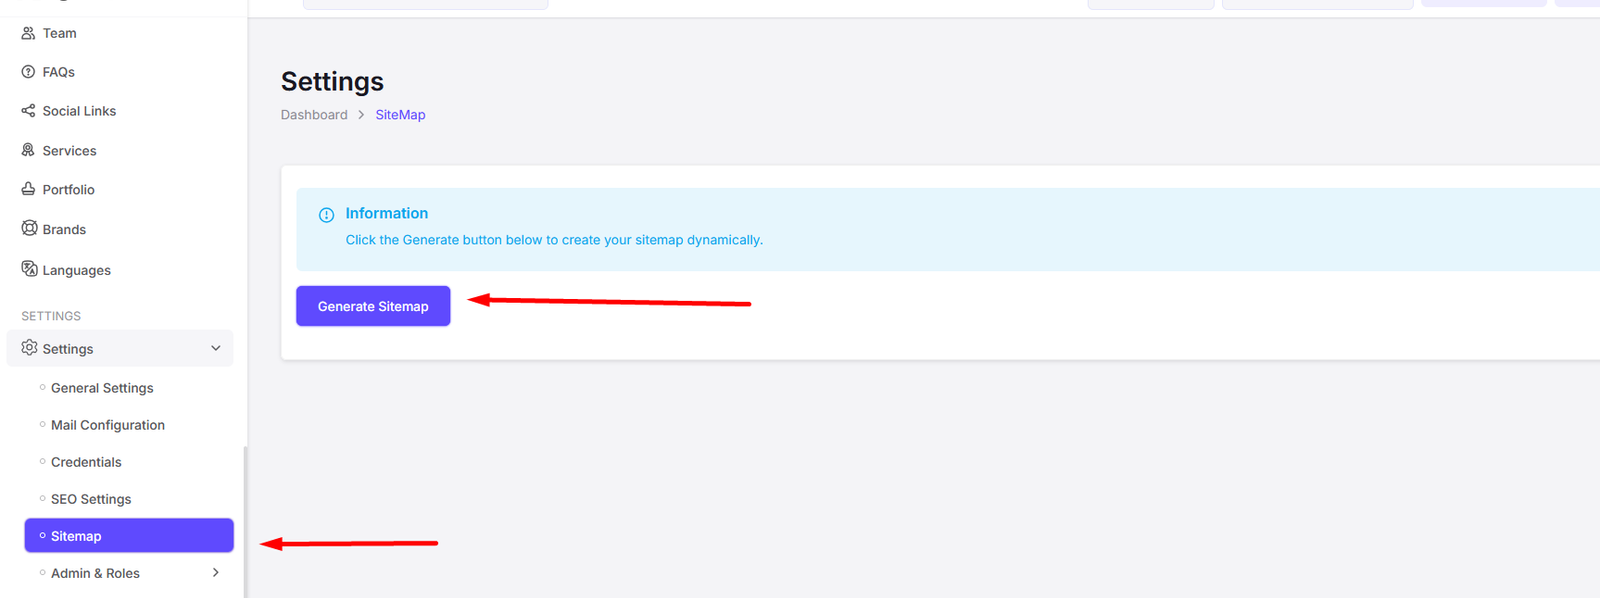
Sitemap Generate
You can generate your site's Sitemap from here. This is used to generate your site's sitemap.xml file.
Admin & Roles
You can manage your site's Admin & Roles from here. This is used to manage your site's admin users and their roles.
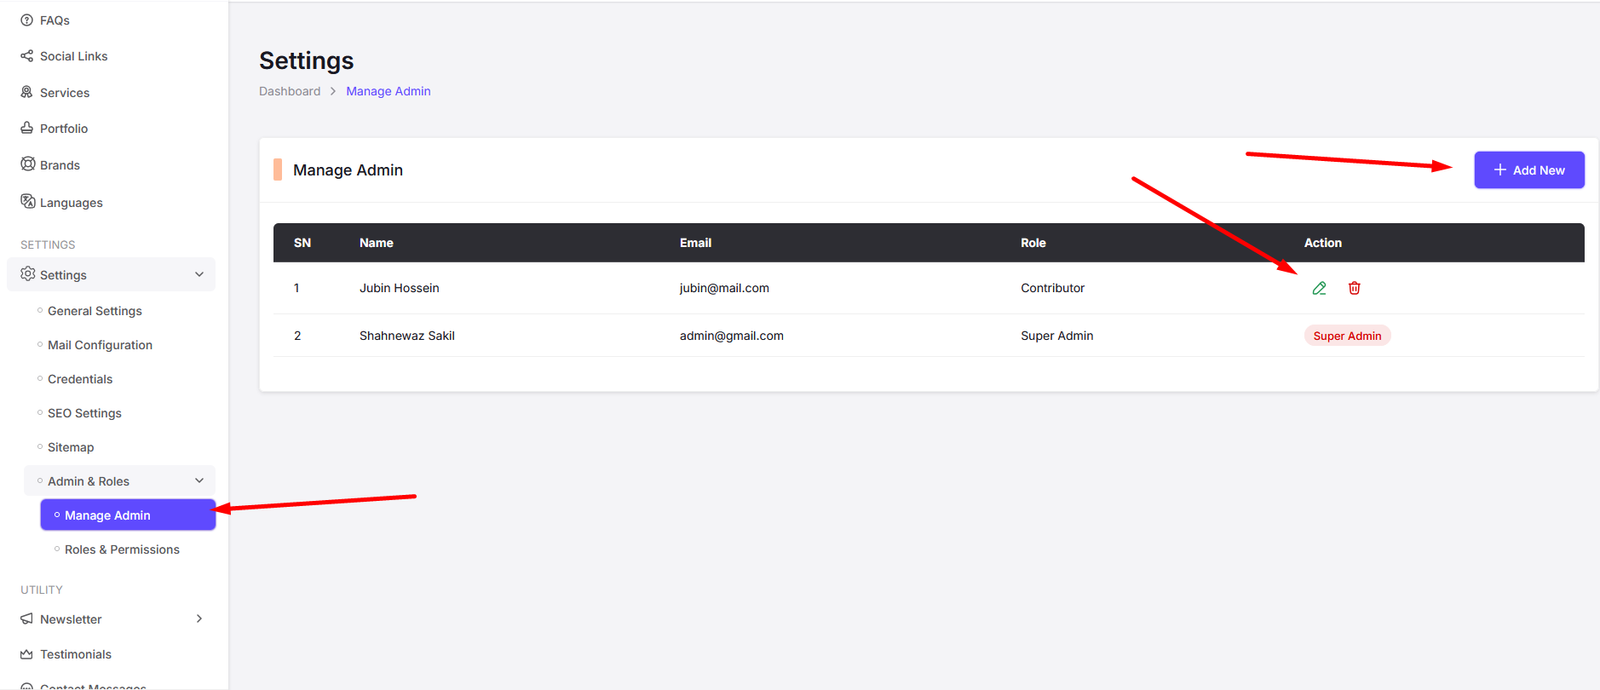
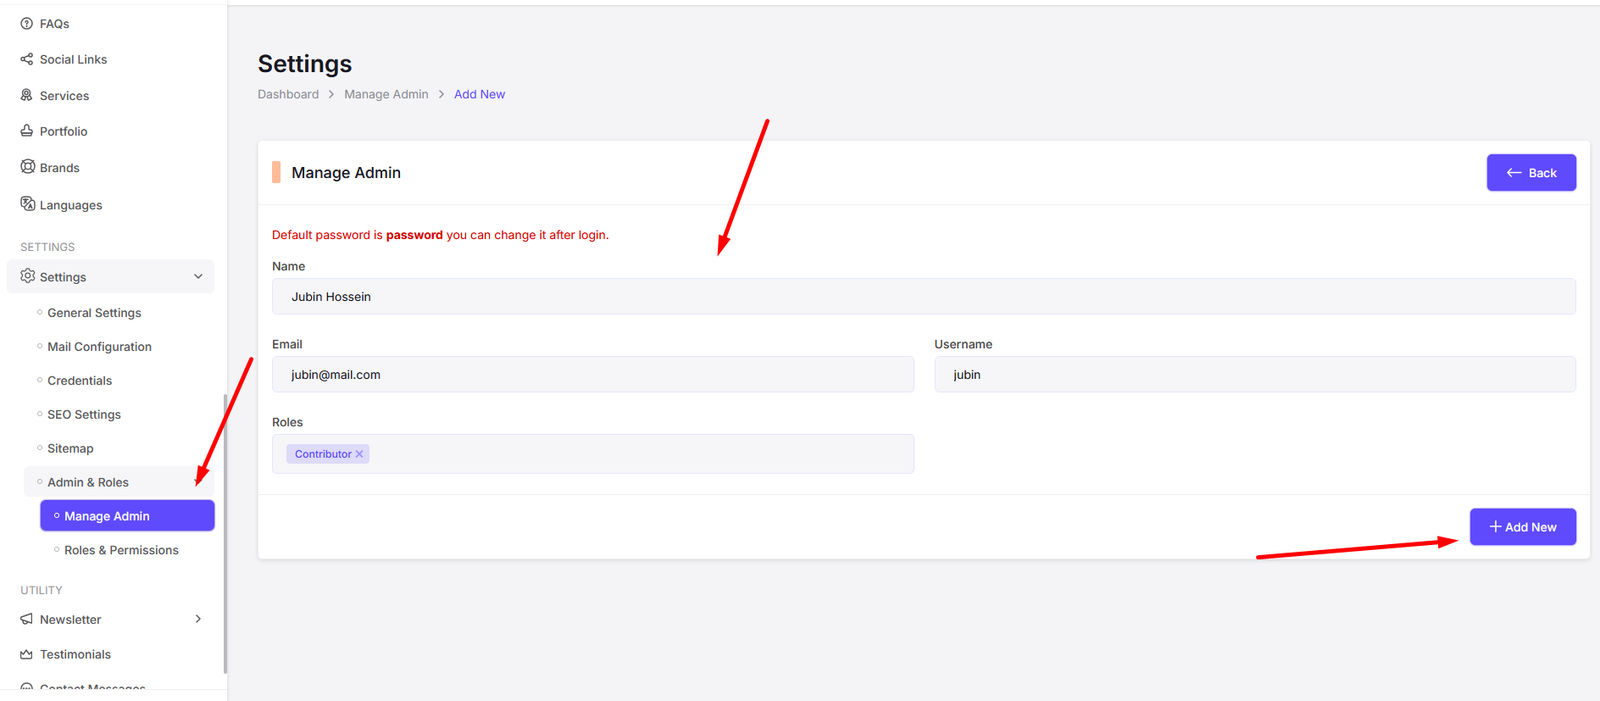
Add Admin
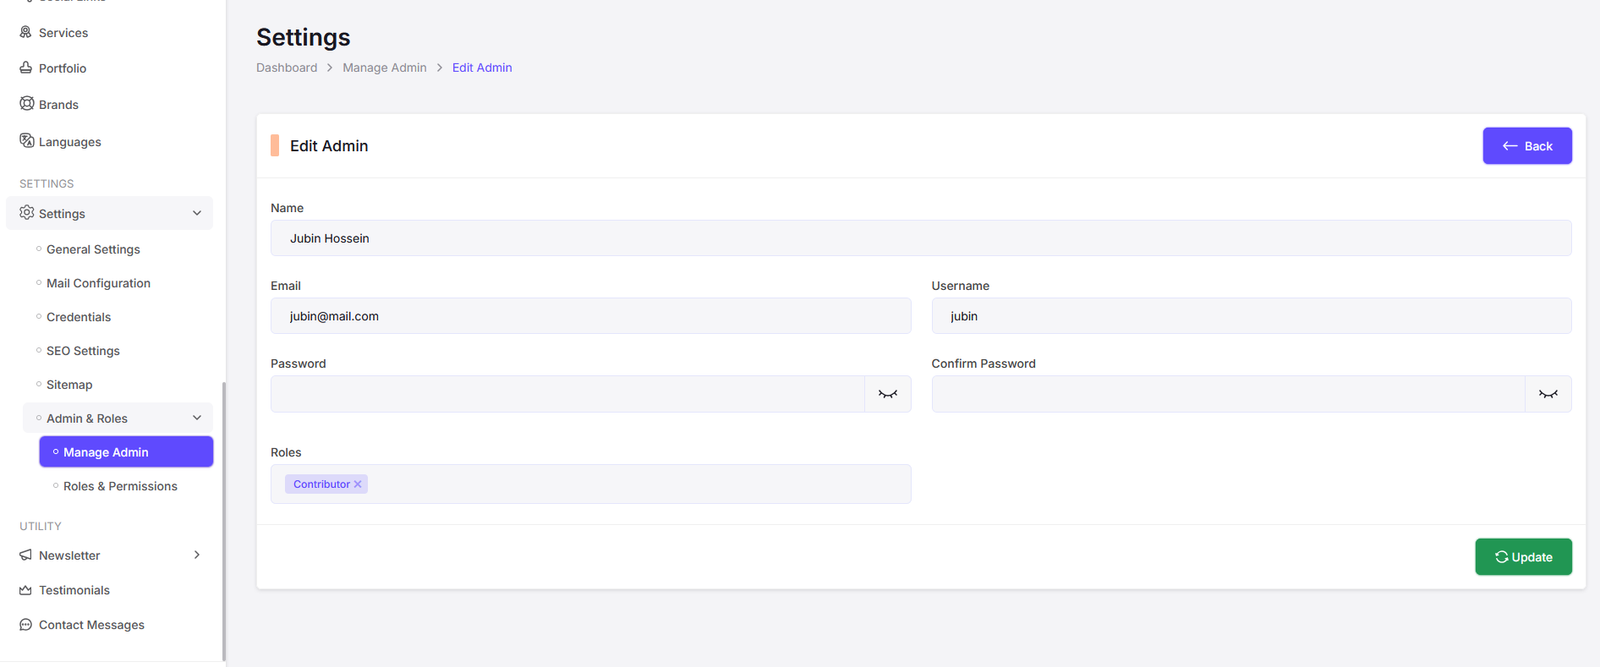
Edit Admin
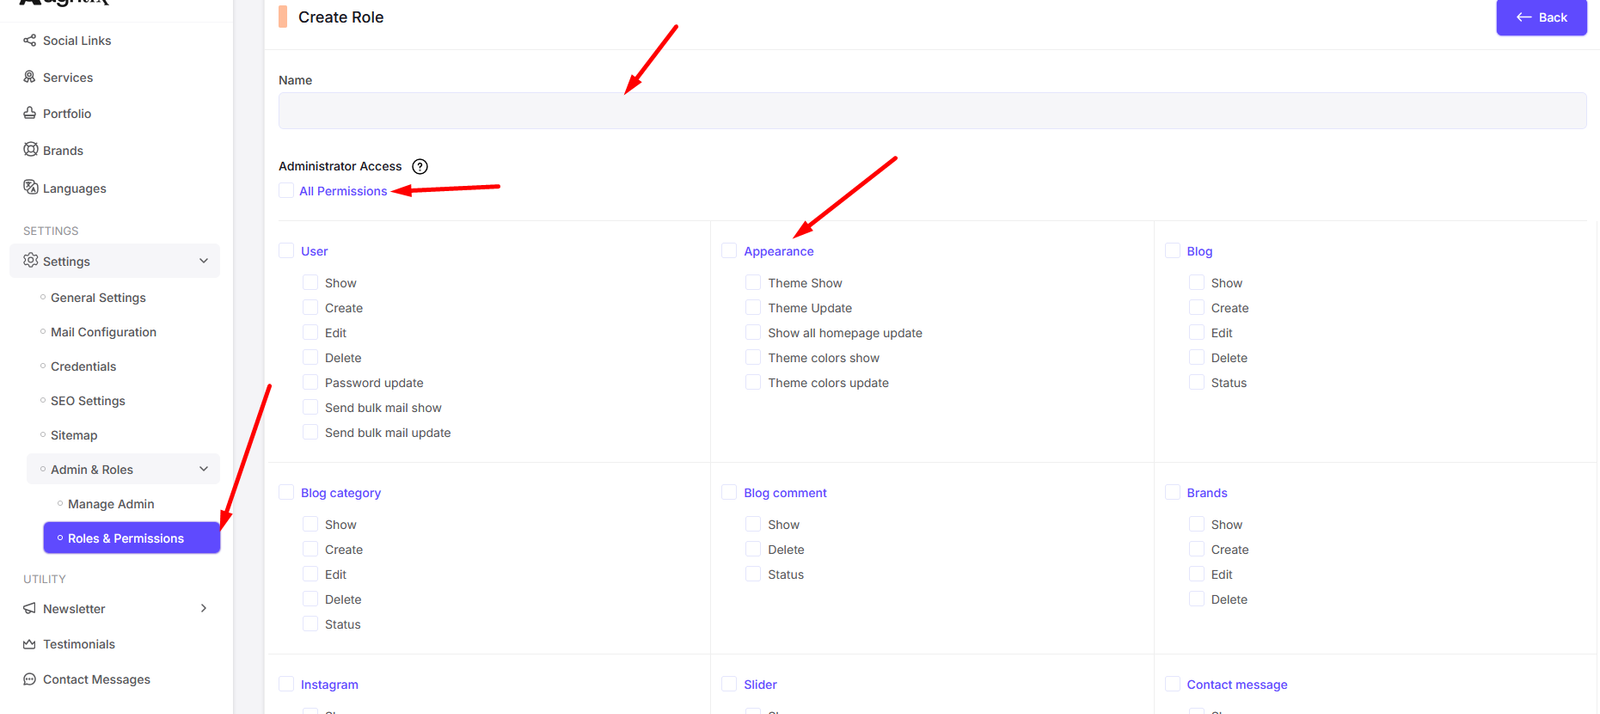
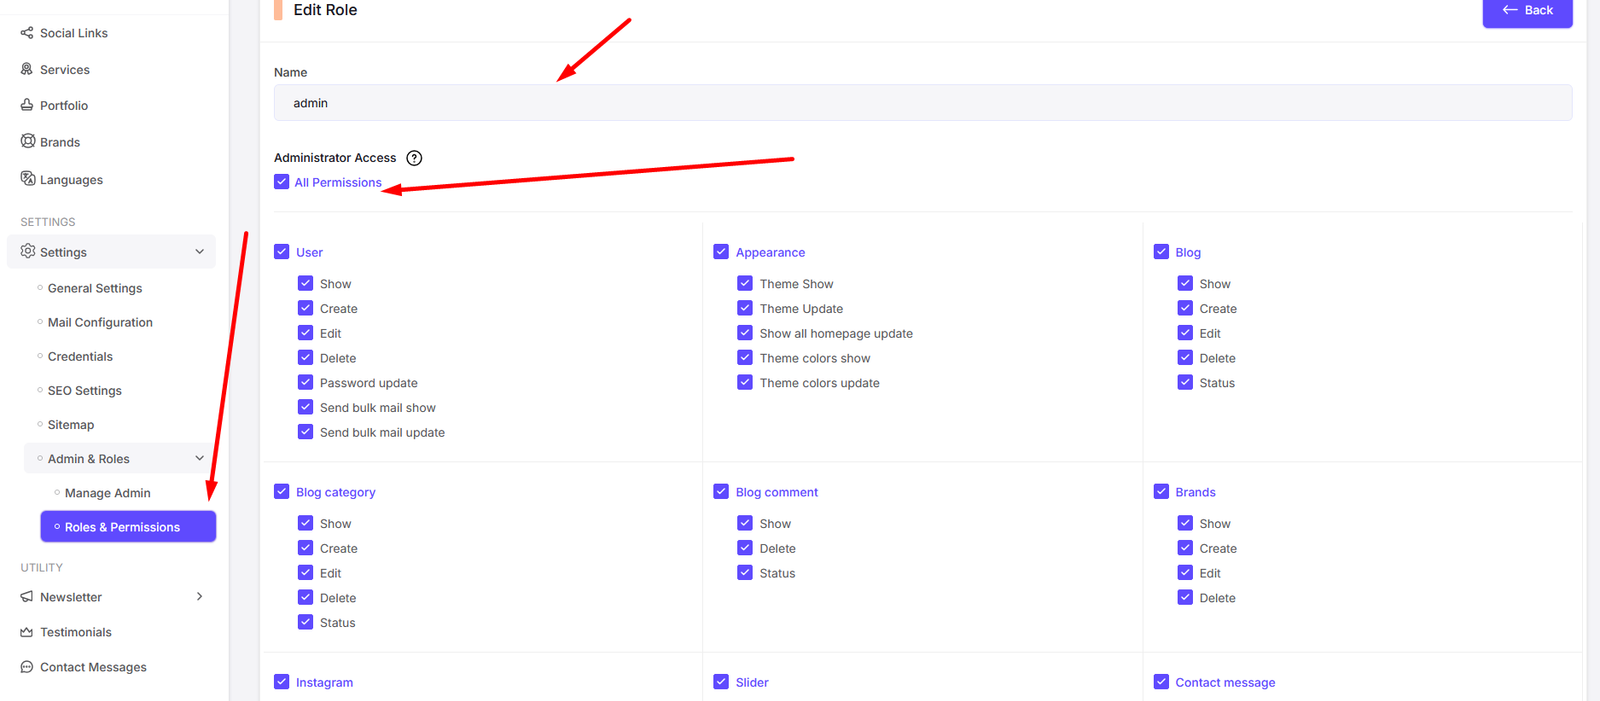
Roles & Permissions
You can manage your site's Roles & Permissions from here. This is used to manage your site's roles and their permissions.
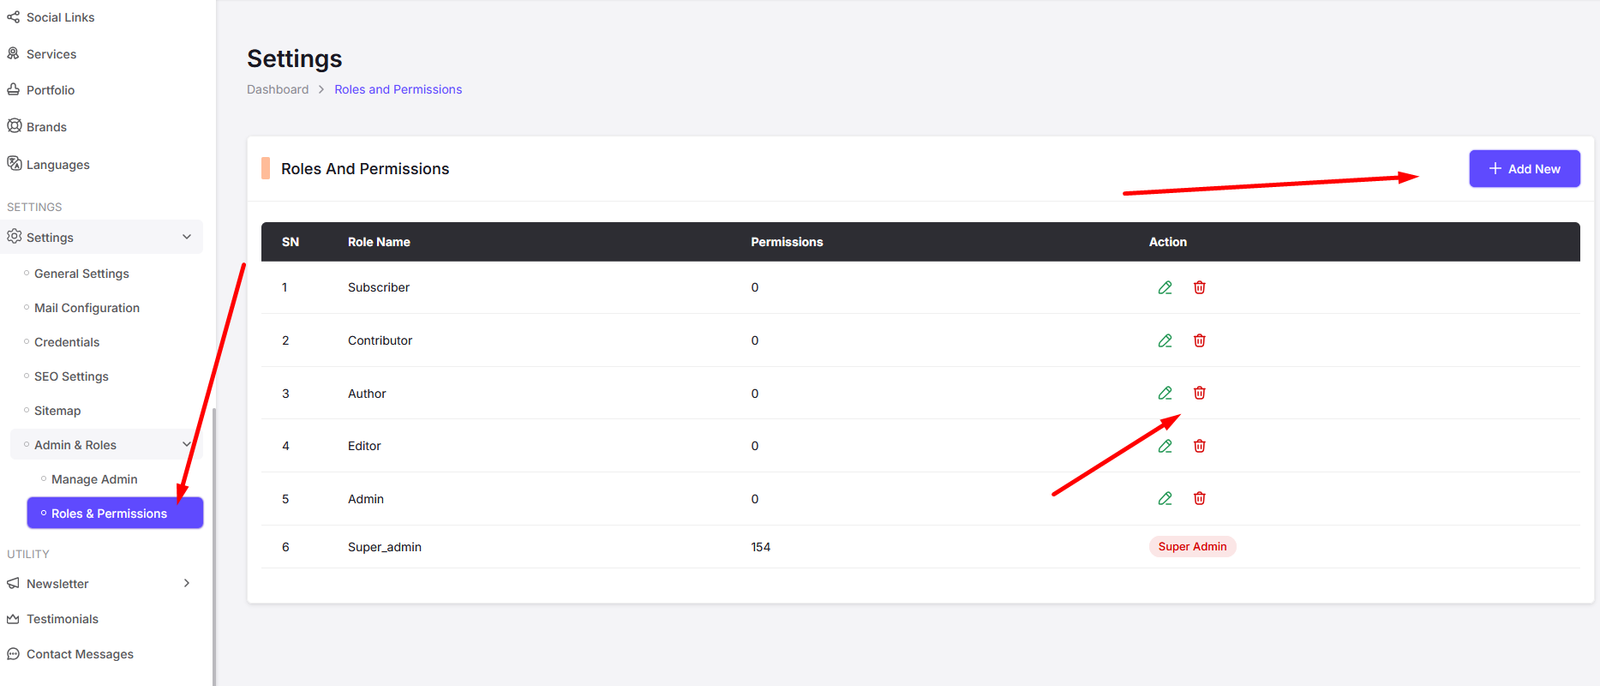
Add Role
Edit Role
Shop Settings
Navigate to Manage Products to manage your shop products and categories.
You can manage your shop products and categories from here. Like Product Categories, Products, Orders, Coupons, Shipping Methods, Payment Methods, and Shop Settings.
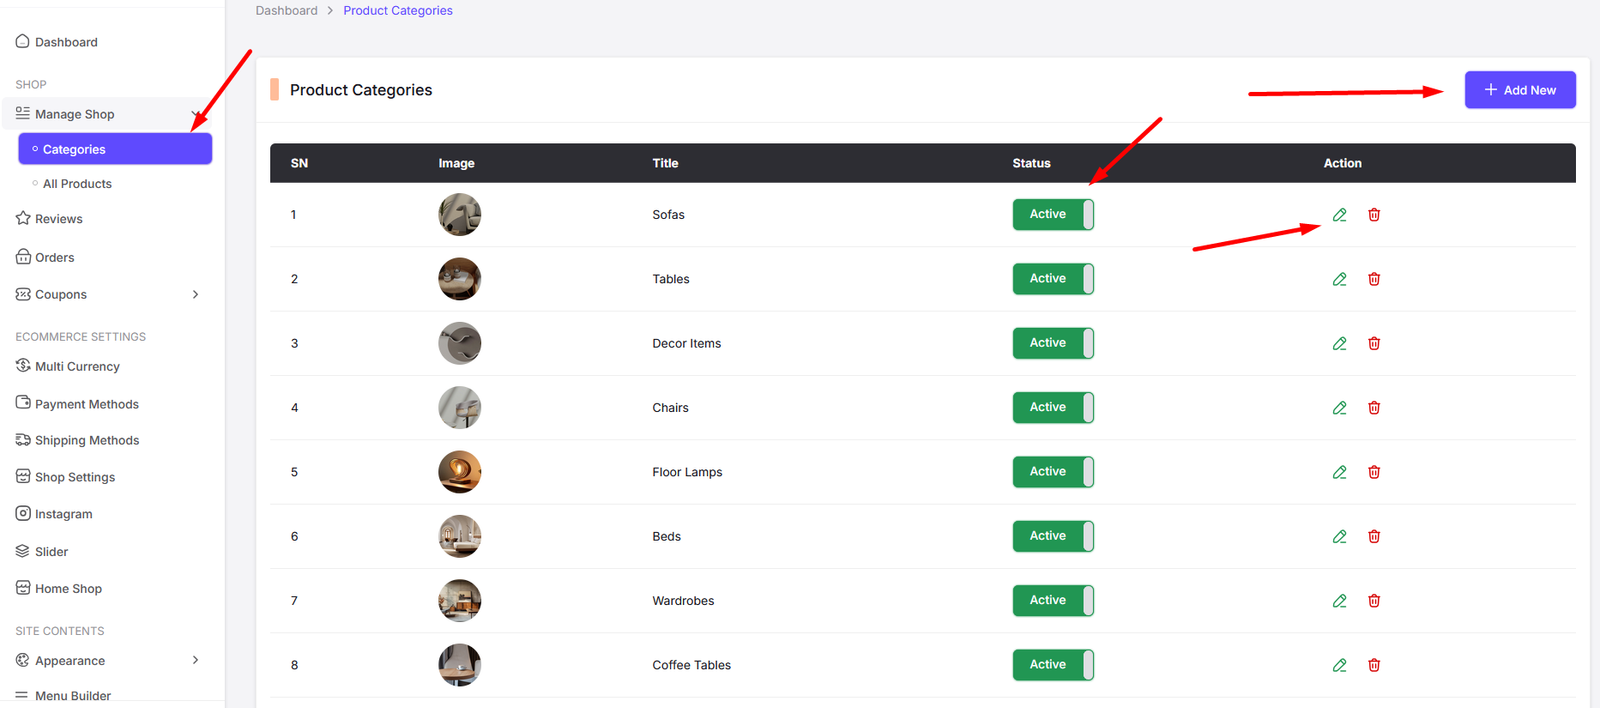
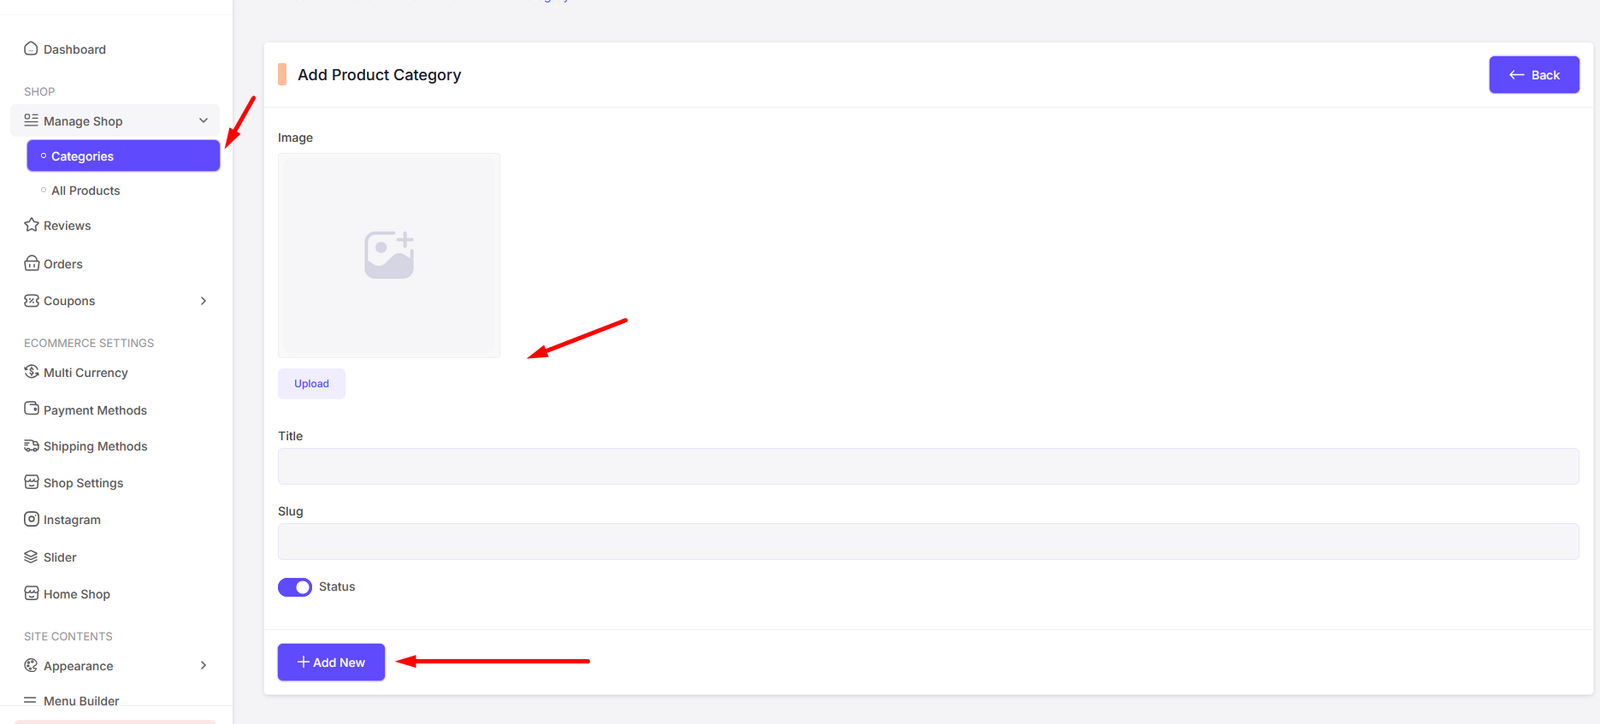
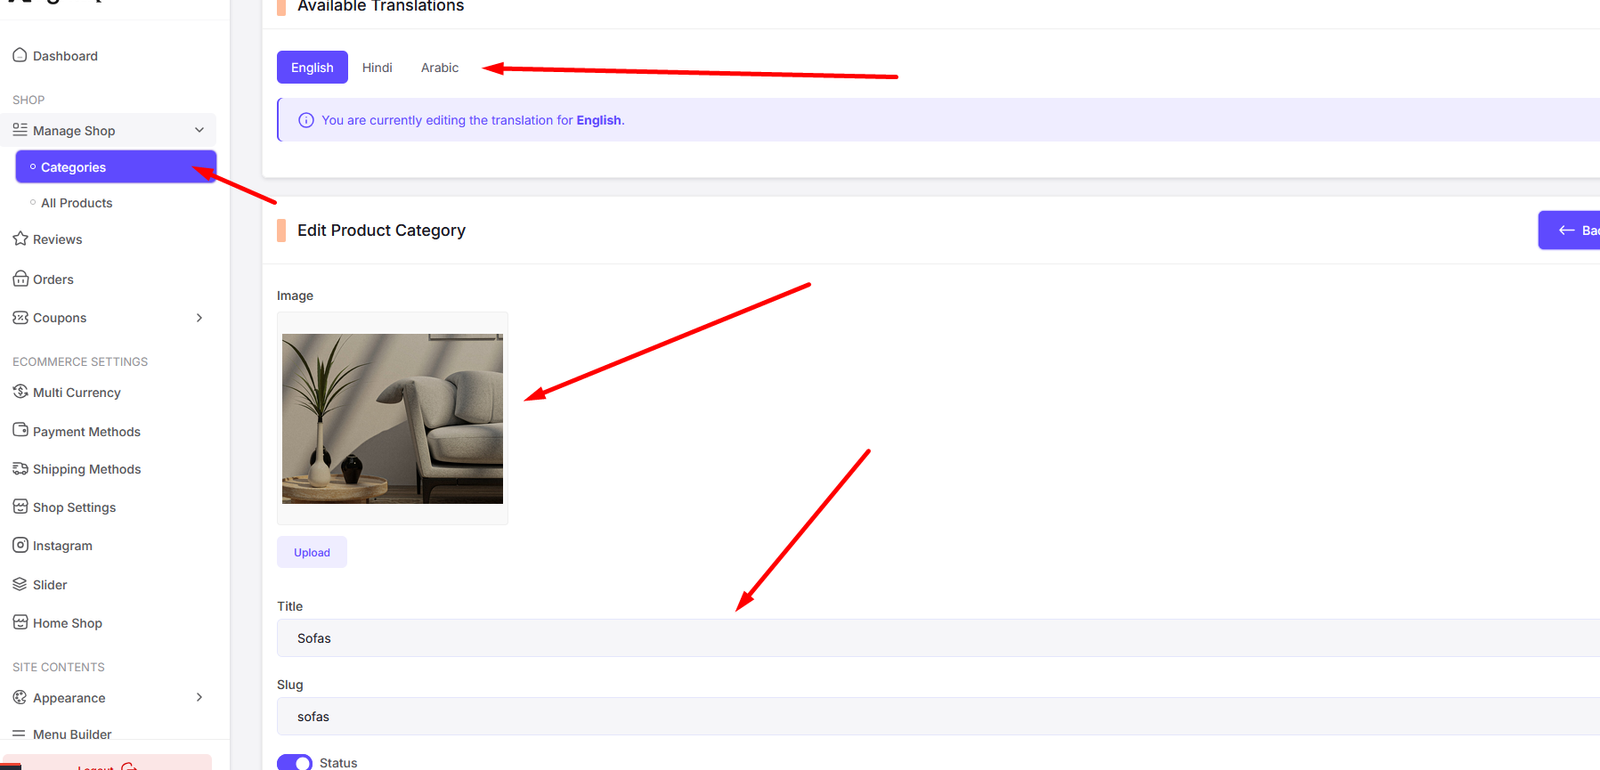
Product Categories
You can add, edit, delete your product categories from here.
All Categories
Add Category
Edit Category
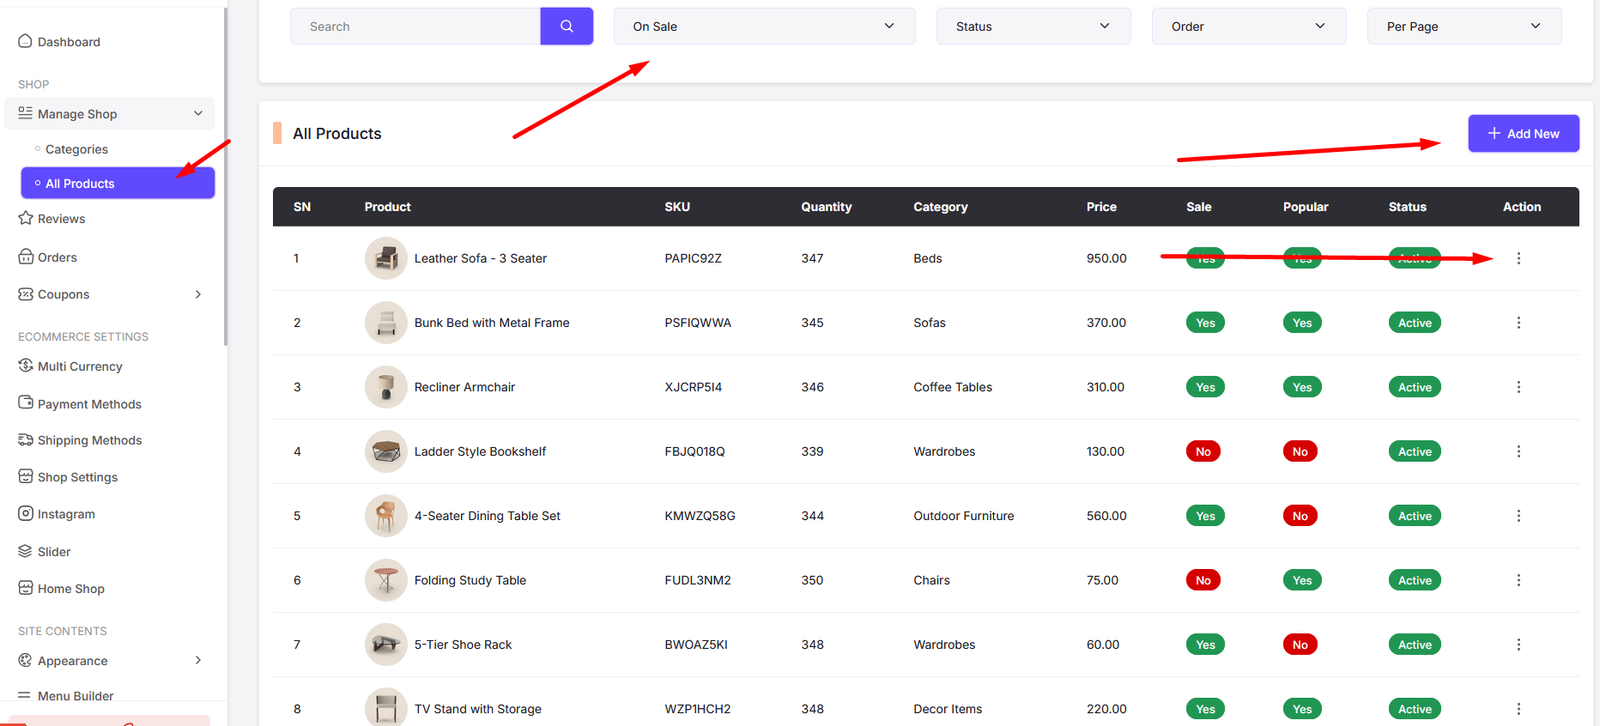
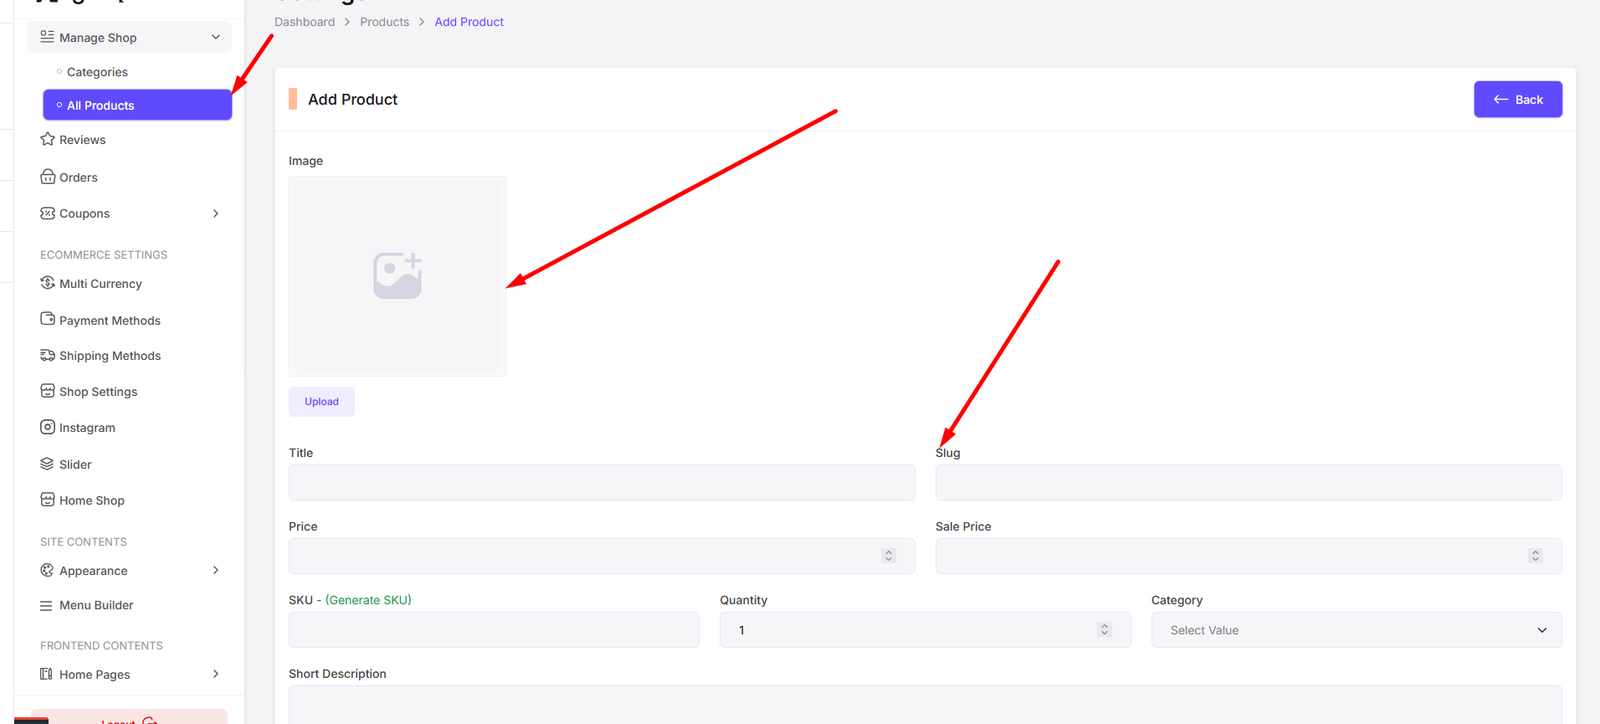
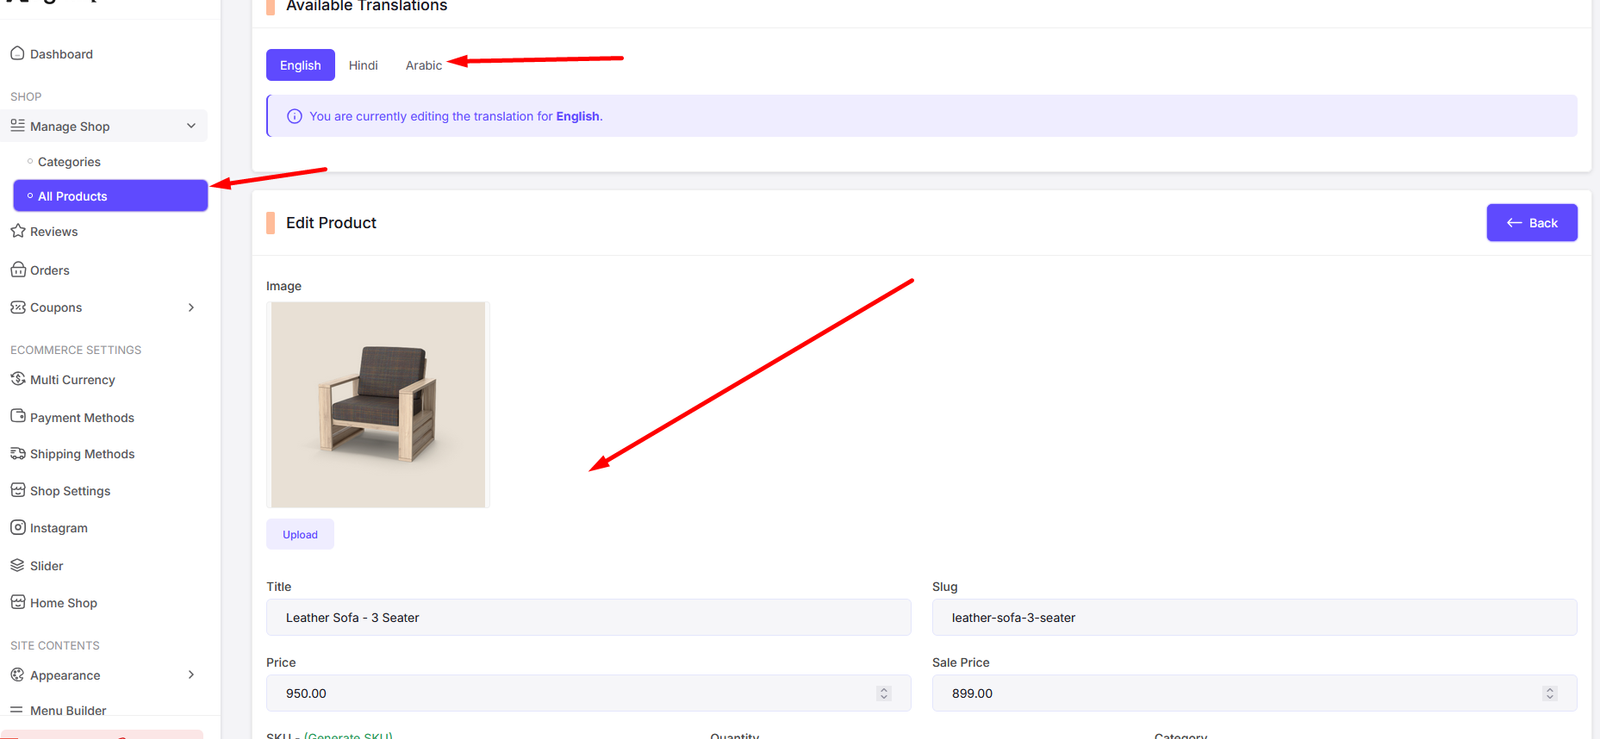
Product Lists
You can add, edit, delete your product lists from here.
All Products
Add Product
Edit Product
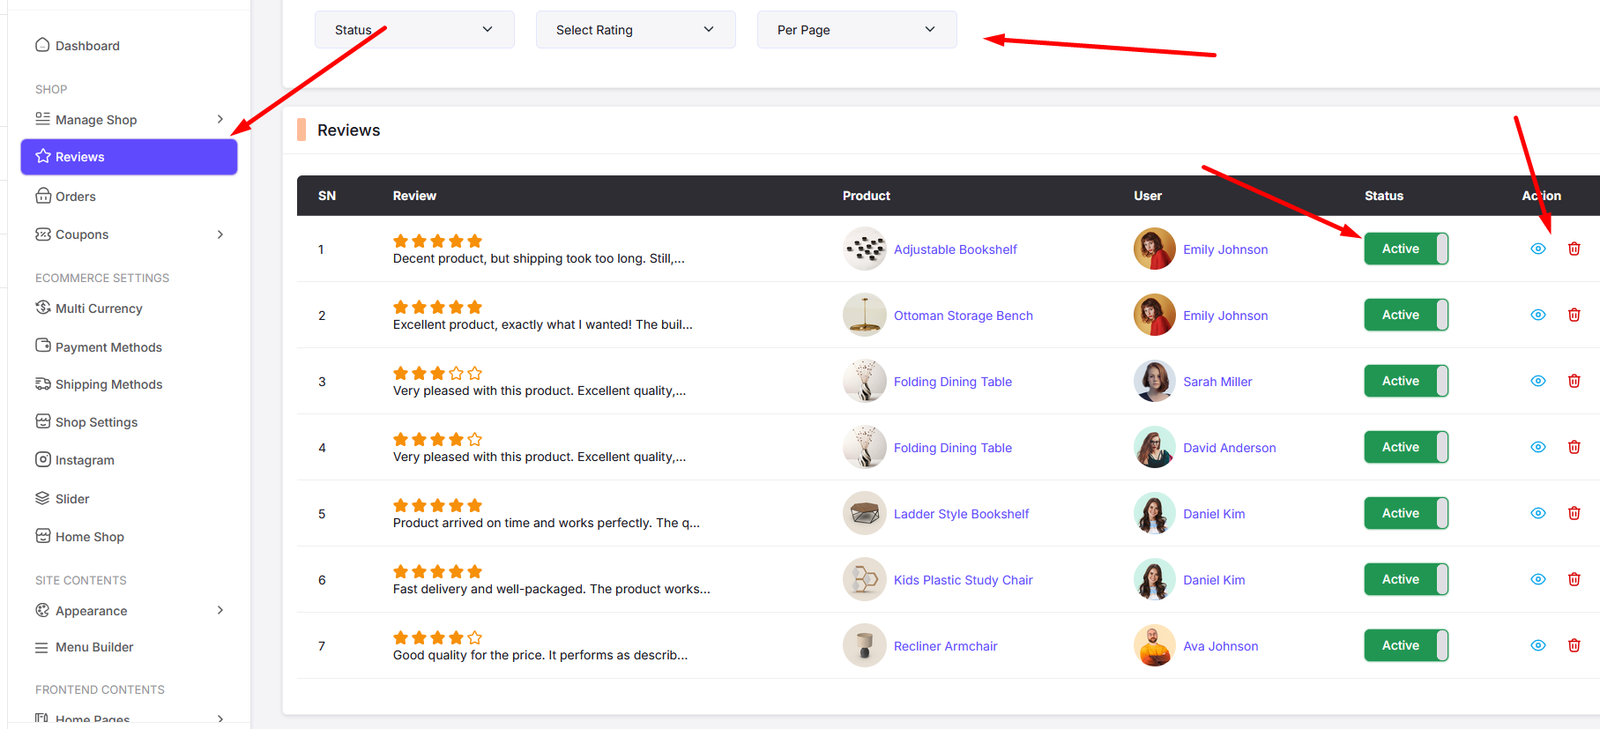
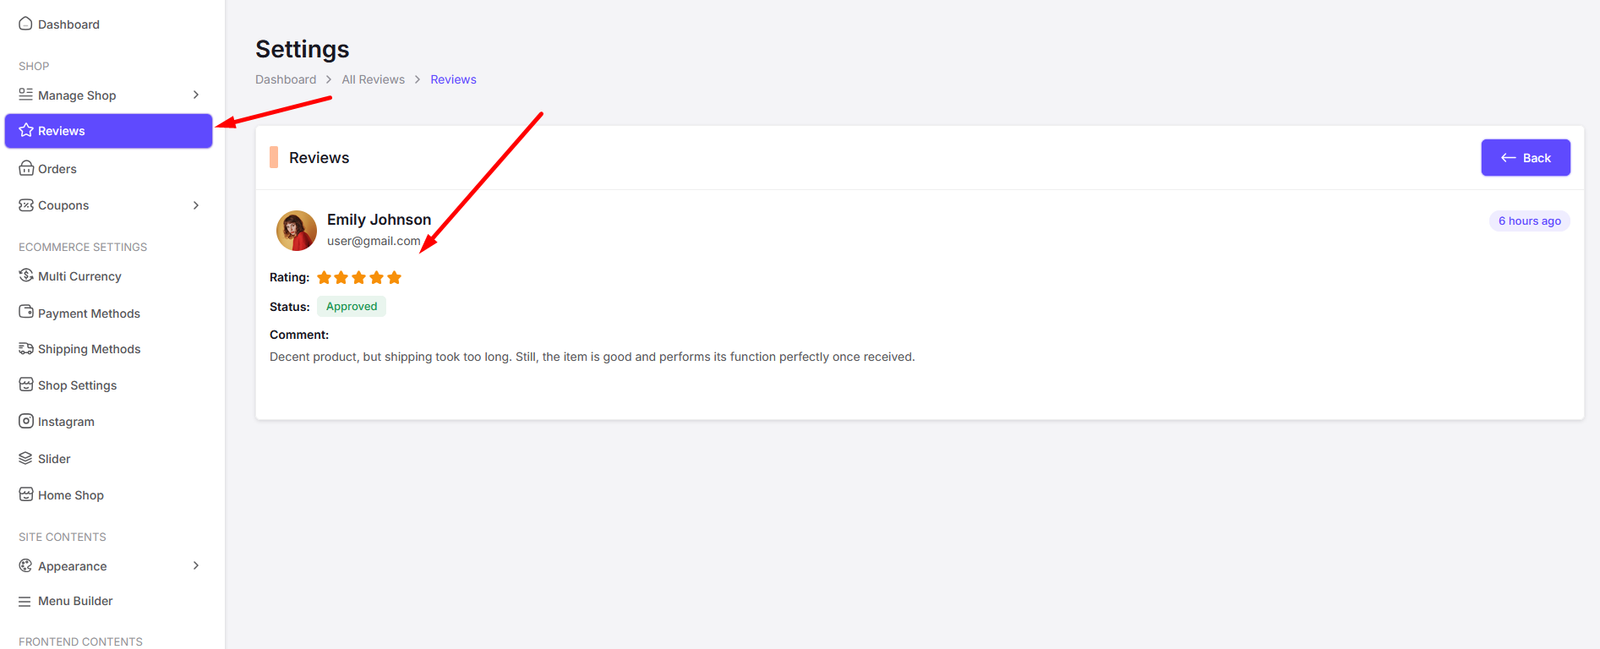
Product Reviews
You can check your product reviews from here.
All Reviews
View Review
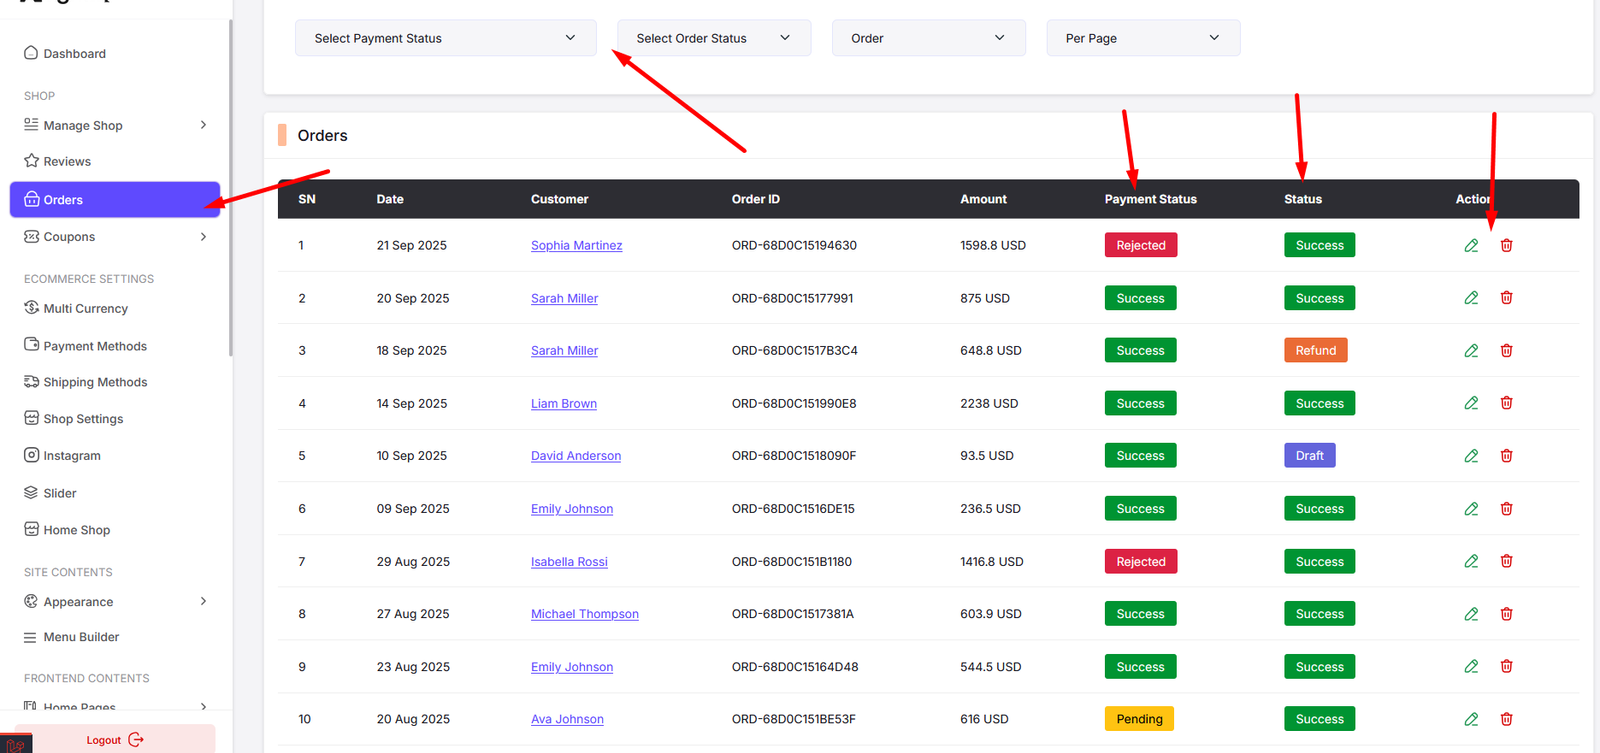
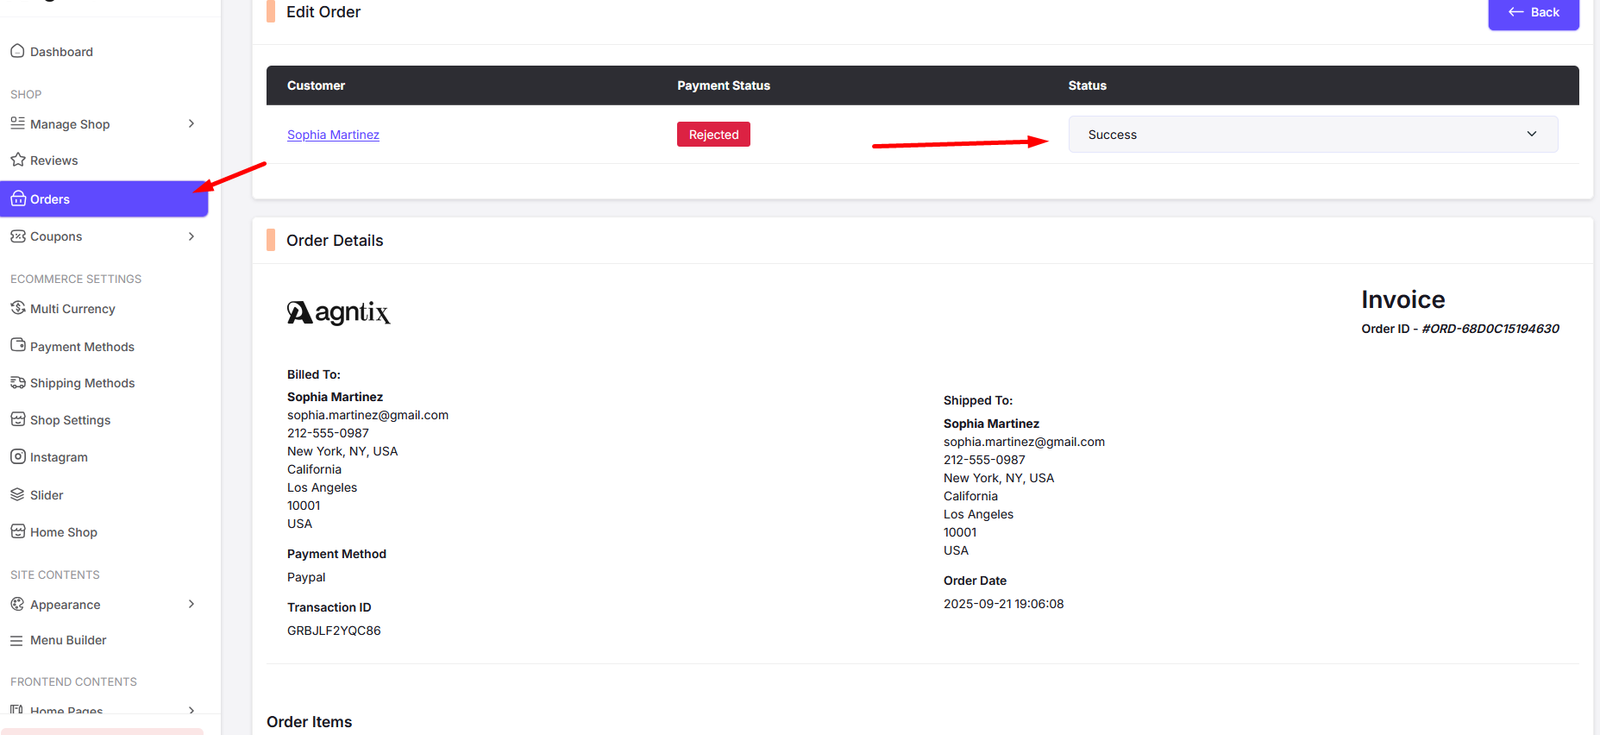
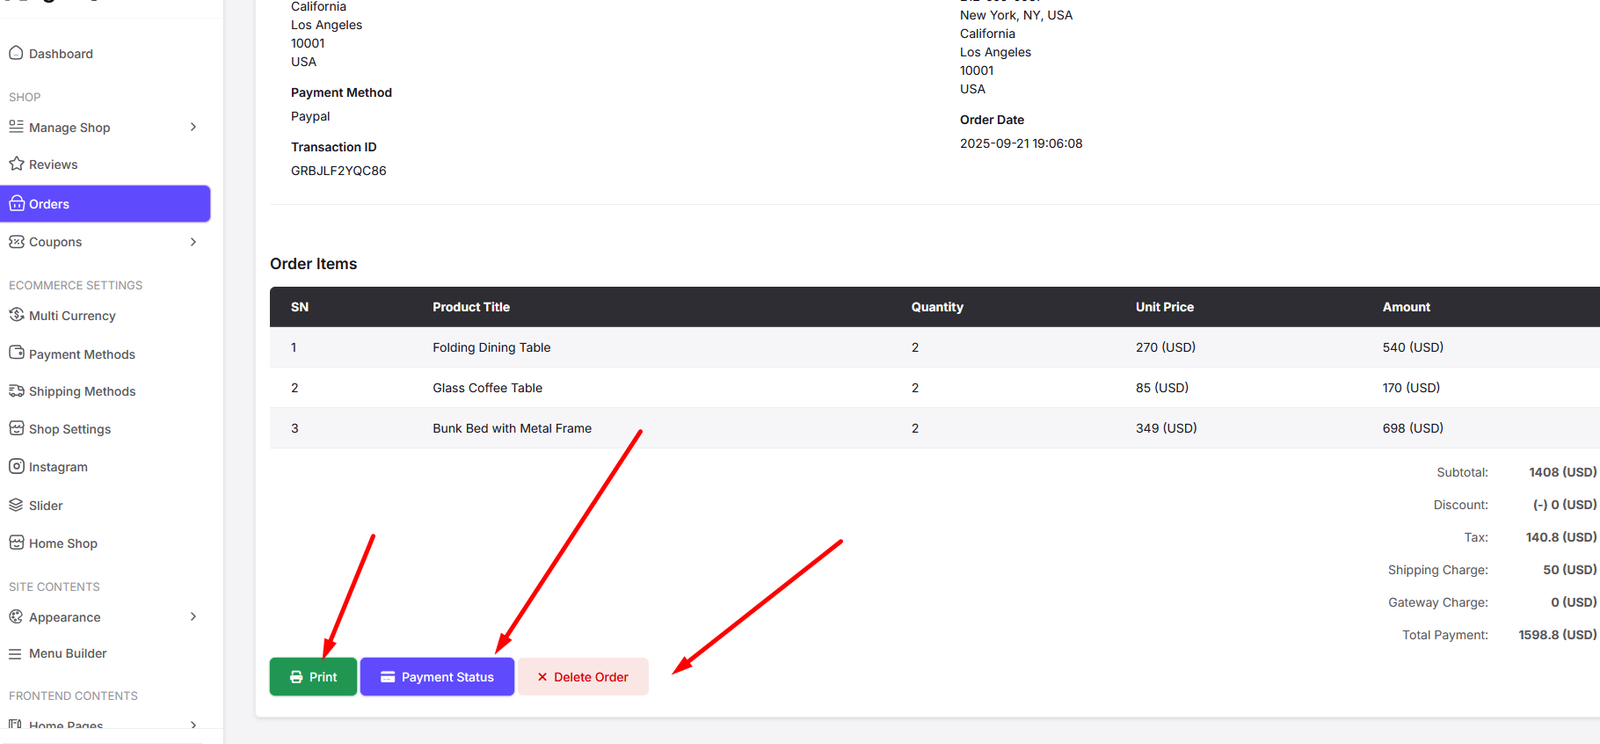
Order
You can manage your orders from here.
All Orders
View Order
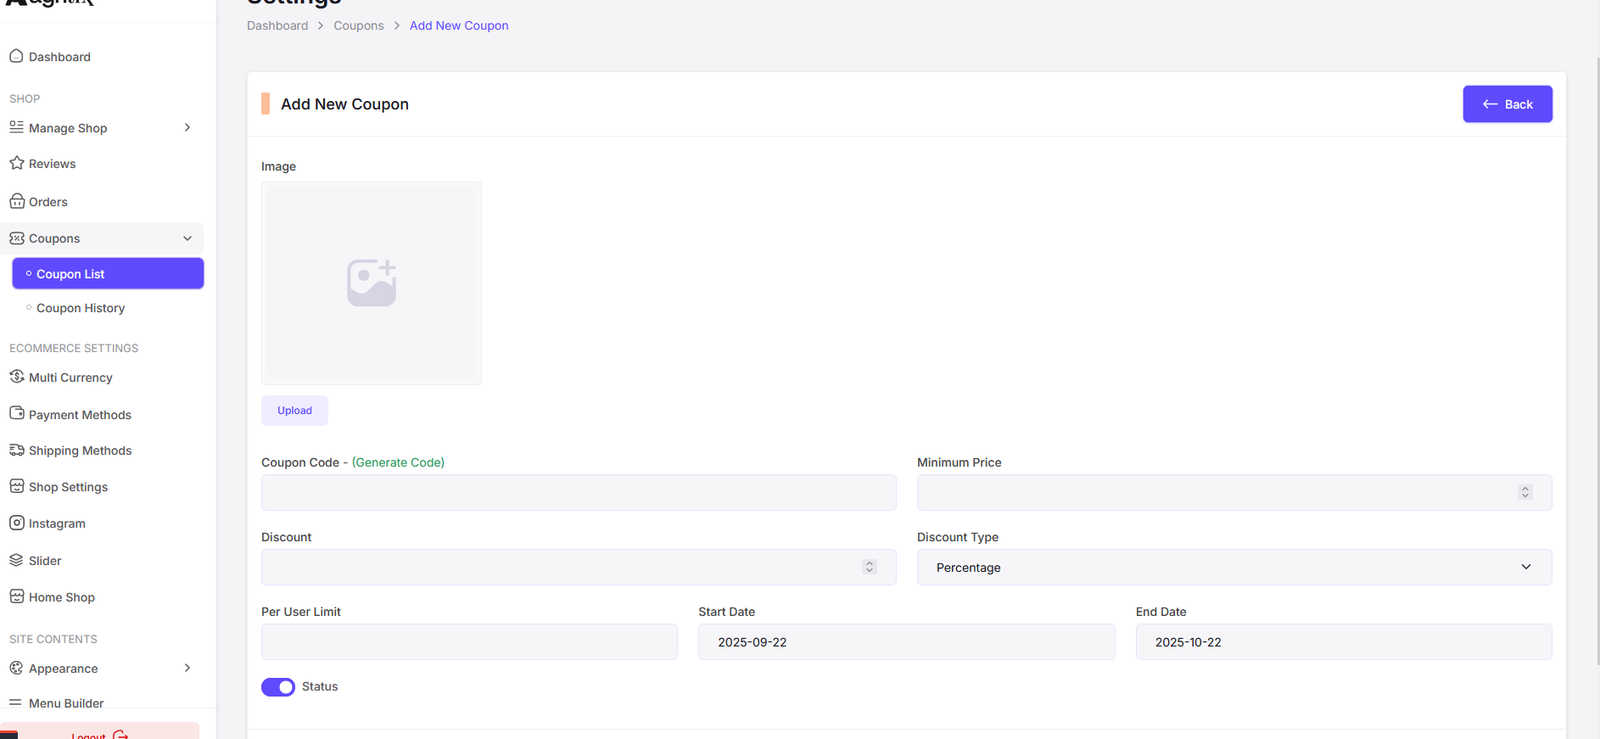
Coupon
You can manage your coupons from here.
All Coupons

Add Coupon
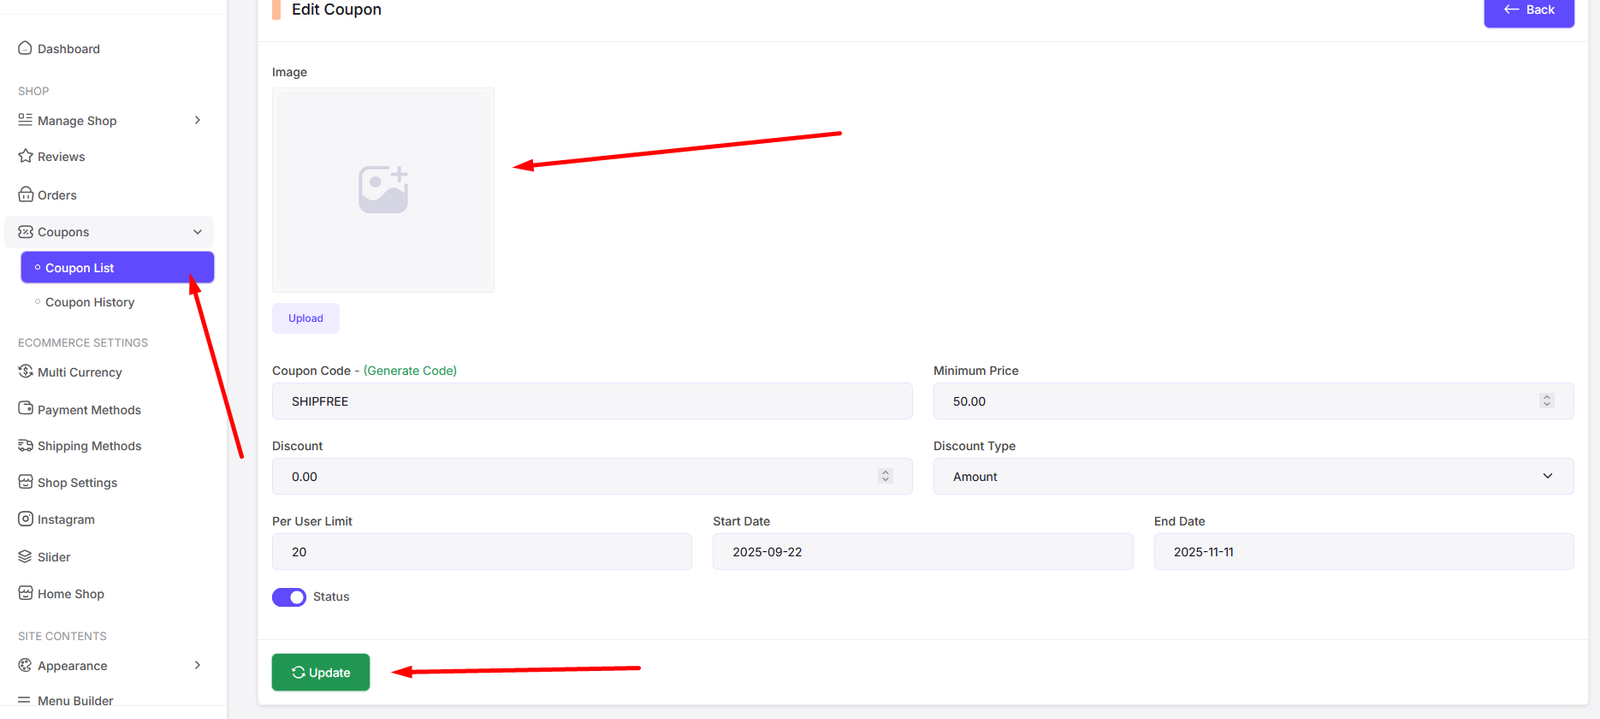
Edit Coupon
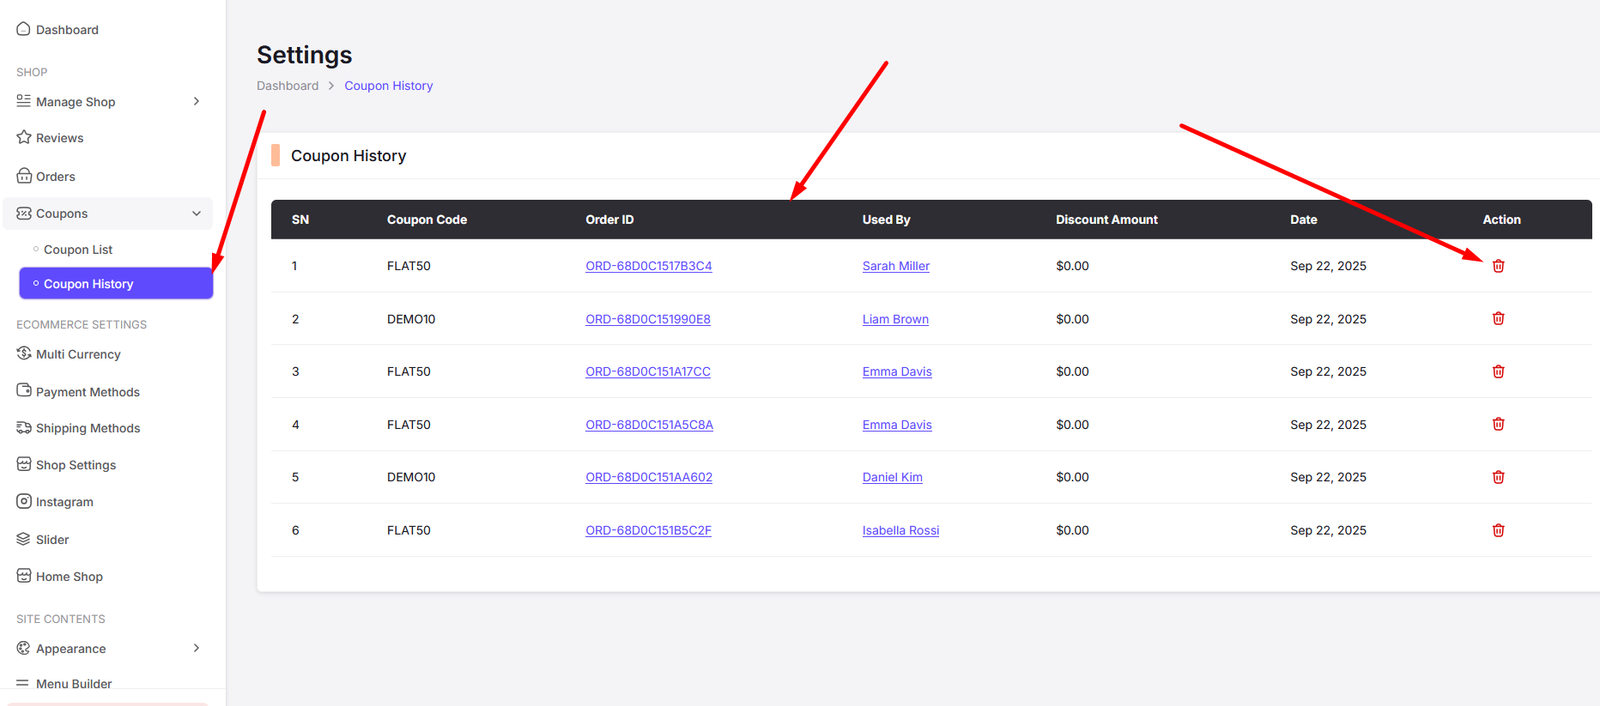
Coupon History
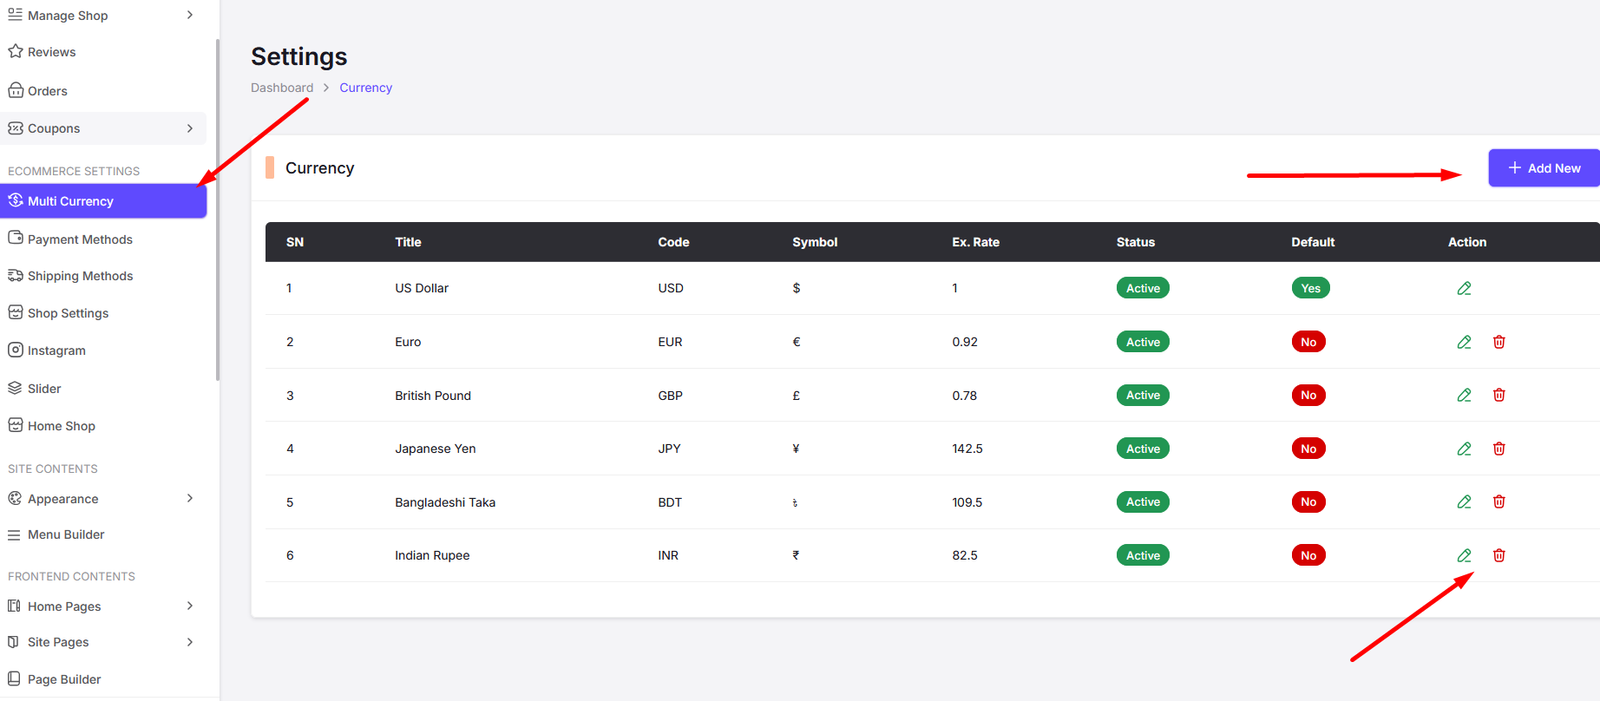
Multi Currency
You can manage your multi Currency settings from here.
All Currencies
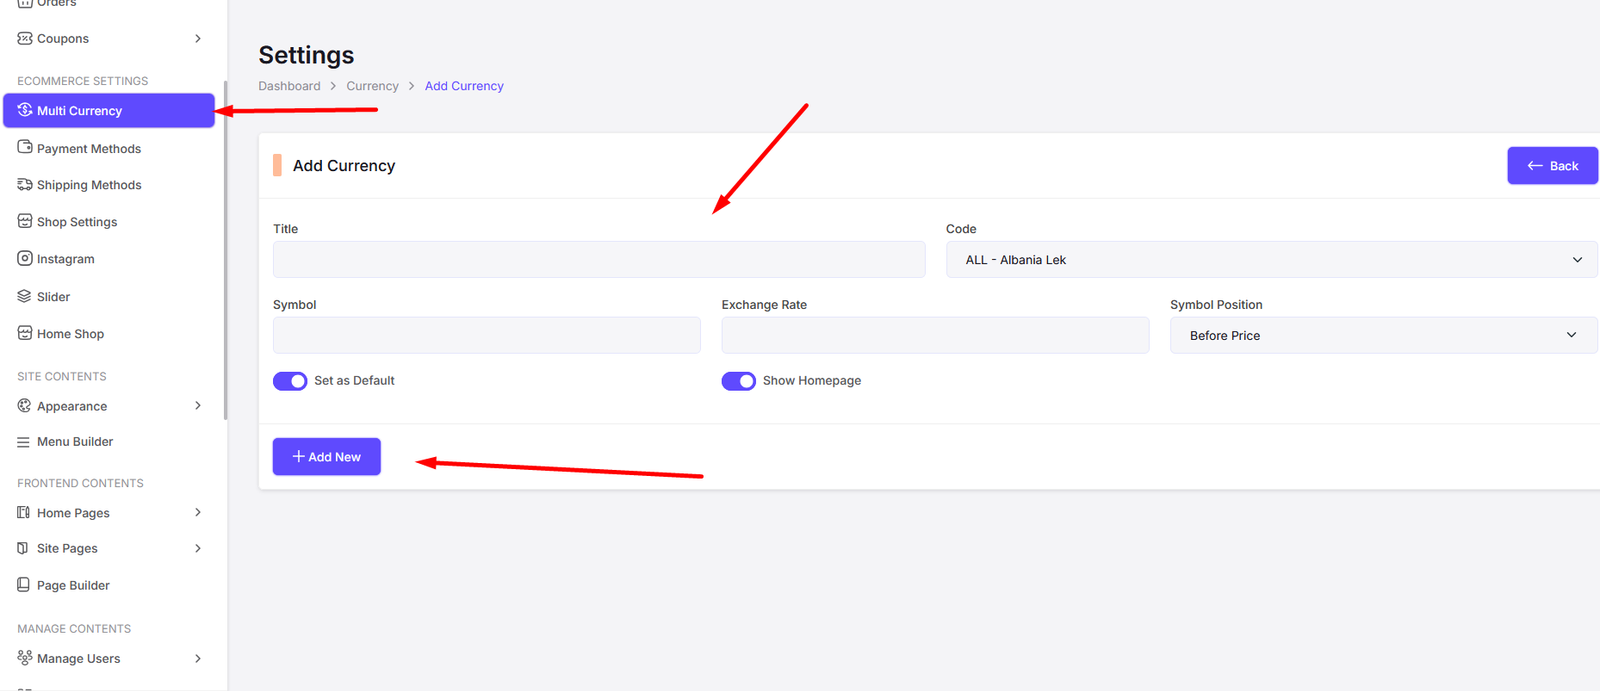
Add Currency
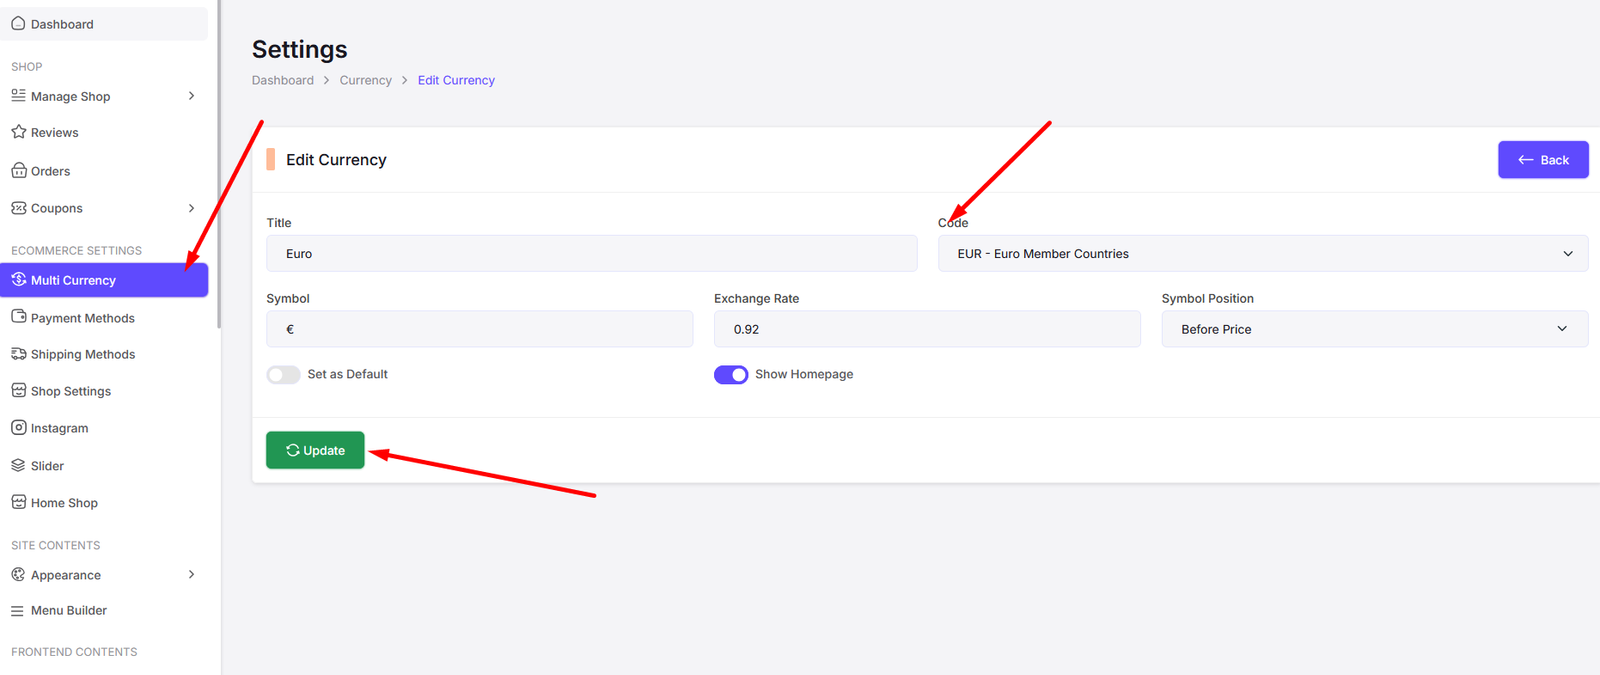
Edit Currency
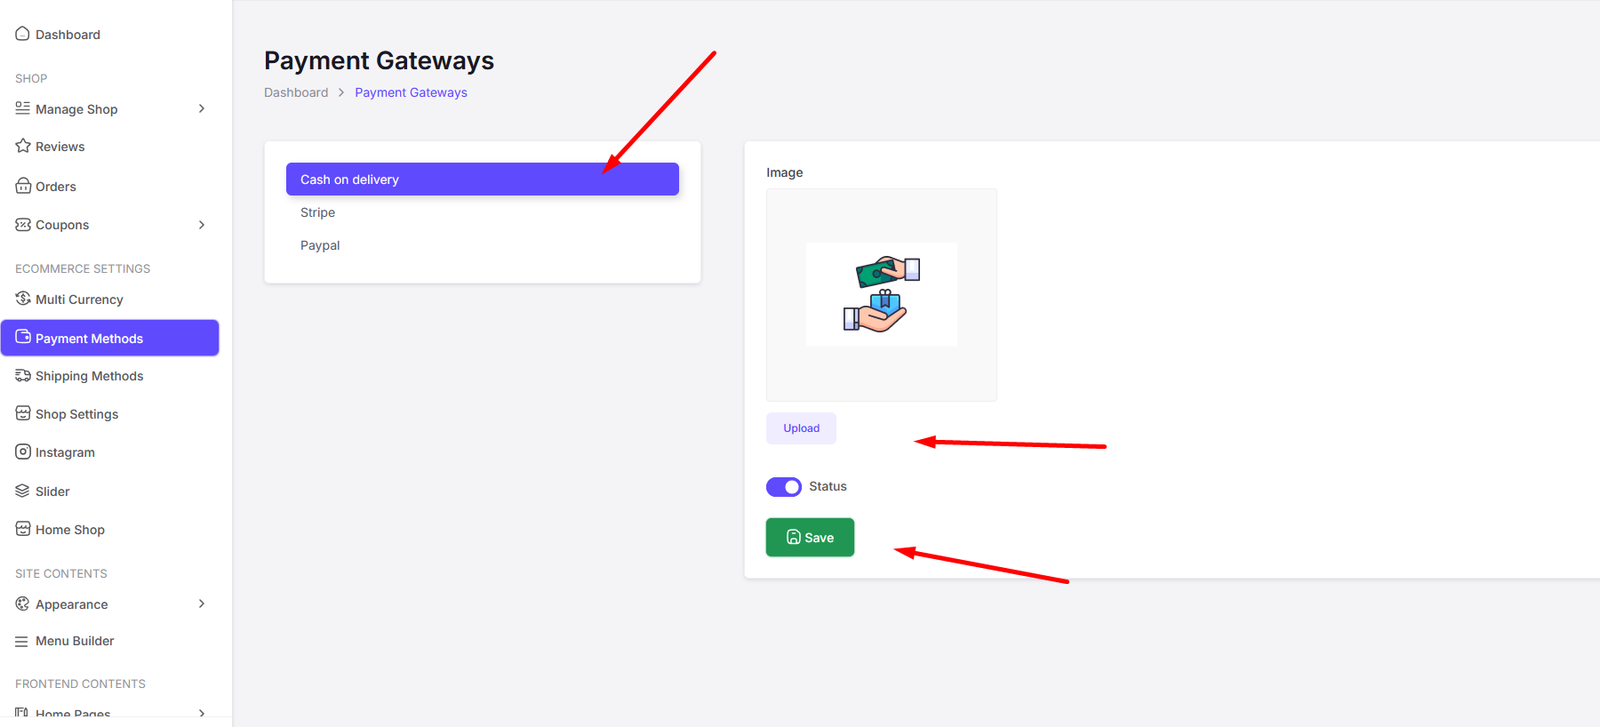
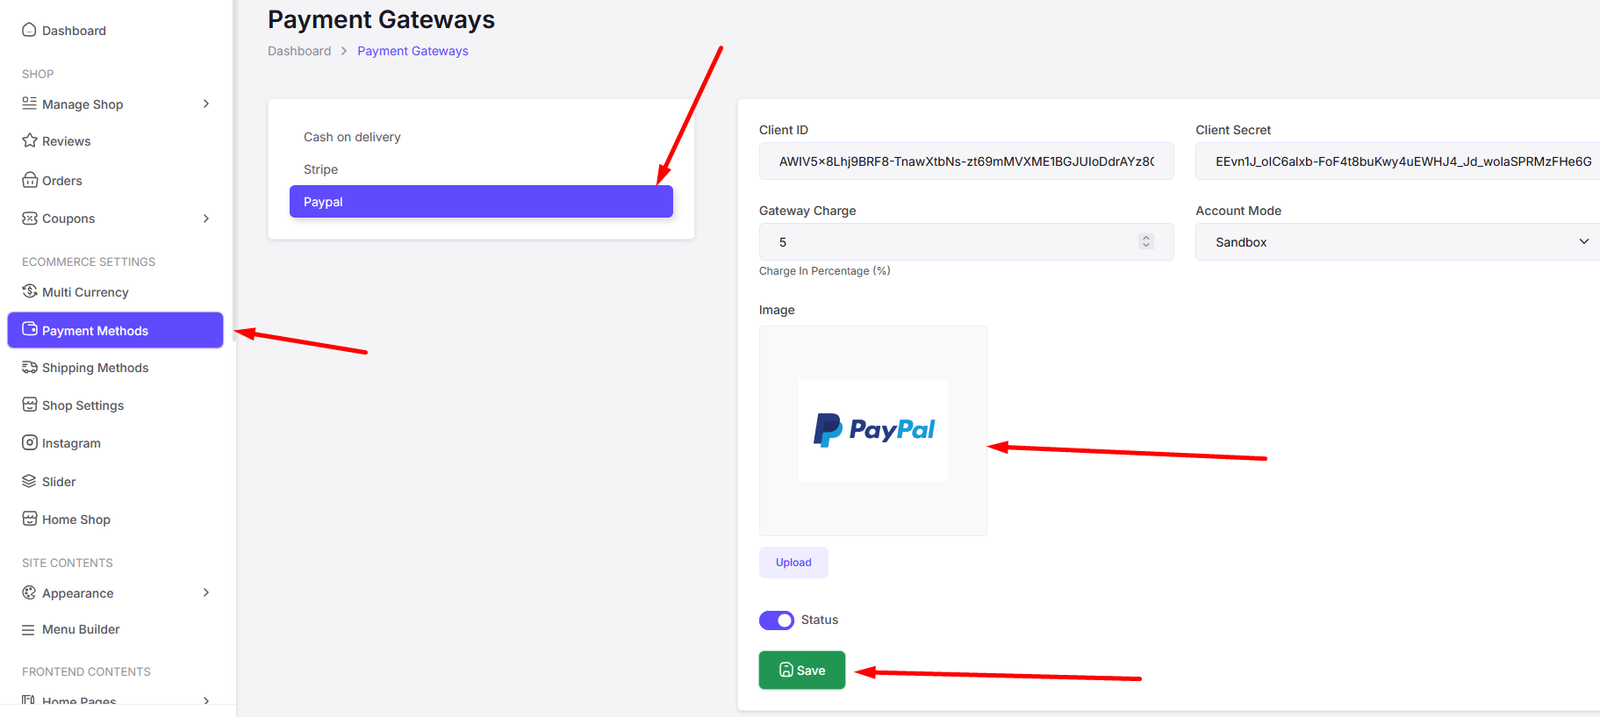
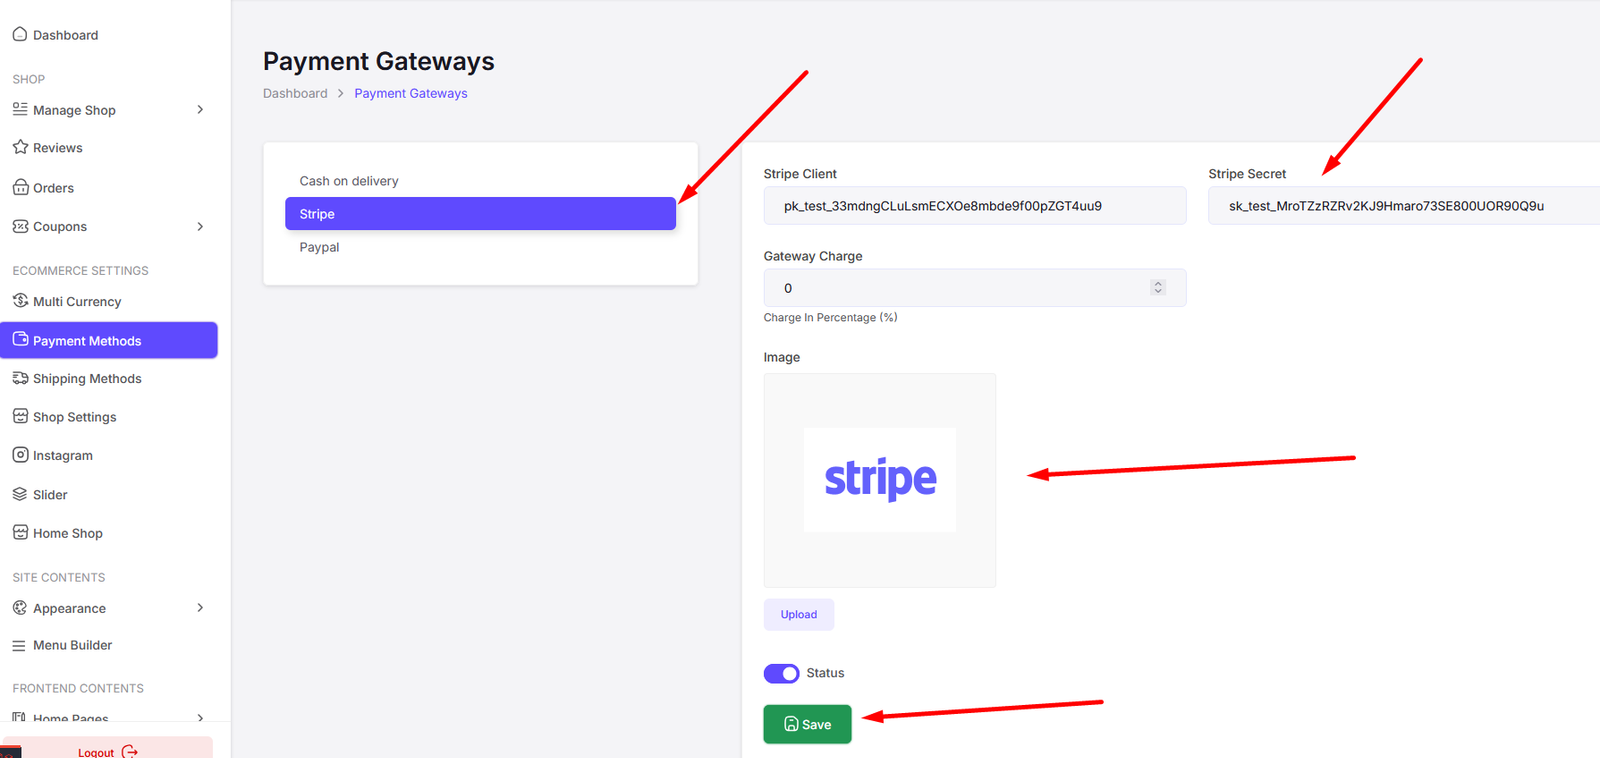
Payment Methods
You can manage your payment methods from here.
Cash On Delivery
PayPal
Stripe
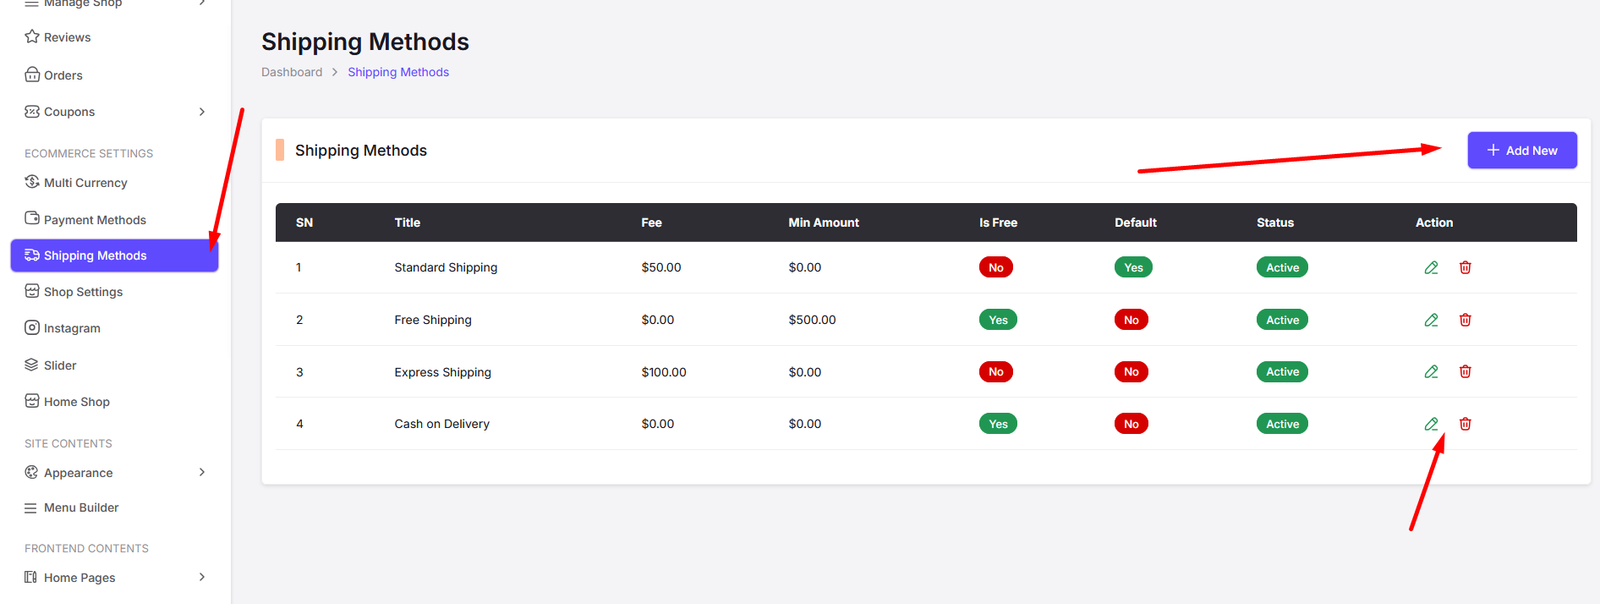
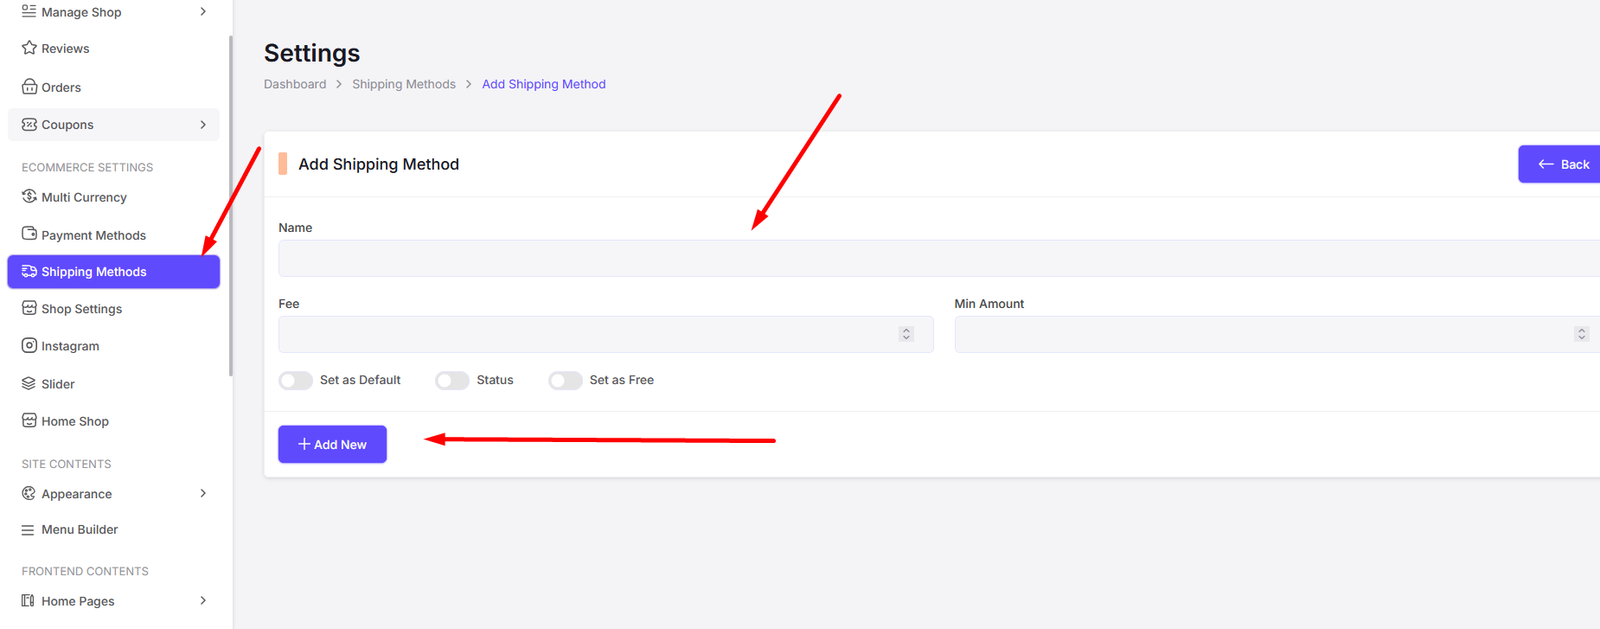
Shipping Methods
You can manage your shipping methods from here.
All Shipping Methods
Add Shipping Method
Edit Shipping Method
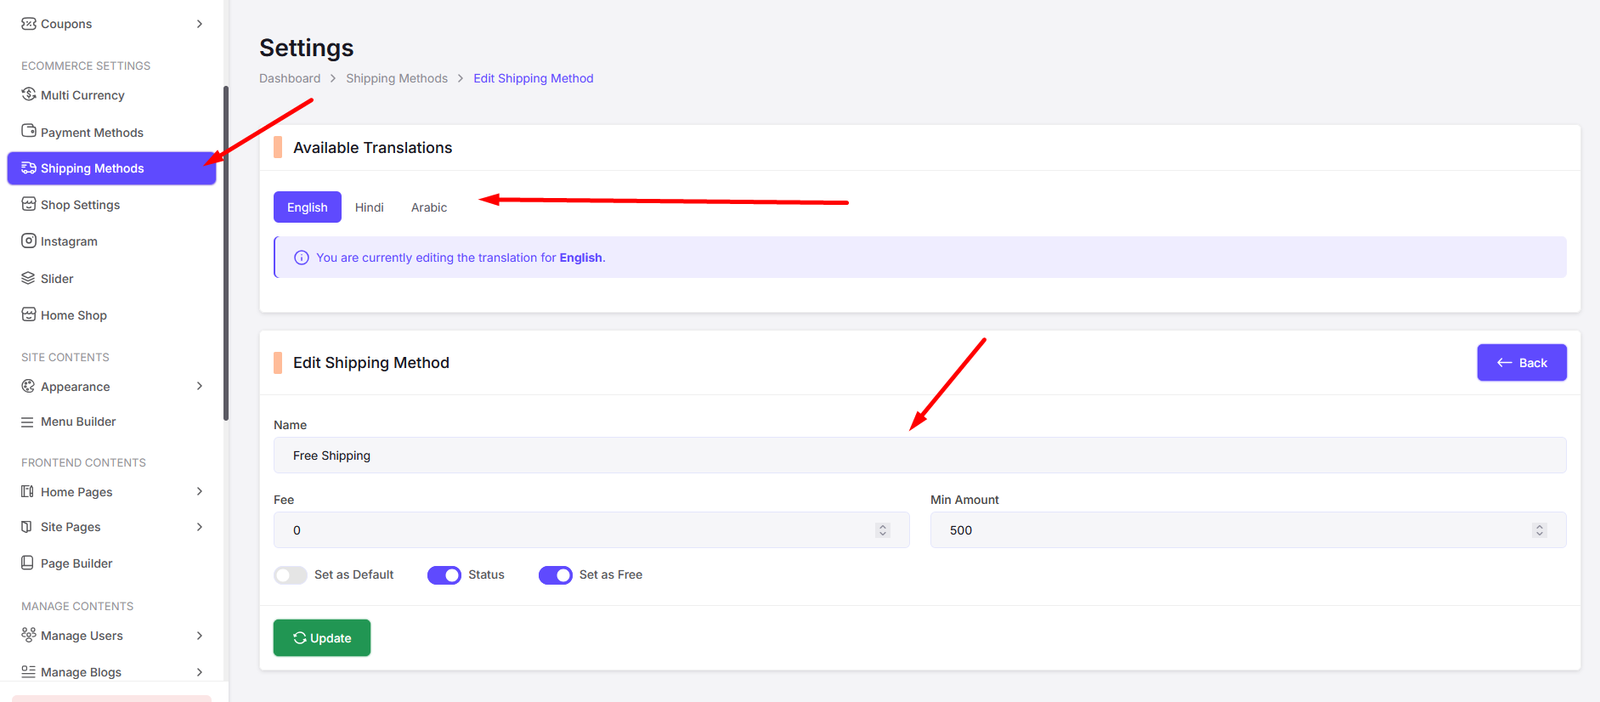
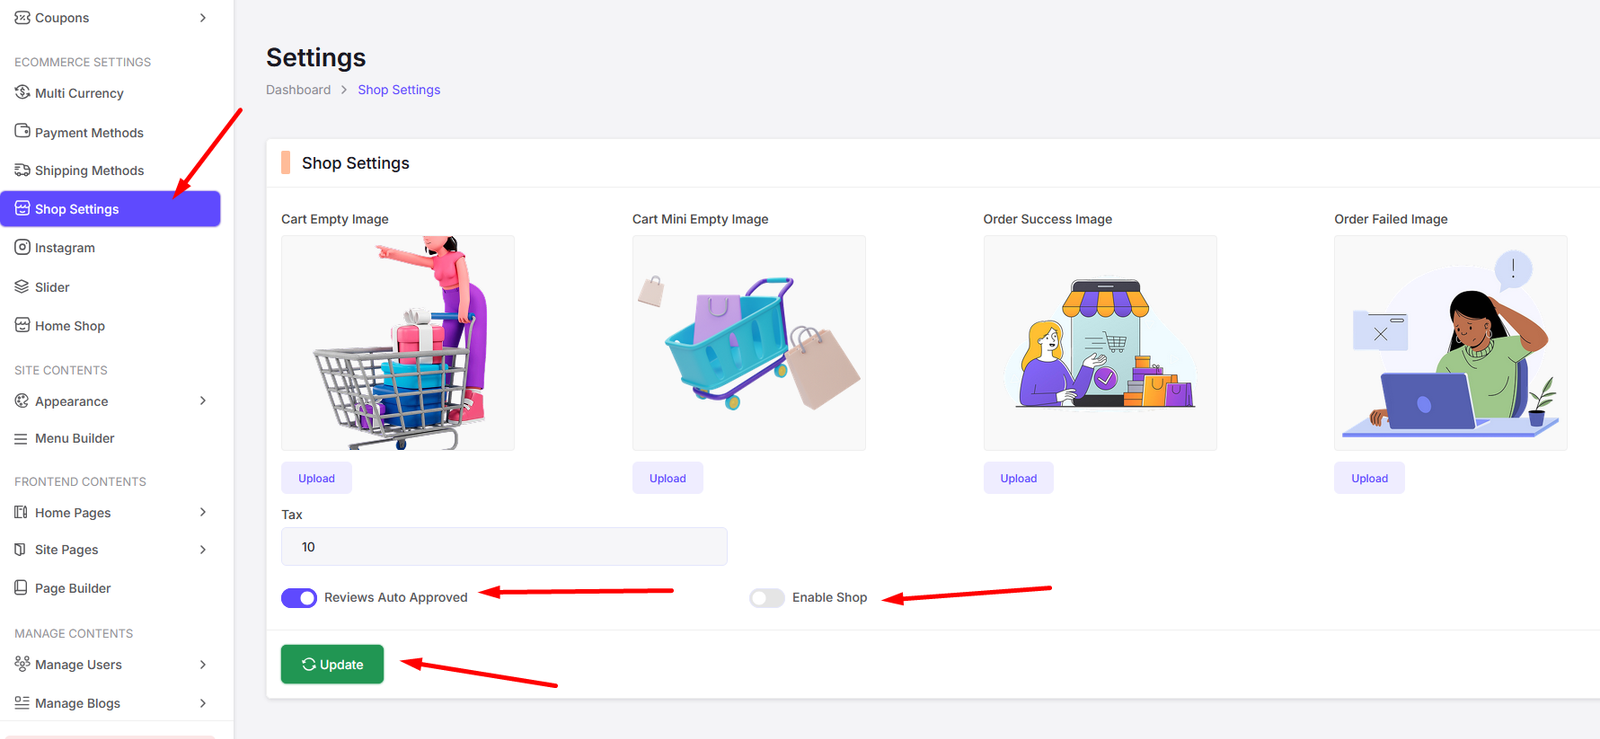
Shop Settings
You can manage your shop settings from here.
Shop Settings
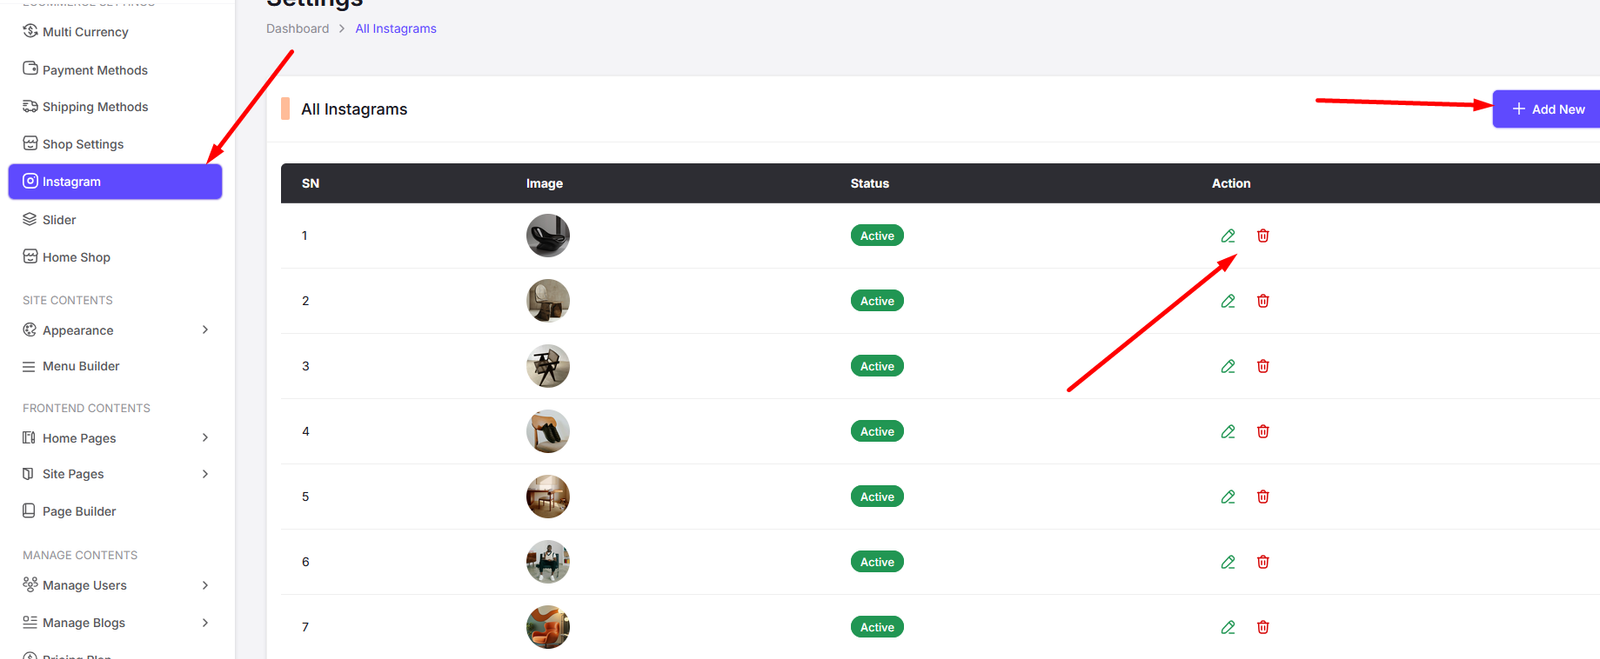
Shop Instagram
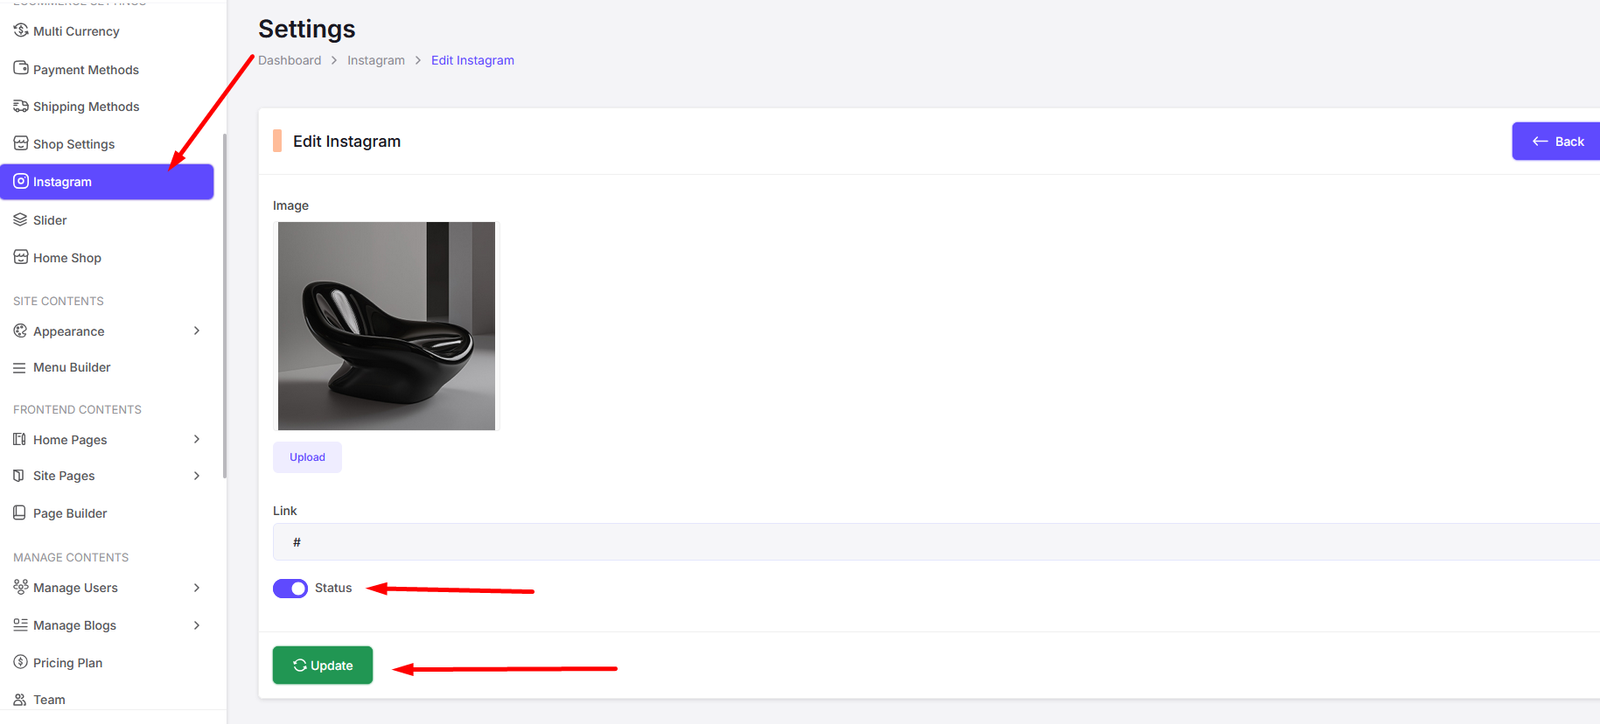
You can manage your shop Instagram settings from here.
All Instagrams
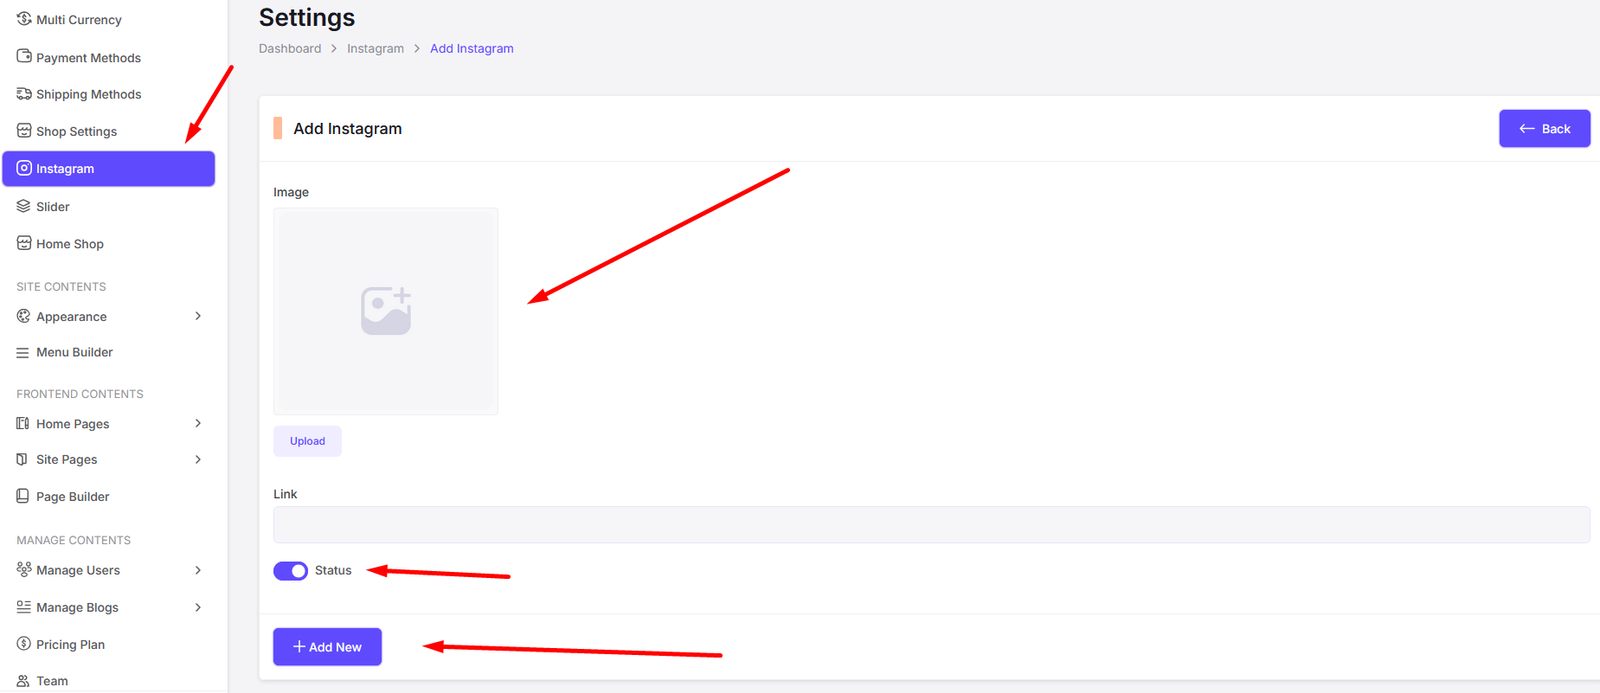
Add Instagram
Edit Instagram
Shop Home Page Slider
You can manage your shop home page slider settings from here.
All Slides
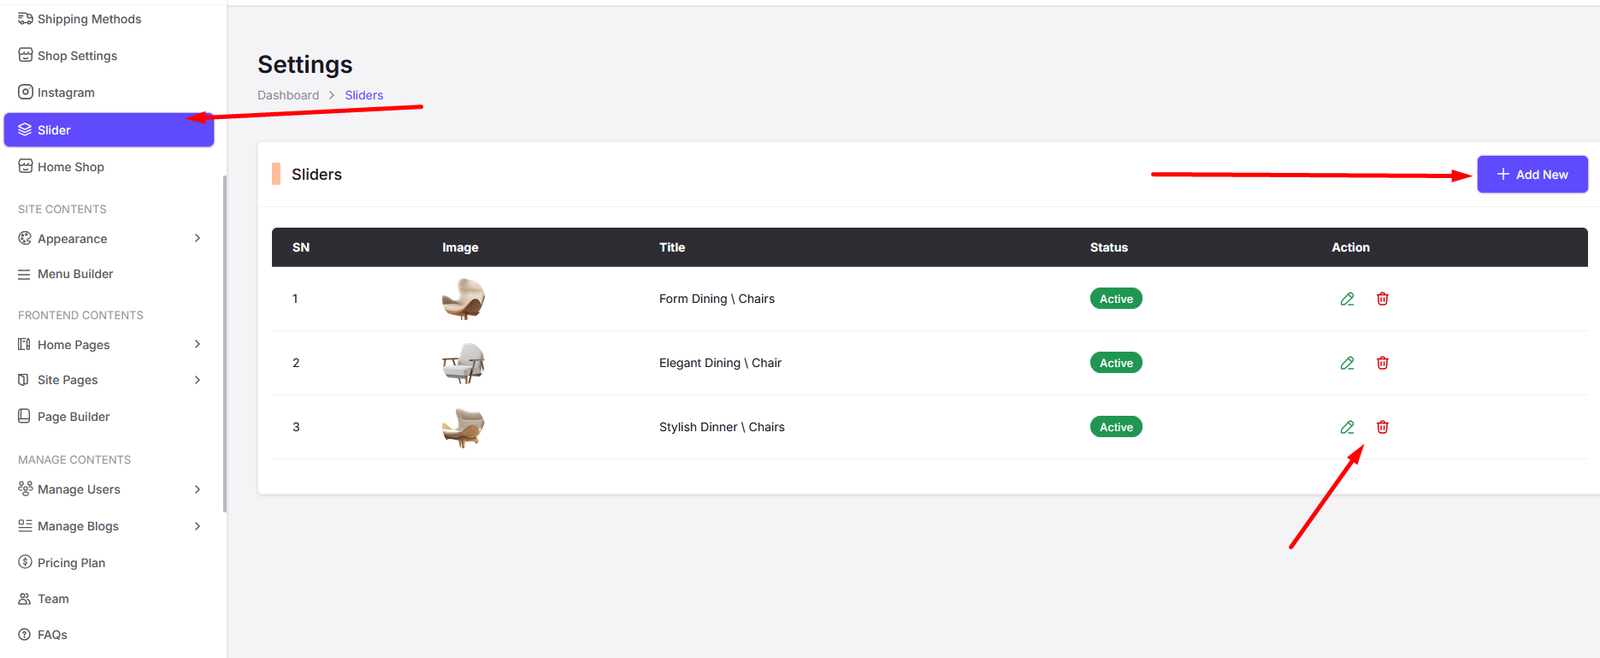
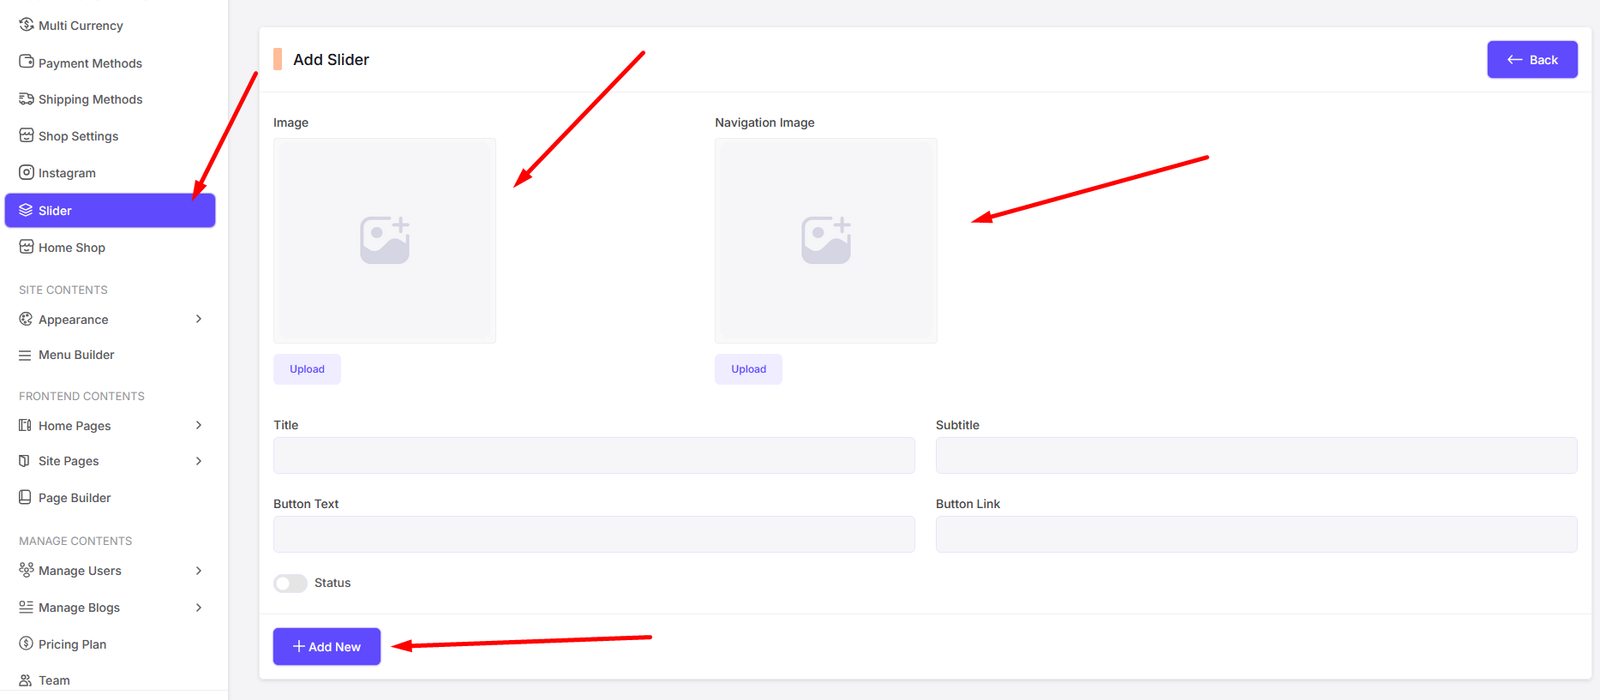
Add Slide
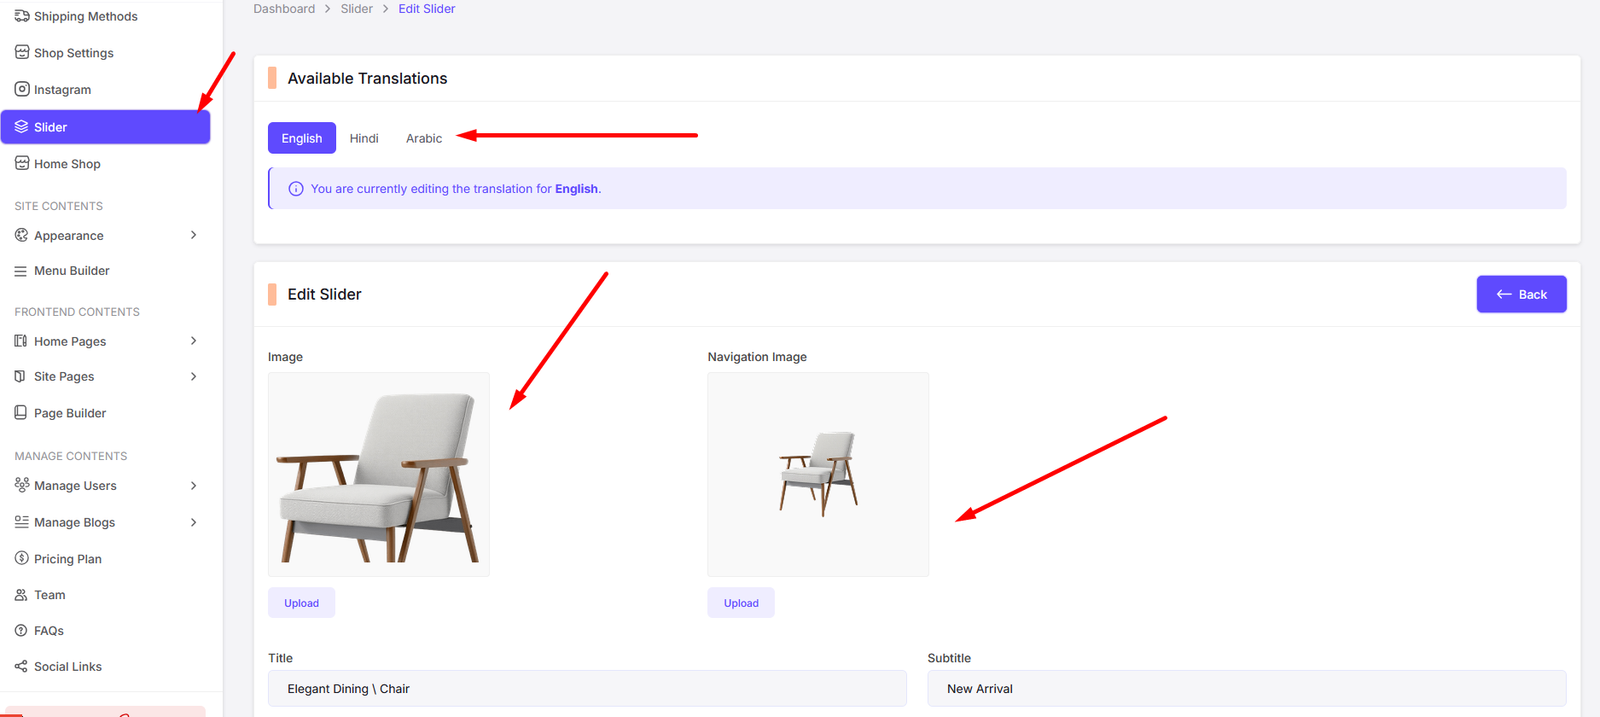
Edit Slide
User Options
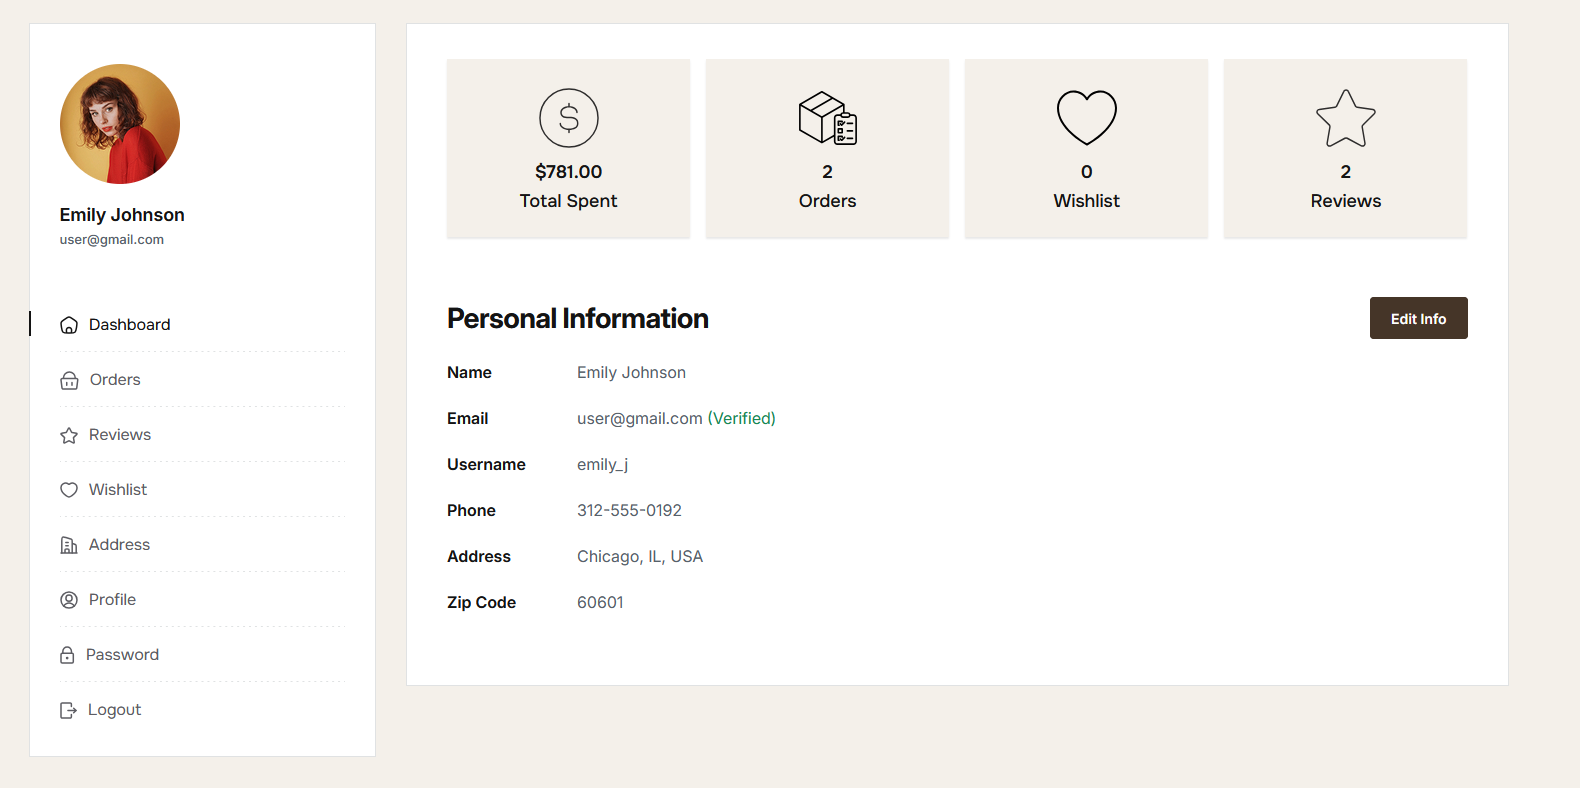
Dashboard
The dashboard is the first page that the user sees after logging in. It contains a summary of the user's account information.
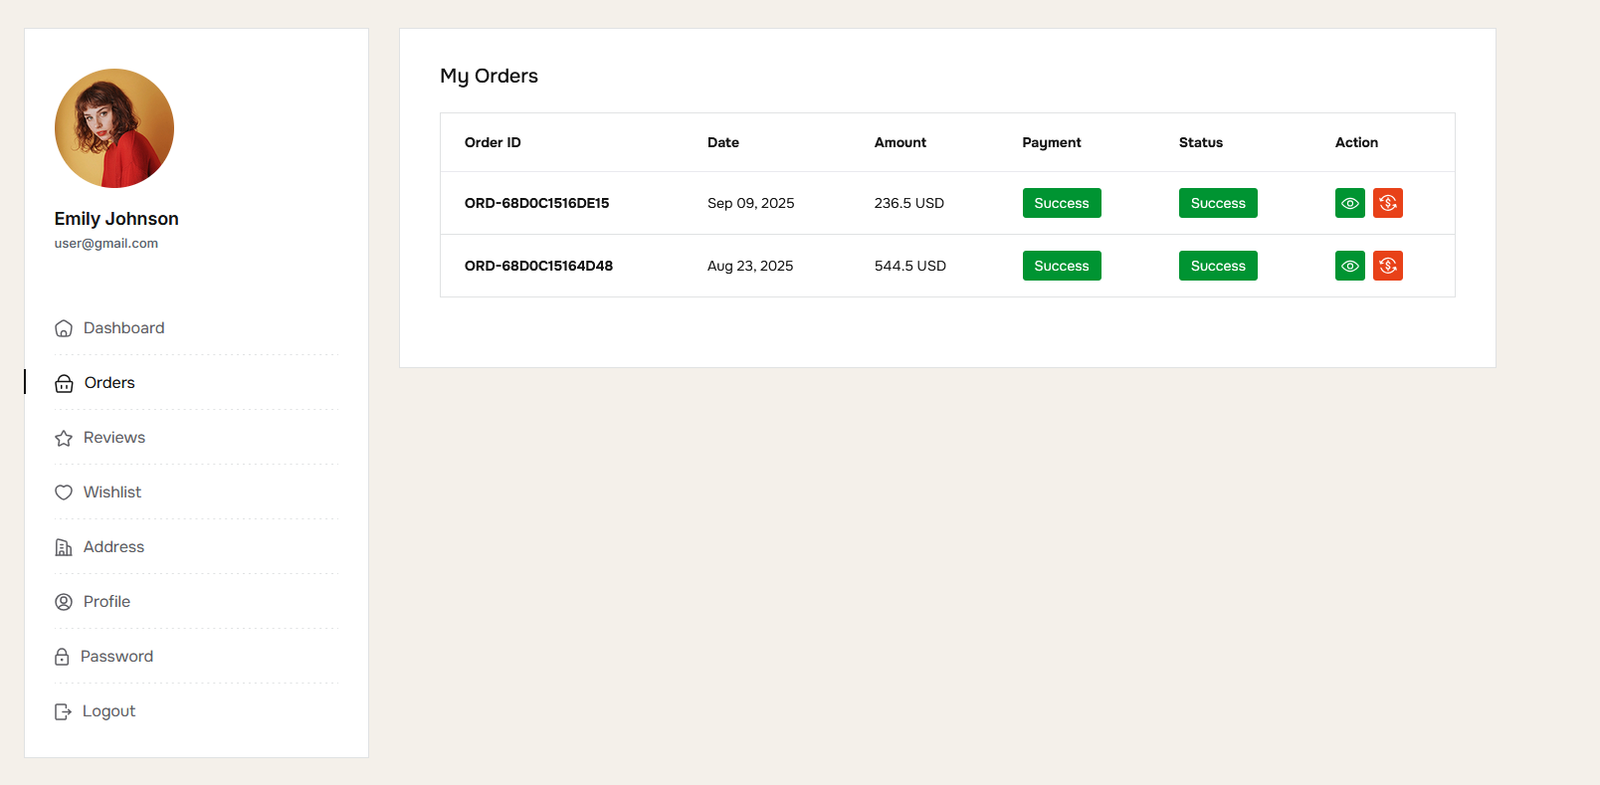
Orders
The orders page allows the user to view their order history and track the status of their current orders.
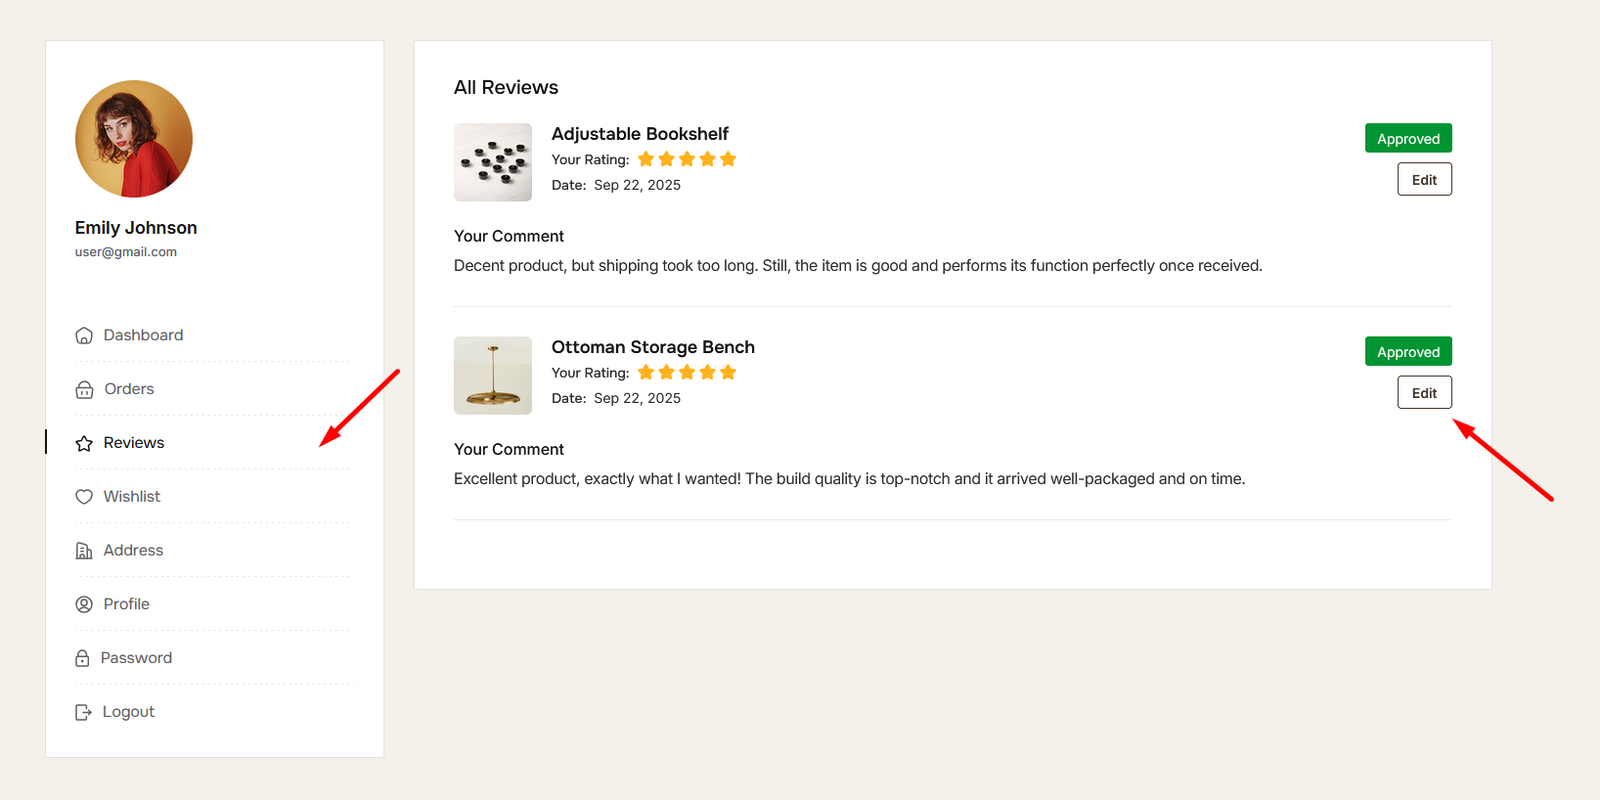
Reviews
The reviews page allows the user to view and manage their product reviews.
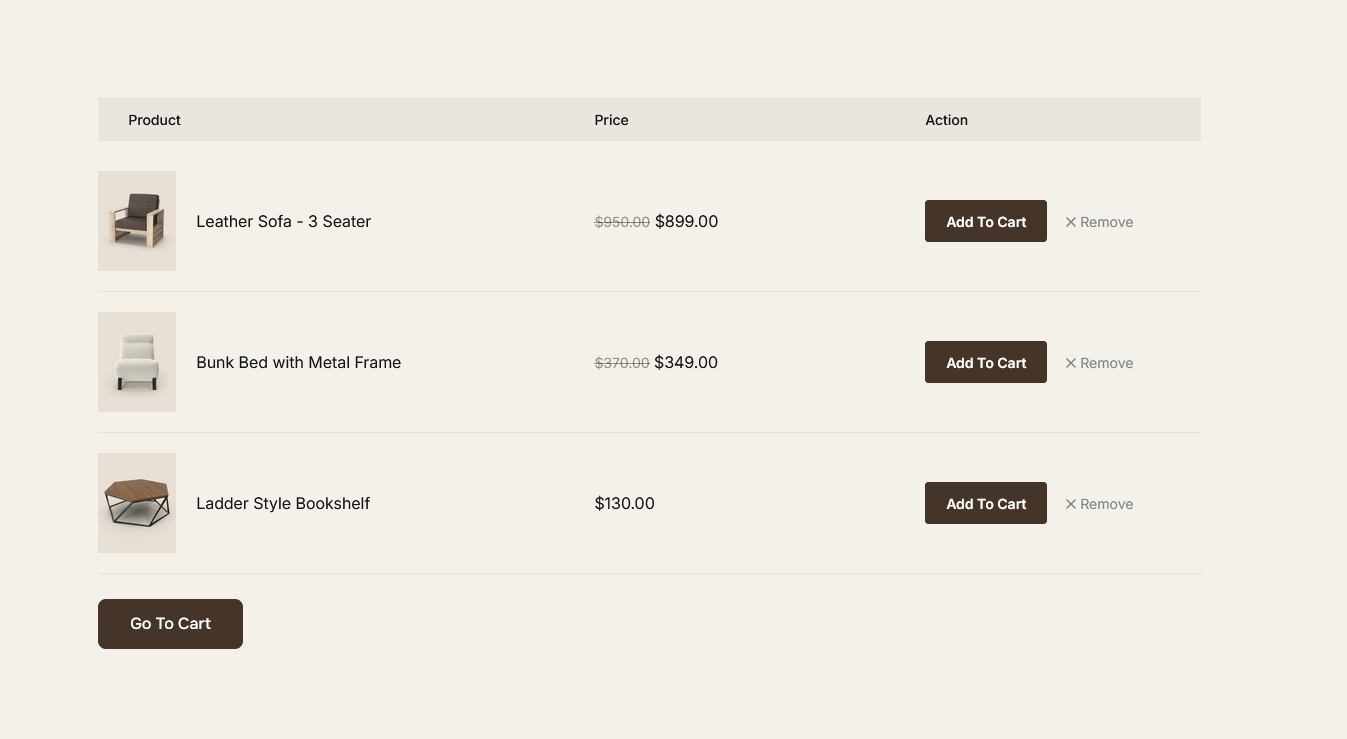
Wishlist
The wishlist page allows the user to view and manage their favorite products.
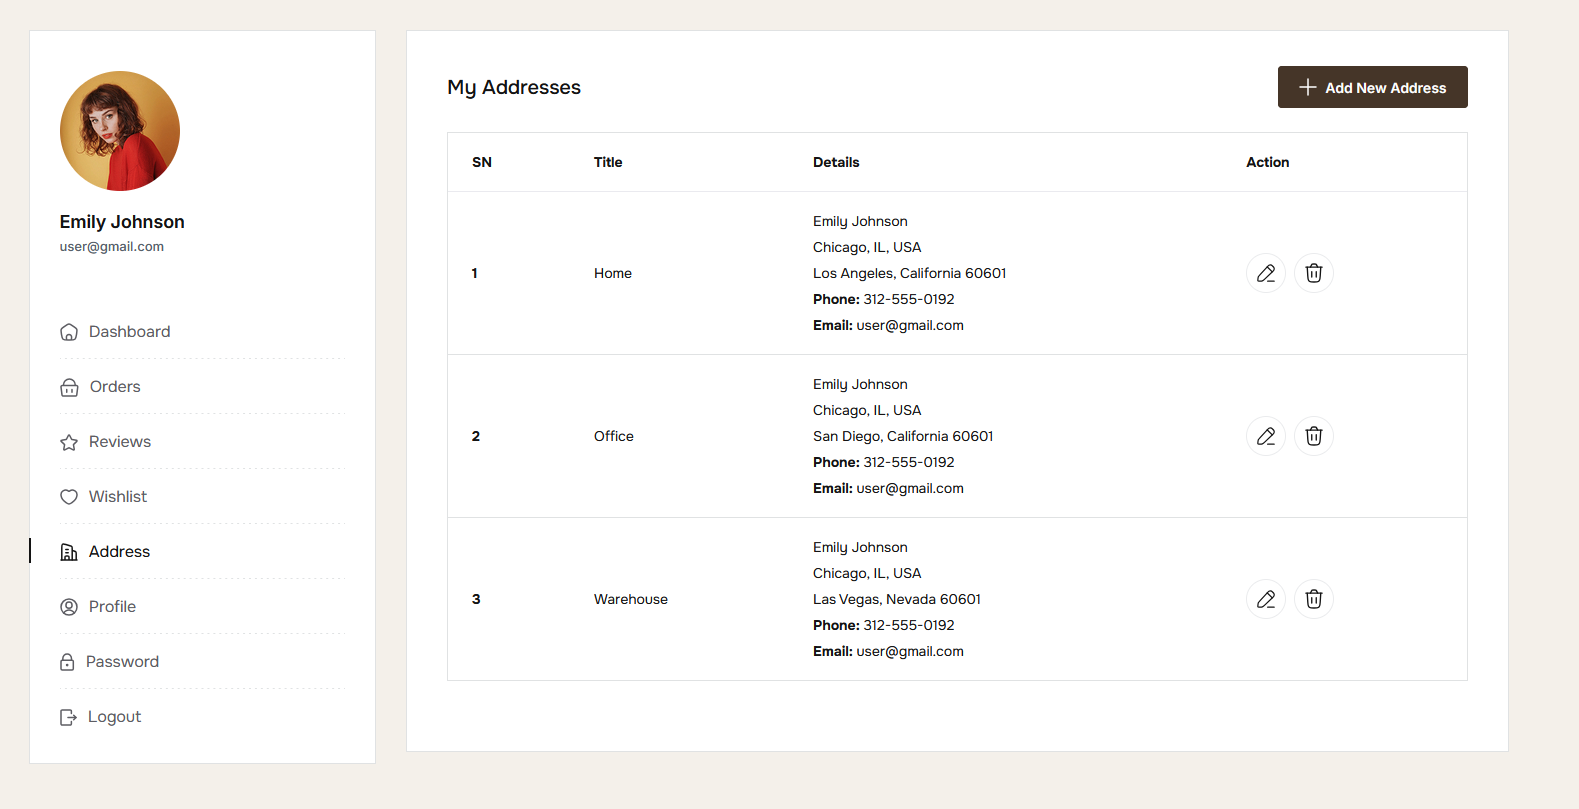
Address
The address page allows the user to view and manage their shipping and billing addresses.
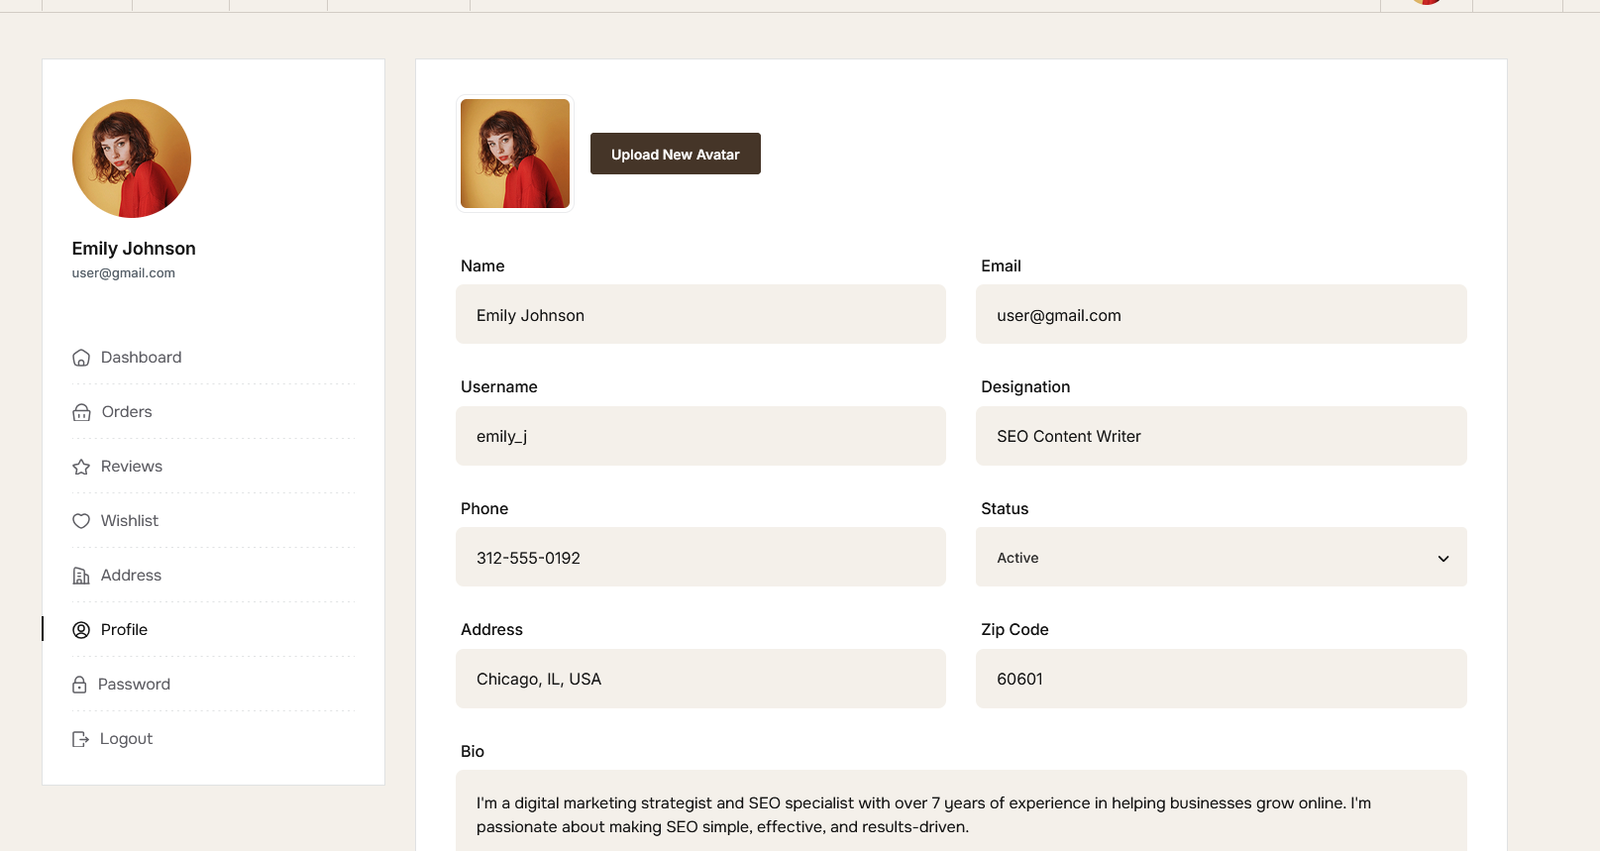
Profile
The profile page allows the user to view and update their account information, such as their name, email address, and phone number.
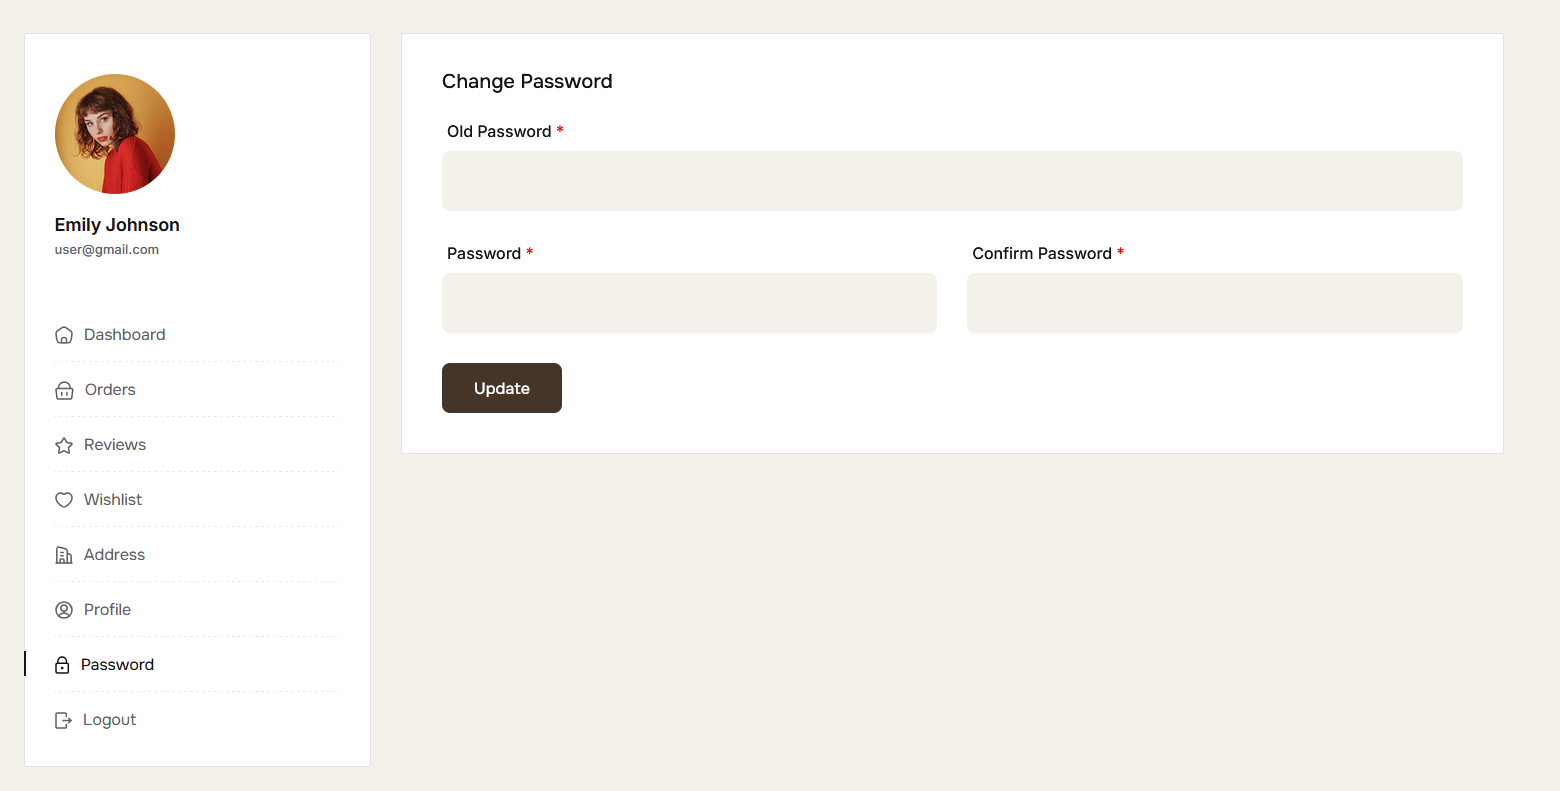
Password
The password page allows the user to change their password. The user must enter their current password and then enter their new password twice to confirm the change.
Social Links
Navigate to Social Links to manage your site's social media links.
You can add, edit, and delete social media links from here.
Note: You can get social icon class names from Fontawesome. Just search for the icon you want to use and copy the class name.
Add Social Link
Edit Social Link